Setting up
To set up WebAPI access Online Instance of Dynamics CRM, you require the following:
- An Azure account. A
- An online instance of Dynamics CRM.
- An account in the CRM instance that will work on behalf of The Portal Connector
Register application with Microsoft Azure
- Sign in to the Microsoft Azure management portal ( https://portal.azure.com/ ) by using an account with administrator permission. You must use an account in the same Office 365 subscription (tenant) as you intend to register the app with.
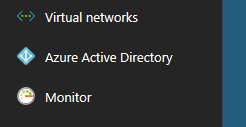
- Click Azure Active Directory in the left column of the page.
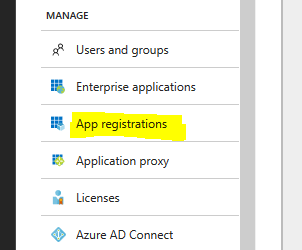
- Next, click App registrations
- On the app registrations page, click Endpoints.

- This brings up a list of different Endpoints that can be used. Find the Endpoint labelled “OAuth 2.0 Token Endpoint” and click the Copy button next to it.

- This will copy the URL. Open Notepad or another text editor and paste the copied URL.
- Click the New application registration link

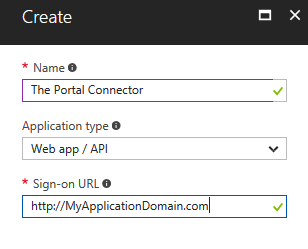
- In the Create dialog,
- Give the application a name.
- Set the Application Type should to Web app / API
- Set a Sign-on URL. We won’t be using this value, but it is required. Your domain will do.
- Finally, click the Create button at the bottom.
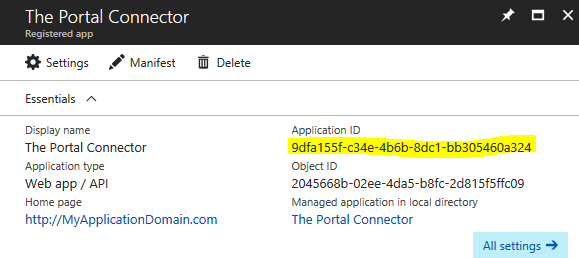
- Once saved, the Application should appear in the list. Click it to open it. You will see details of the application. The info we are looking for is the Application ID. Hover your mouse over this id and a copy button will appear. Click it to copy the Id. Save the id with the endpoint URL we copied earlier.
- Next step is to give permissions to access to Dynamics CRM Online. To do this, click the Required permissions item in settings, under API Access.
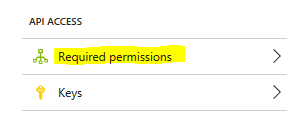
- Click the Add button to add a new permission.

- Click Select an API.
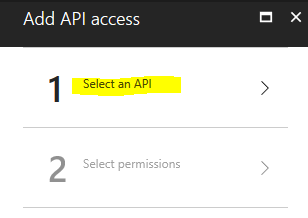
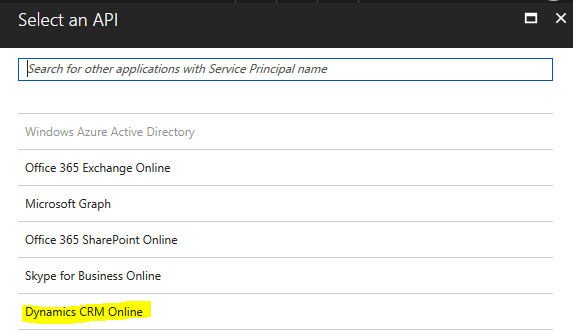
- In the resulting list, find and select Dynamics CRM Online. Click the Select button at the bottom.
- Next, check the Delegated Permissions checkbox. This will make another checkbox appear pre-checked. Uncheck it then recheck it. This will make the Select button at the bottom of the page become clickable. Click the Select button.
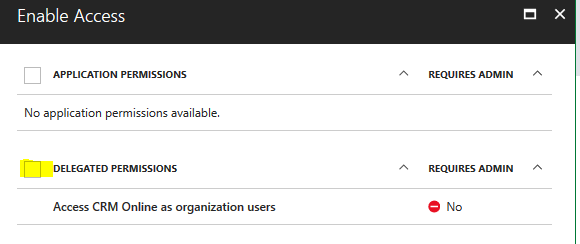
- The Enable Access section will not disappear and the Done button at the bottom of the Add API access section will be enabled. Click the Done button.
- Next, click Grant Permissions in the Required Permissions. You will be prompted to gie permissions, click Yes.
- Next, click the Keys item under Settings, in the API Access section.
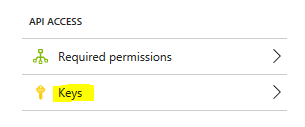
- In the Keys section,
- Set the Key Description to something descriptive such as “portal key”
- Set the Duration to Never Expires
- Finally, click Save
- After a moment, the new key will appear, copy it right away and save it with the ApplicationId and OAuth 2.0 Token Endpoint from earlier.
- That’s it. These 3 pieces of information (ApplicationId, OAuth endpoint and Key) will be needed to setup The Portal Connector WebAPI connection. In addition, you will also need:
- Server URL
- CRM Username
- CRM Password
Configuring The Portal Connector
Now that you have setup Azure Active Directory to provide authentication for your CRM online instance, we can configure The Portal Connector to use it.
- Login to your Sitefinity site and navigate to the backend.
- In the Administration menu, click Portal Connector Configuration
- Fill in the details of your CRM instance:
- Connection Type is Online
- Protocol is HTTPS
- Server URL will be the URL of your online instance without the protocol e.g.: mydomain.crm.dynamics.com
- Check the Use WebAPI checkbox. This will cause 3 additional fields to appear.
- In the Application Id field, enter the Application ID you saved. It was the 1st piece of information gathered from Azure.
- In the OAuth 2.0 Token Endpoint field, enter the Endpoint URL you saved. It was the 2nd piece of information gathered from Azure.
- In the Client Secret field, enter the key we generated in Azure. It was the 3rd piece of information gathered from Azure.
- In the Username field, enter the CRM user that the portal Connector will use to interact with CRM.
- In the Password field, enter the password of the above user.
- Click the Save & test Connection button. If all the above information is correct, you should see the “Dynamic CRM Connection Settings have been saved successfully! The connection to CRM tested successfully!” message. If you get an error, please go back to Azure and double check the information we gathered above. The most common error would be not copying the key correctly or not setting the required Delegated Permissions for CRM.
- The final step is to refresh to CRM Metadata to get additional attribute info needed by the WebAPI to function correctly. To do this, click the General Settings item in the left side of the page. Next, click the Refresh CRM Metadata button. This process could take up to an hour to complete. Until it completes, there is a chance some forms may not submit or load correctly due to missing meta data. You can monitor the progress on the Entity Metadata Manager page found under the The Portal Connector menu item at the top of the page.
You have now completed the configuration of WebAPI access to CRM online. You can now setup forms and pages needed for your project. If you have forms and pages already, they will be functional once the meta data refresh is complete.