Portal Form
The following steps outline the quickest way to create a new Form that allows users to enter data directly into Dynamics CRM. There are many options and variations available and not all are covered in this section.
Creating a Blank Form
Once logged into the Administration area of Sitefinity, click on the Content menu item and choose Forms.

Click the Create a form button at the top.

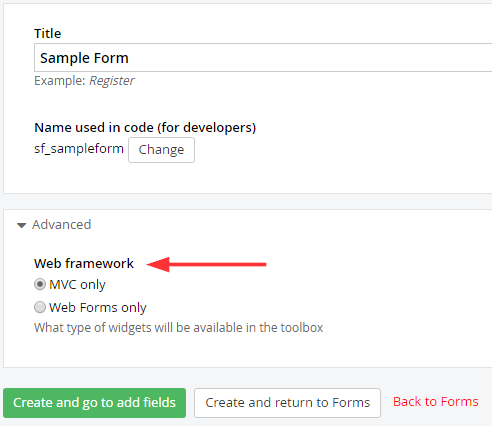
Give a name to the form under the Title field. In Advance section you can select the Web framework for the forms. By default the framework selected is MVC only as this framework is more robust and fast in performance.
You will now see the Form Designer screen. The first thing we need to understand are the different elements of a Form we need to define. At the top right there are 3 buttons, Content, Layout and Settings.
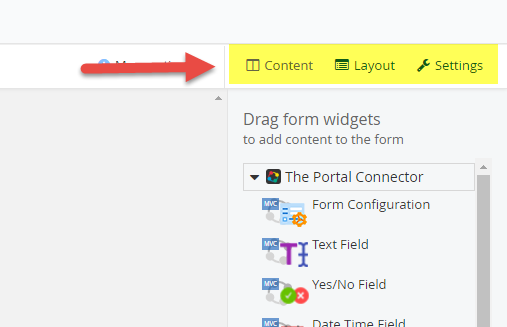
Content is where we drag the fields (aka Widgets) onto the Form, but first we need to define the Layout of our Form. Finally the Settings option lets us determine what happens after a Form is submitted.
Define the Form Layout
You need to start with the Layout section.
Here you define what areas of the form will contain Dynamics CRM linked fields.
Note: You can create a Form that is not linked to Dynamics CRM and simply emails you the results of the submission, but if you want the Form to be linked with Dynamics CRM you need to define the specific area that will contain Dynamics CRM fields. On the lower right hand side you will notice The Portal Connector list of layout elements. Click that list and you will see one layout element called TPC Form Layout.
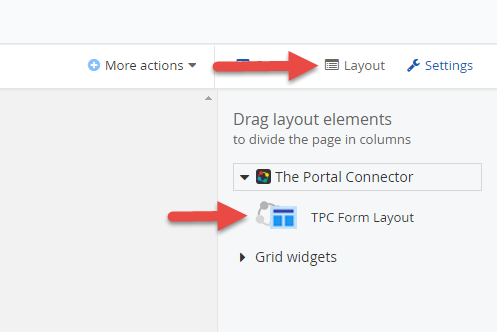
Drag that Layout Control onto the form area.
That is now the container in which you will place all Form Widgets you want linked to Dynamics CRM.
Now you can click the Single and Two Column list to see all the options you have for creating a flexible Form design. Drag on a two, three, four or five column layout element INSIDE your TPC Form Layout element. Put as many layout element you wish to create the form design you
need.
Link the Form to an Entity
Once you have the layout defined, you can switch to the Content designer by clicking the Content button at the top right.
Click The Portal Connector list on the lower right to revel the CRM specific Form Widgets you can place on your Form.
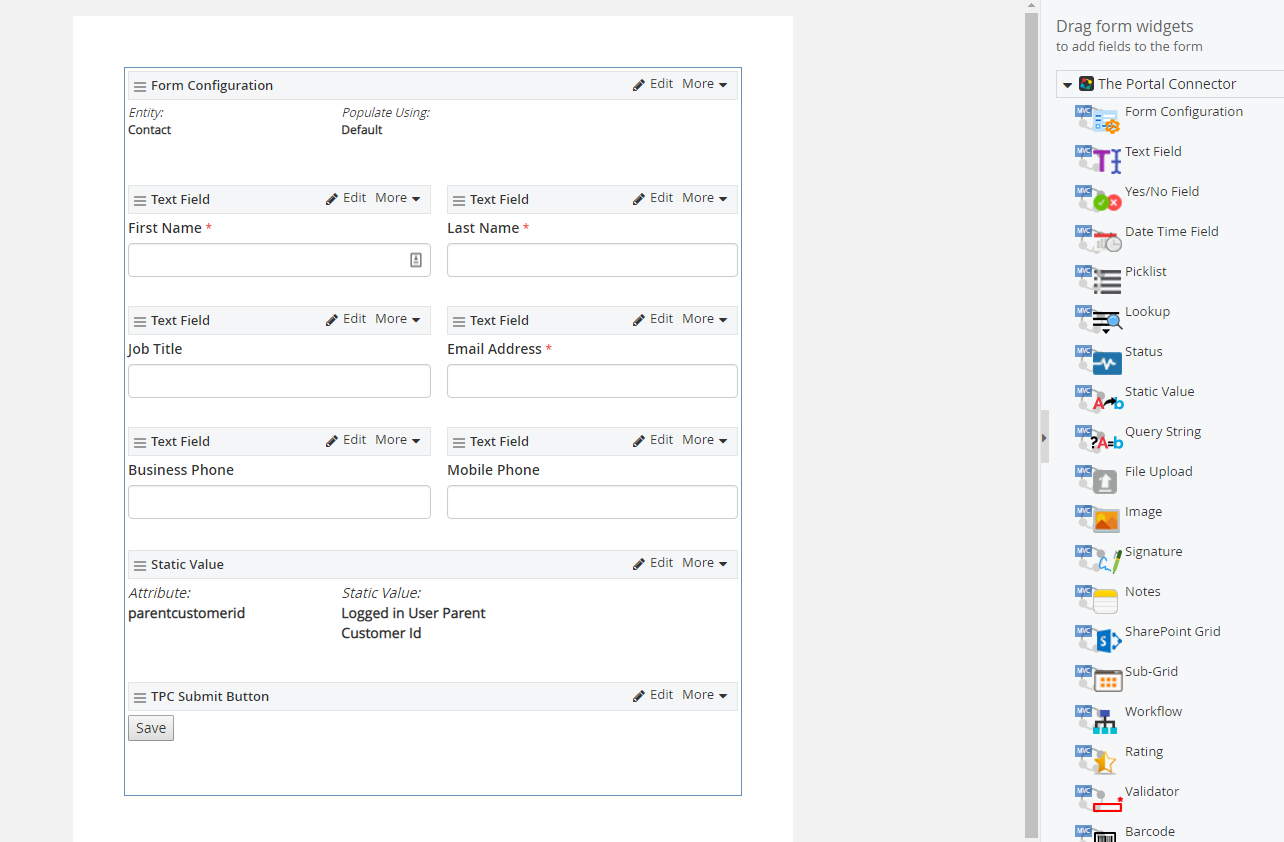
The most important one you must place on every Dynamic CRM linked form is the Form Configuration Widget.
It does not matter where you place it as long as it is placed somewhere inside the TPC Form Layout Control referenced above. This tells The Portal Connector that every CRM Widget inside this CRM Layout Control is linked to a specific CRM Entity.
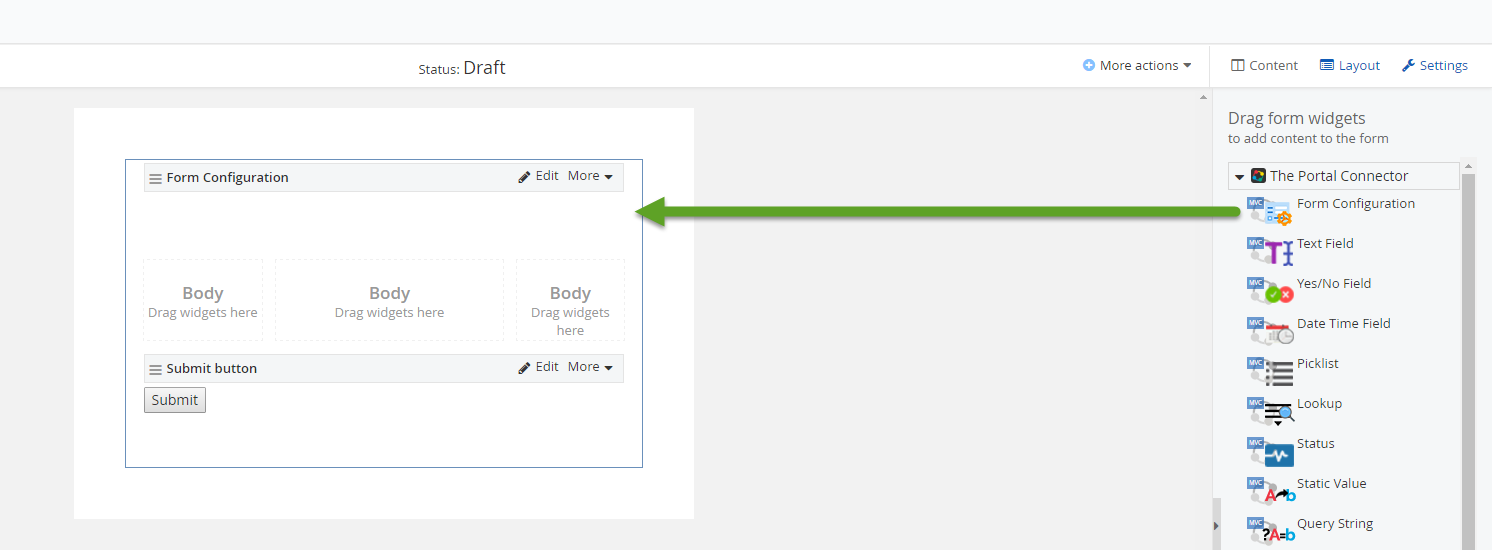
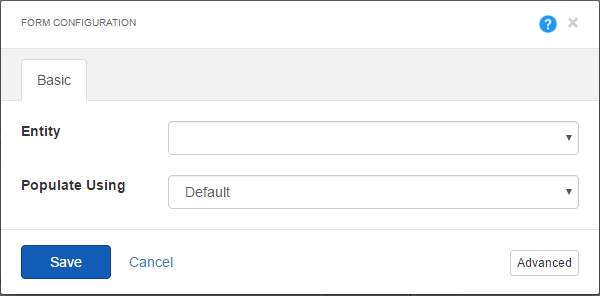
Click the Edit link inside the Form Configuration Widget and select to which Entity you want this Form linked. Then click Save.
You can now drag the Submit button Widget to any place on the form you wish. A submit button will automatically be added when you place your first widget on the form if you haven't already added one.
If you want to change the default Submit button text or size, click the Edit link on that Widget.
Build Your Form
Now you are ready to build out the form by dragging on the CRM Widgets you need.
Each Widget is tailored to a specific need. You can find detailed documentation for each form level widget in Forms Widgets Section.
Define the Form Settings
Now that you have defined the layout of your form and added the required fields, you can now control what will happen when a form is submitted.
Click the Settings button on the top right to display your options.
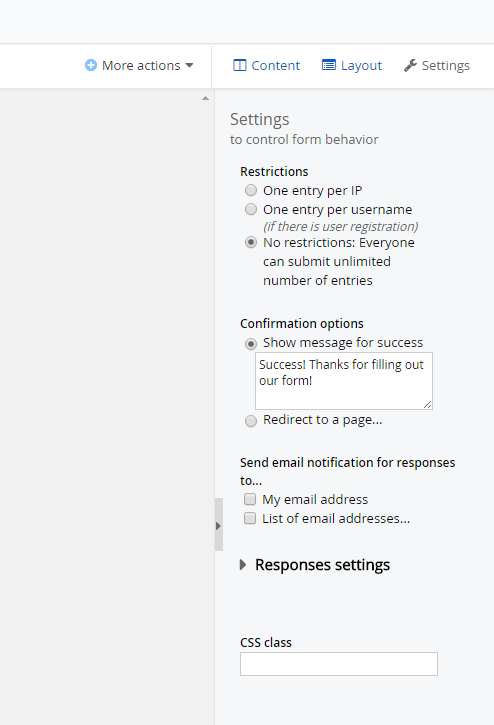
Specify your Restriction on the Form and control whether a user can fill the form our multiple times or only once.
You can also choose to have a Confirmation message displayed on successful submission of the form OR have the form redirect to another webpage.
When a form is submitted, a notification email can be sent to one or many email addresses with the form submission data. This notification email comes from Sitefinity and The Portal Connector, not from Dynamics CRM.
You can also determine where you want the Form Labels placed in relation to the input fields.
Publish Your Form
Once you have built your form, you need to click the Publish button so it can then be available to add to a page on your website. At any time during the development of your Form you can click the Save Draft button to save your work so far.