By installing the portal solution to your CRM, you will be able to manage Portal Users, assign them Portal Roles, and send any Portal Invite directly from CRM as well. In order for your portal website to function correctly, you will have to install the Dynamics CRM Solution.
Step 1 - Installing Portal Solution
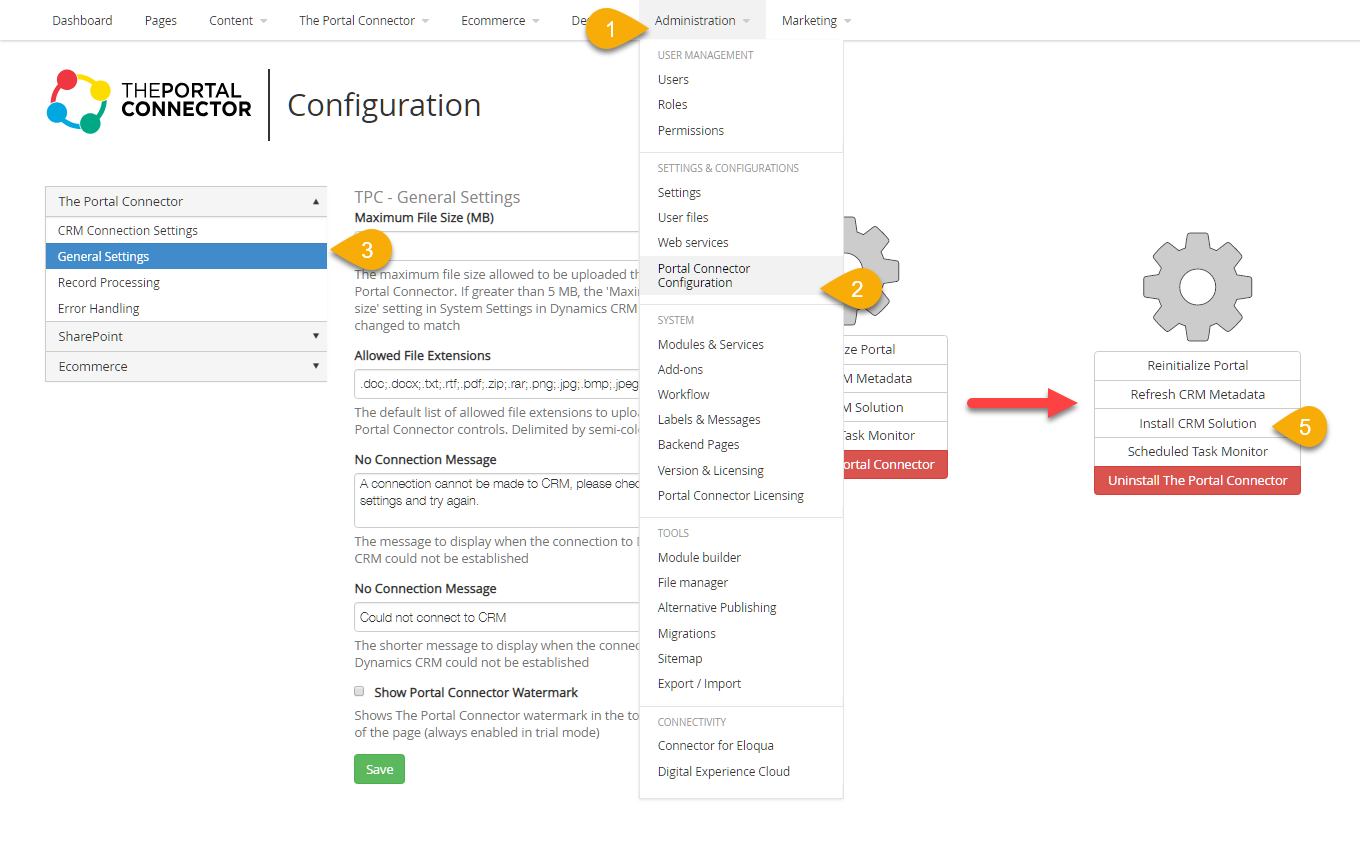
First, log onto your Portal instance and navigate to the General Settings page under The Portal Connector Configuration which is underneath the Administration section of your Sitefinity backend.

Once there, all you have to do is click on the Install CRM Solution button located on the right side of the page. If your Portal is accessible then CRM will proceed to automatically add the Portal Connector Solution.
Step 2 - Adding a Portal Record
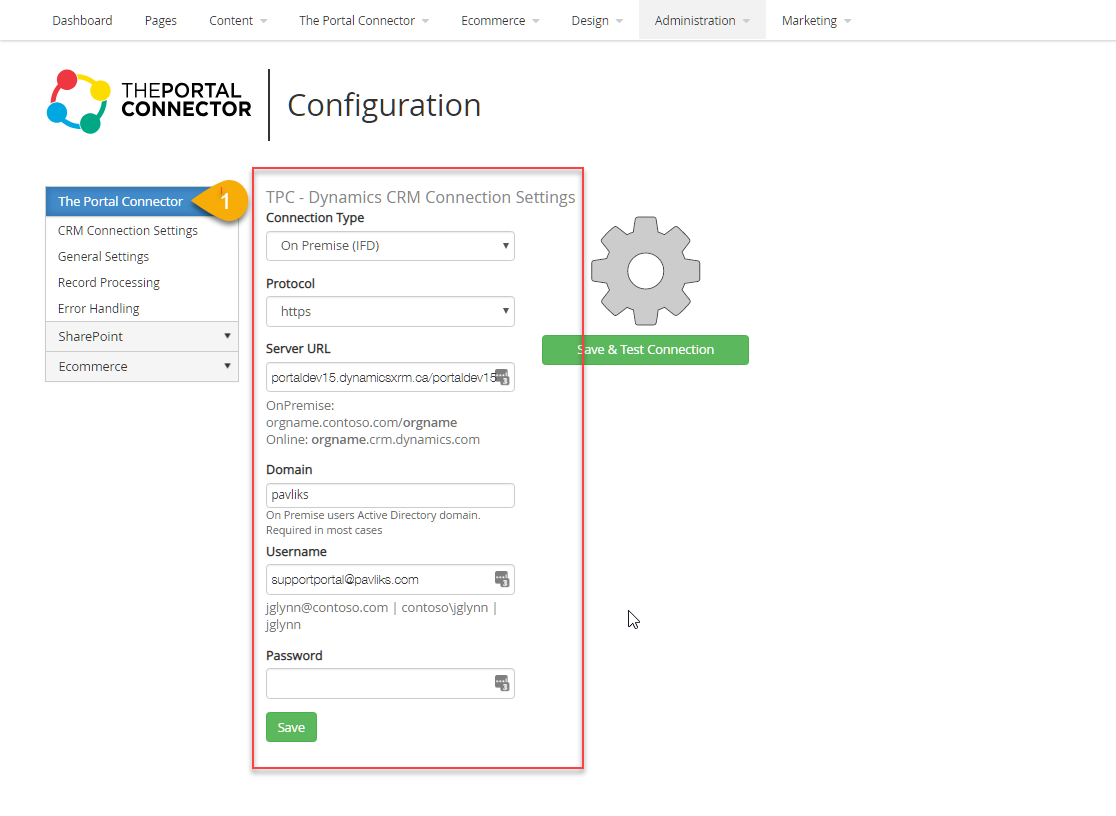
Once the Portal CRM Solution is installed to your CRM, you will need to point Dynamics CRM to your Portal Site.
Under Settings you can now select The Portal Connector group and then portals. This is where you add one entry for each unique portal you wish to link to Dynamics CRM.
Add a new portal record by clicking the New button.
Give the portal a name and enter the URL of your portal website
 .
.
The Update Portal Entity option can be changed to Yes at any time. This will push out to The Portal Connector an updated list of all the Entities you have in you Dynamics CRM instance. On the creation of a new Portal record this will happen automatically regardless of the status of this field.
Step 3 – Creating Portal Roles
Roles are used to allow administrators to control which contacts from Dynamics CRM can view which pages within your Portal. These permissions are set on your Sitefinity instance and can be used to control which group of users are allowed to visit a particular page. It can even be used to restrict groups of users from viewing a specific widget or content block. By default there are no Roles defined within Dynamics CRM.
Roles are simply logical groupings of Portal Users which may or may not view a page or element on a page in your Portal. There is no need for any other permission settings on the Dynamics CRM side of the system.
Any Roles you create in Dynamics CRM will be pushed out and synchronized with The Portal Connector when users are assigned the role.
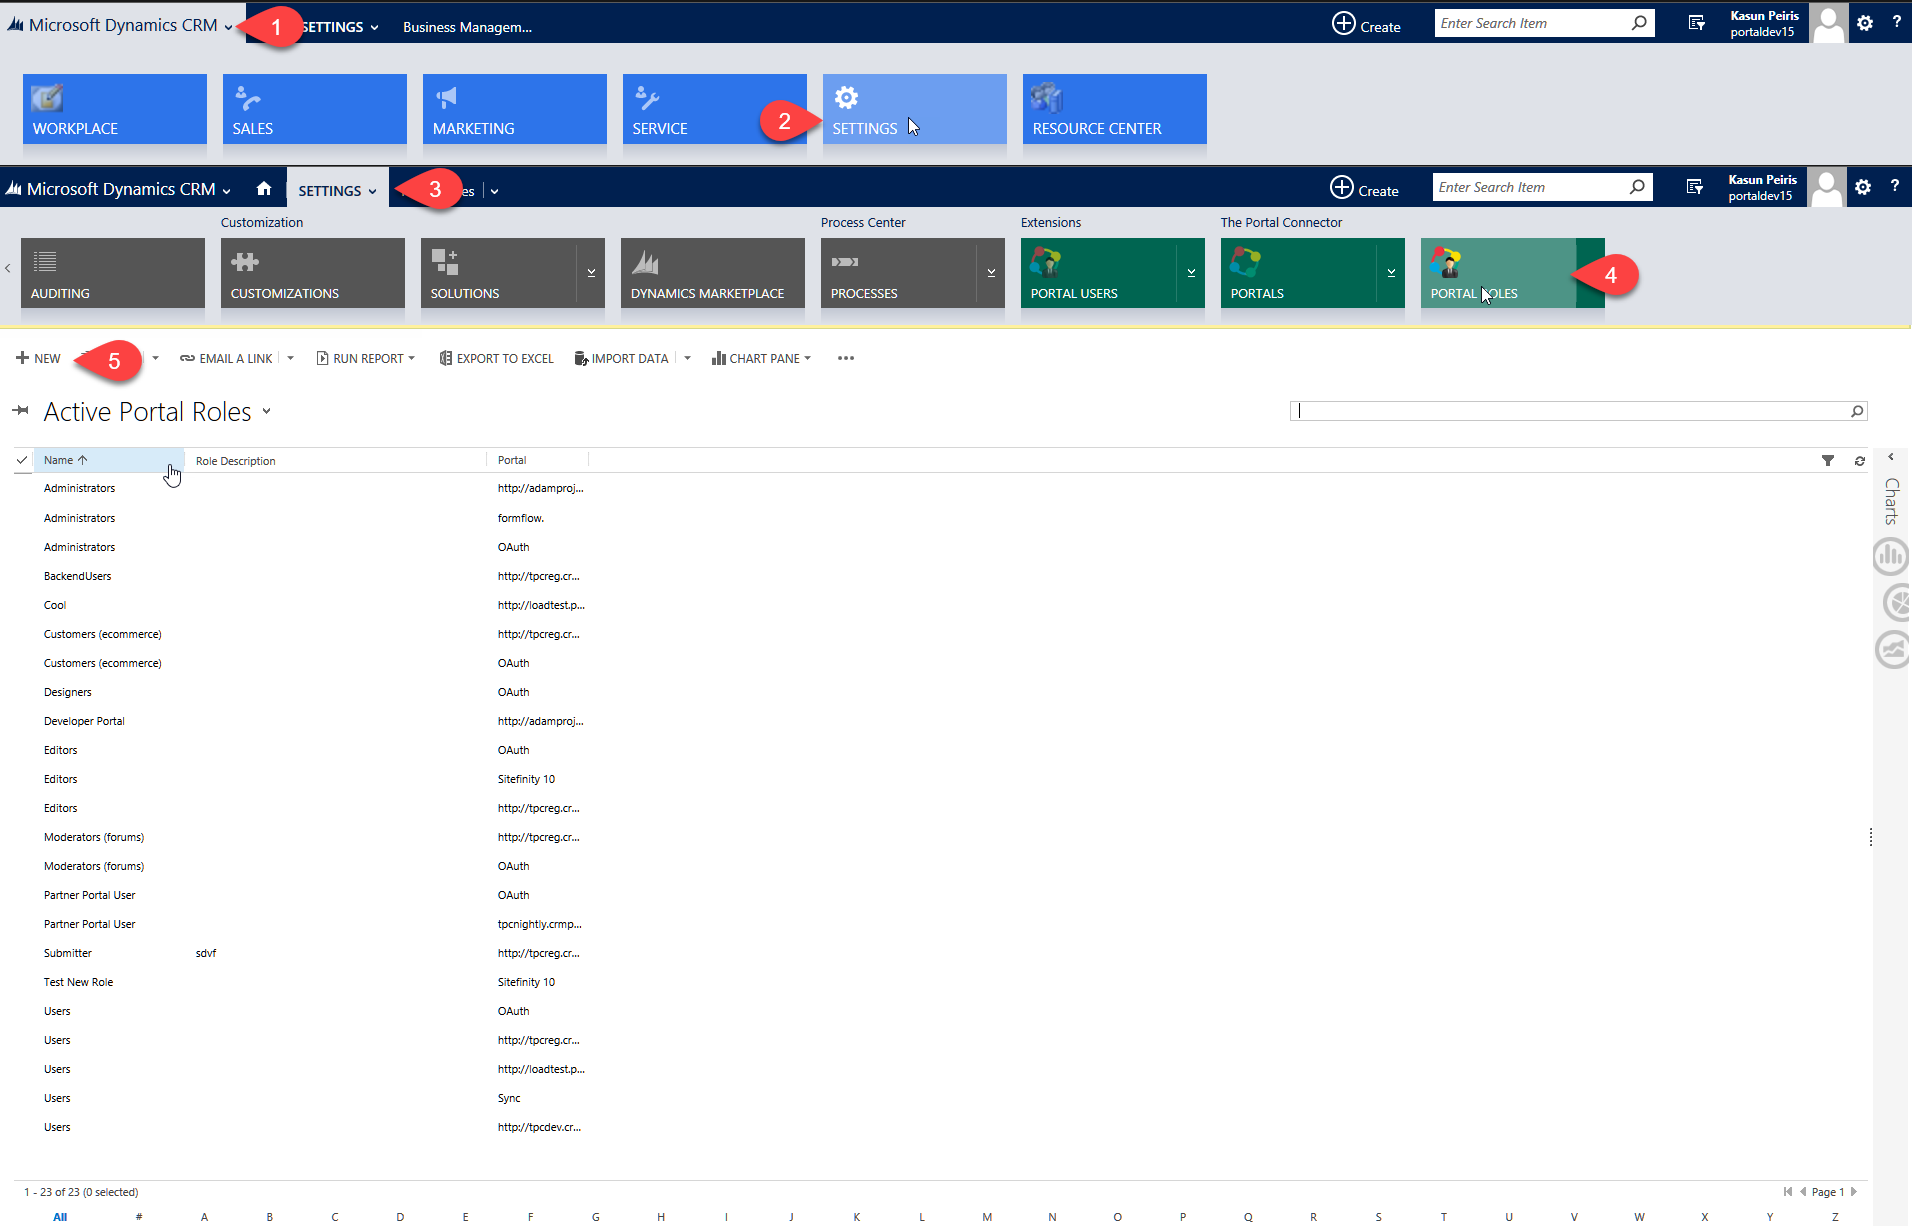
To create a new Role, in Dynamics CRM navigate to Settings and select The Portal Connector group and then Portal Roles. Click the New button and give the Portal Role a name.

You can create as many roles as you'd like.