Prerequisites
To get started, you are required to have:
- A service principal (app-only token).
- You need to have your own Azure Active Directory tenant setup.
Follow the steps below to register a new application using a Service Principal to authenticate.
- Navigate to https://portal.azure.com/ and sign in.
- Under Azure Active Directory > App registrations, click “New
Registration”.
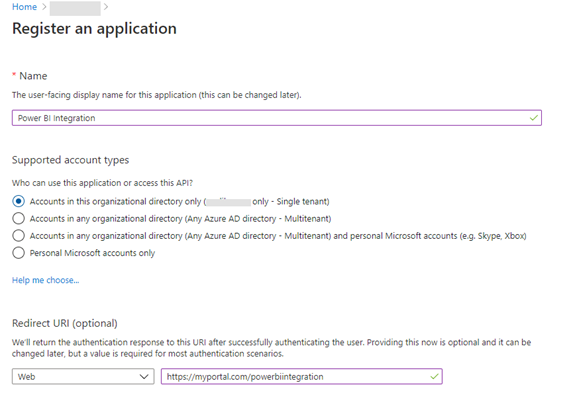
- Specify any Application Name and select a Supported account type, which determines who can use the application. Click the Register Button.
- On the left panel, click “API Permissions”
- Click “Add a permission”.
- On the right panel, select Power BI Service.
- Select “Delegated Permissions”
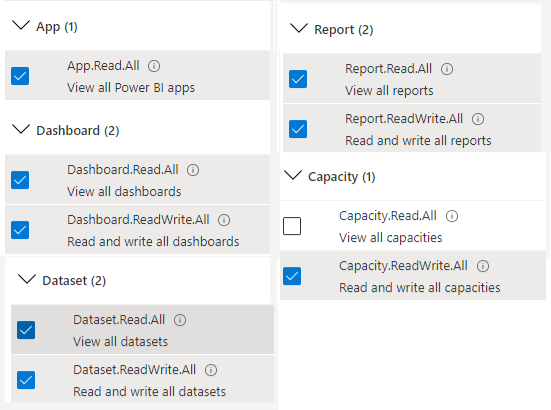
- Check the following boxes:
- Click on “Add Permissions”
- Create a Client Secret:
- On the left panel, select “Certificates & secrets”.
- Select Client secrets -> New client secret
- Provide a description of the secret and a duration. When done, select
Add.

- Copy the secret value because you will not be able to retrieve the key later.
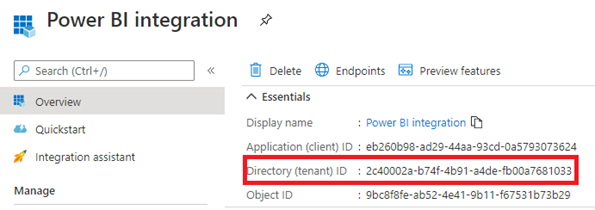
Save your Tenant ID for later.
Create a security group on Azure AD
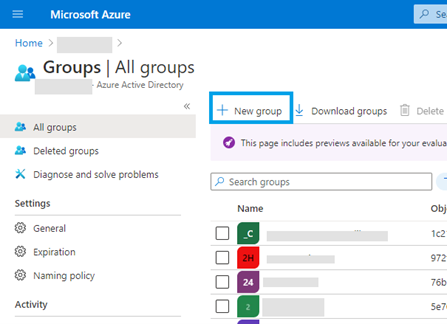
- On the Active Directory page, select
Groups and then select New group
- For “Group type” select Security
- Add a Group Name and Description
- For “Membership type” select Assigned
- Click on “Members” and add the Application you just created
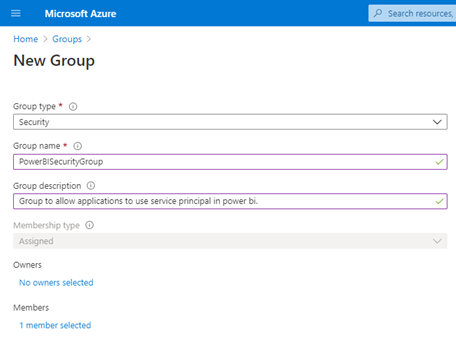
- Click Create
Enable service principal in the Power BI service admin settings:
- Navigate to https://app.powerbi.com/ and login as a Power BI admin.
- Under Settings > Admin Portal > Tenant Settings > Developer Settings >
Allow service principals to use Power BI APIs.
- Set the setting to “Enabled”.
- Select “Specific security groups” and add the security group you created in Azure AD.
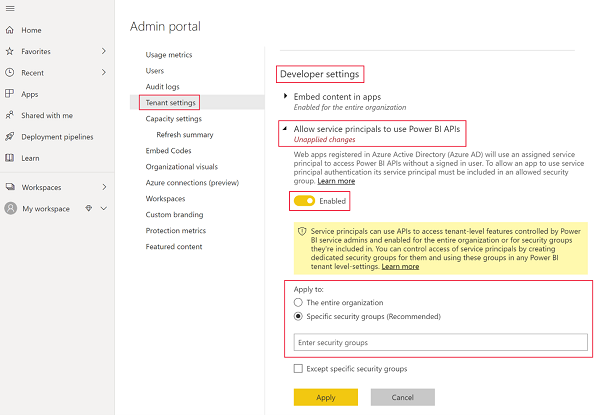
- Click Apply
Add the service principal to your workspace
- Scroll to the workspace you want to enable access for, and from the
More menu, select Workspace access.
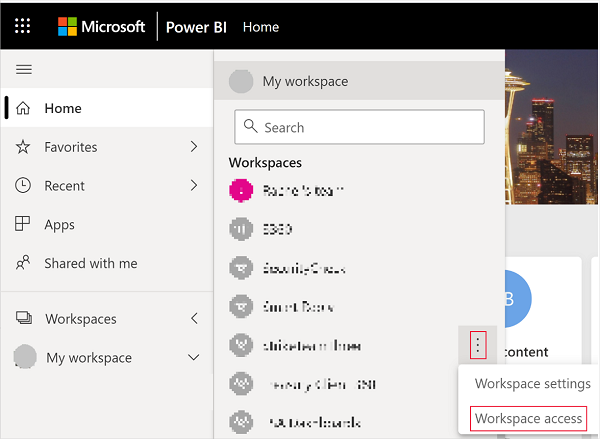
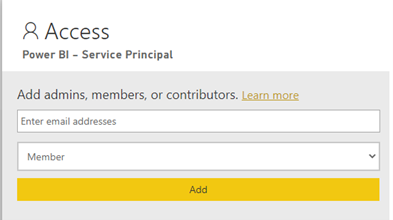
- In the Access pane, text box, add one of the following:
- Your service principal. The name of your service principal is the Display Name of your Azure AD app, as it appears in your Azure AD app's overview tab.
- The security group that includes your service principal
From the drop-down menu, select Member or Admin.
Select Add
Note: Make sure your account has the required permission to access the application.
Embed your content
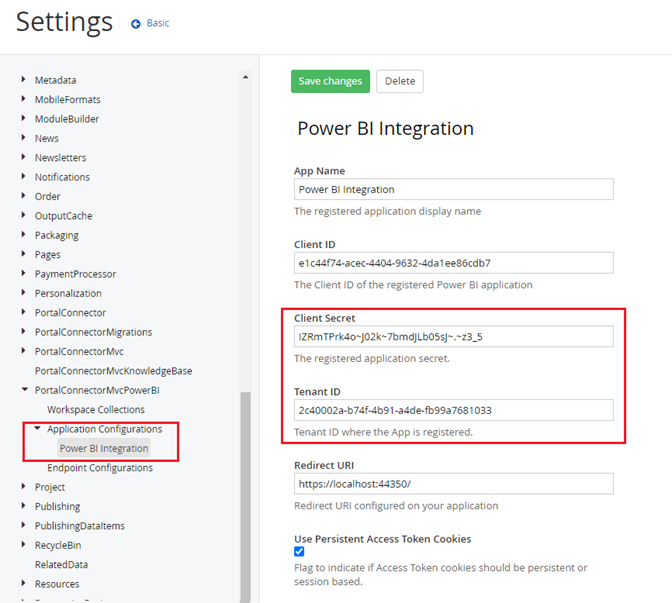
To display reports in The Portal Connector using the Power BI Web app, you would need to configure the application in The Portal Connector as follows:
- Navigate to the Sitefinity backend
- Go to Administration > Settings > Advanced > PortalConnectorMvcPowerBI > Application Configurations
- Click Create New
- Fill in the App Name. It does not have to match your App Name configured previously
- Fill in the App Id (copy from Azure)
- Fill in Client Secret and Tenant ID.
- The Redirect URI should be the same as the Azure app.
- Check the Use Persistent Access Token Cookies if you want to save your Access Tokens with an expiry date. Leave it unchecked to indicate that the Token will only be used during the current user session
Assign a workspace to a capacity
In order to embed content to your portal, you need to assign a Power BI Embedded capacity to your workspace where your content is located.
Ps.: Before creating a Power BI Embedded capacity, make sure you have signed into Power BI at least once.
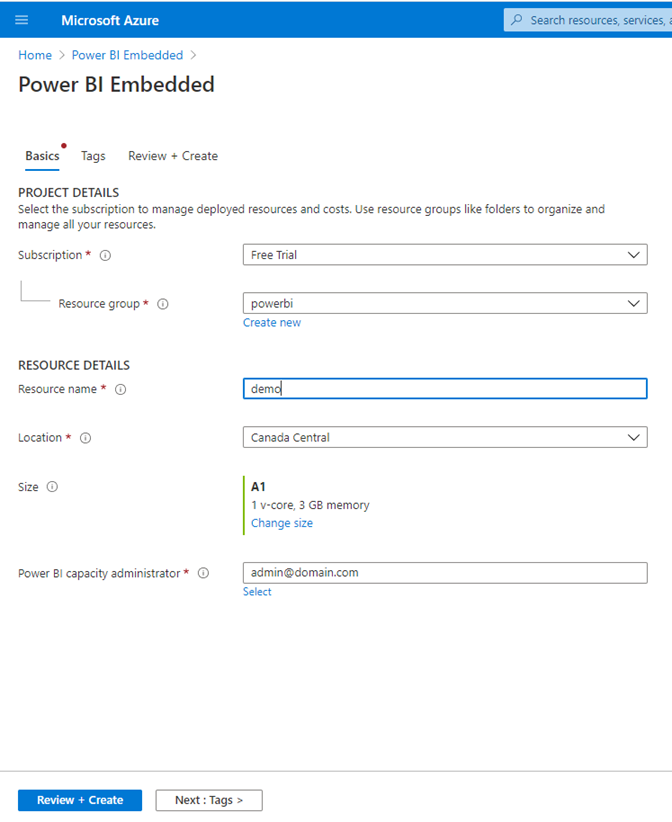
Follow these steps to create a Power BI Embedded capacity on Azure:
- Navigate to https://portal.azure.com/ and sign in.
- In the search box, search for Power BI Embedded.
- Within Power BI Embedded, select Add.
- Fill in the required information and then click Review + Create.
Follow the steps below to assign a capacity to a
workspace:
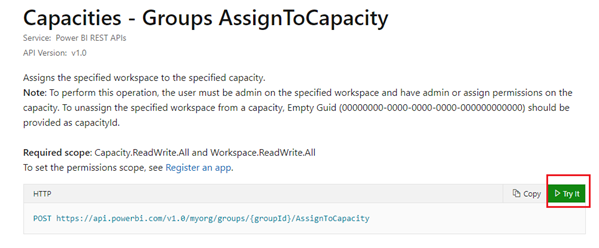
- Navigate to https://docs.microsoft.com/en-us/rest/api/power-bi/capacities/groups_assigntocapacity
- Click “Try it” and sign in with your Azure Account.
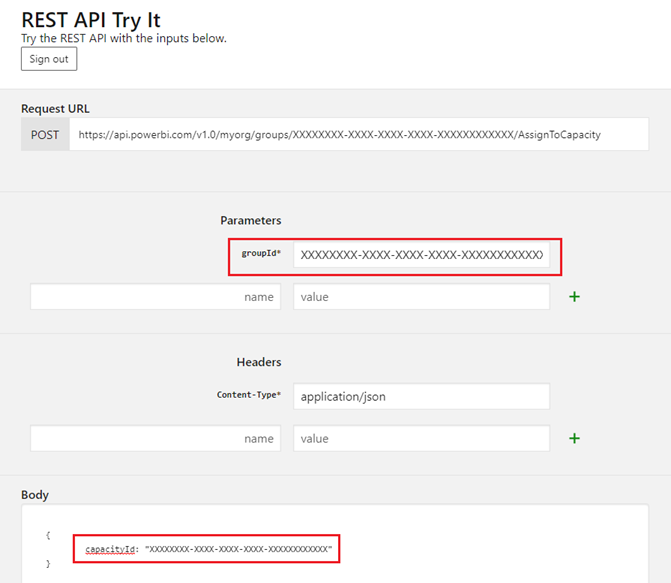
- Fill in the “groupId” which is the ID of your workspace and “
capacityID” which is the ID of your capacity created in the previous step.
- You can find the workspace ID by navigating into the workspace on Power Bi
service.

- You can find the capacity ID by navigating to Power BI Admin portal > Capacity Settings > Power BI Embedded tab.
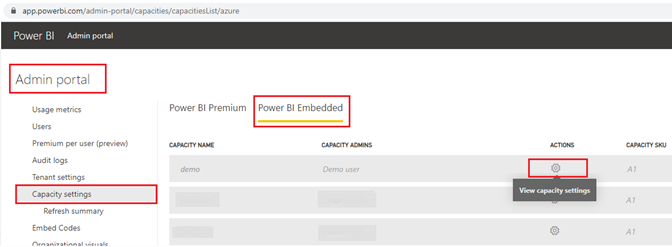
- Locate your capacity in the list and click the engine icon to view the capacity settings:
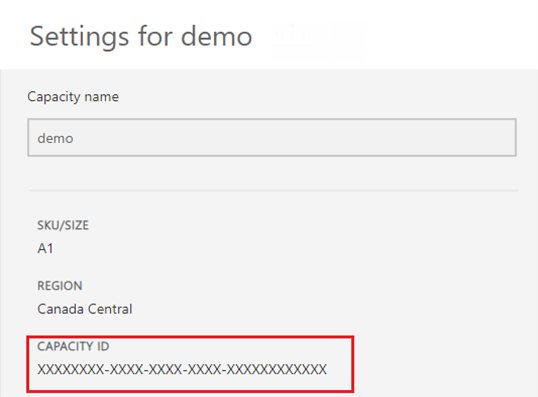
- After inputting the information, click “Run”

- After you select Save, you should see a
diamond next to the workspace name.