Adding a Portal Form to a Page
To make a Form available in your Portal you need to add it to a Page.
Once logged into the Administration area of Sitefinity, click on the Pages menu item.
Create a New Page
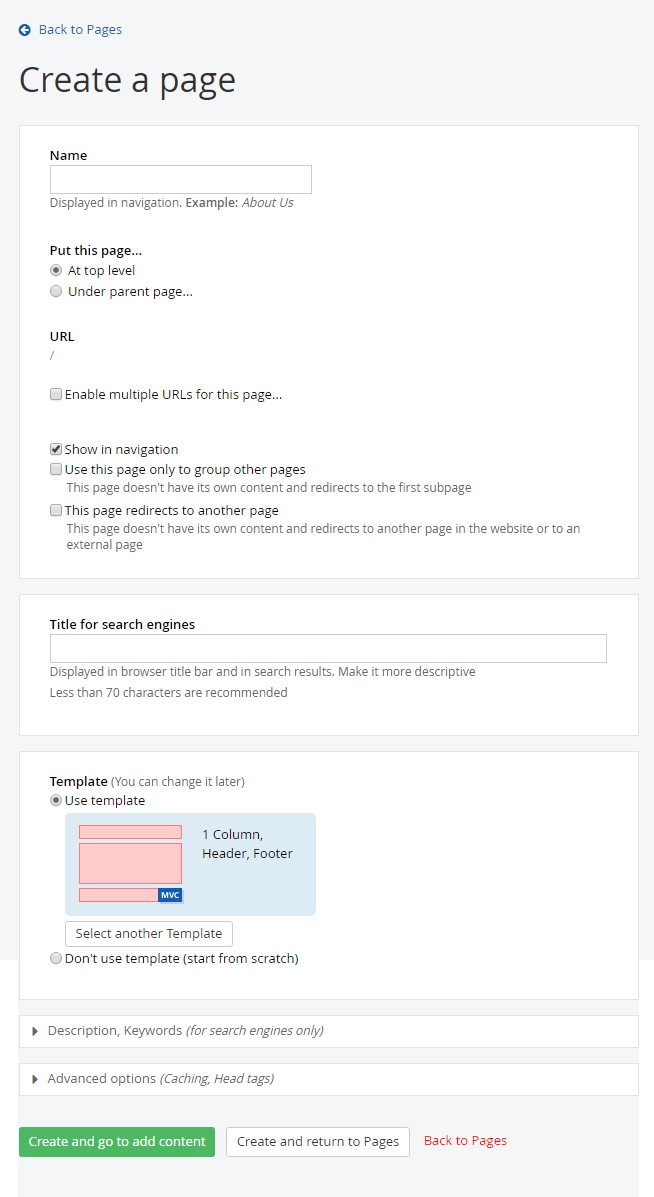
Click the Create a page button at the top left.

The Sitefinity CMS platform contains an extensive feature set for creating and controlling web pages. For the purpose of this Quick Start Guide we will accept all the generic default options that don’t directly affect the adding of a Form to a page.
Give the new page a Name and decide whether you wish this page be made available in whatever navigation structure you have created for your Portal.
You can choose a specific template or start form a completely blank page. Note that all these setting can be changed and updated at a later date.
When you are ready click Create and go to add content.
NOTE: To enable filtering on grid widgets Viewstate needs to be enable on the page. To enable Viewstate expand the Advanced Options section and select Enable Viewstate.
Defining the Page Layout
You are now in the Page Design mode. You may notice it looks somewhat similar to the Form Designer.
You can switch between the Page Content and Layout Designer by clicking a button at the top right of the page.
Like with the Form Designer, you can choose the Layout Designer and build a page format using the many Layout Elements.
Adding the Form to a Page
Switch to the Content Design mode:

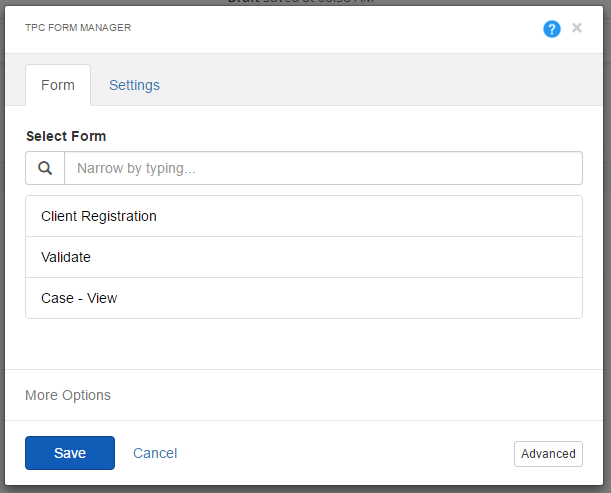
You will notice along the right hand side a large number of Widgets available to build your page. The Widgets are arranged in logical groupings by purpose. Scroll down through the list until you can click on The Portal Connector grouping. These are the specific Widgets you can use that link directly with your Dynamic CRM instance. To add a Form to a Page drag the CRM Form Manager and place that Widget on the Page where you want the form.

Click Select a form OR the Edit link to define which from you wish to display. Displayed will be a list of all the Forms you have created already. Choose the desired form and click Save.
Continue to modify your page as you wish adding other content Widgets such as images, or text. When you are ready, it is time to publish your Page.
NOTE: Please DO NOT USE the TPC Form Layout OR CRM Form Layout (Under layout tab) in page level. They are only meant to be used inside of the Form.
Publish Your Page
Just like with a Form, a Page cannot be made available on your Portal until you Publish it. Click the Publish button at the top left.You can Save as Draft if you wish or even Preview how your Page will look before Publishing.