The Portal Connector Activity feed widget allow you to display activities from CRM on a form in your Sitefinity site. These can be any (or all) of the standard activities that come with CRM as well as custom activities created in CRM. Activities can be added, edited, deleted and filtered from the list.
Required Entities
The Activity Feed widget depends on several CRM entities being added to The Portal Connector. If you are only intending on using the Activity Feed without any ability to add or edit activities, the only required entity is Activity (activitypointer).
If you intend to allow adding and/or activities, you may need to add the following entities depending on which ones you want to add/edit:
- Appointment
- Email
- Fax
- Letter
- Phone Call
- Task
In addition to the above list, you may need to add any custom activity type entities you want to support. Custom activity entities are fully supported.
Configuration
After adding the Activity Feed widget to a TPC form with a correctly configured Form Configuration widget, open the designer by clicking Edit in the top right corner of the widget. You will see the designer as shown below:
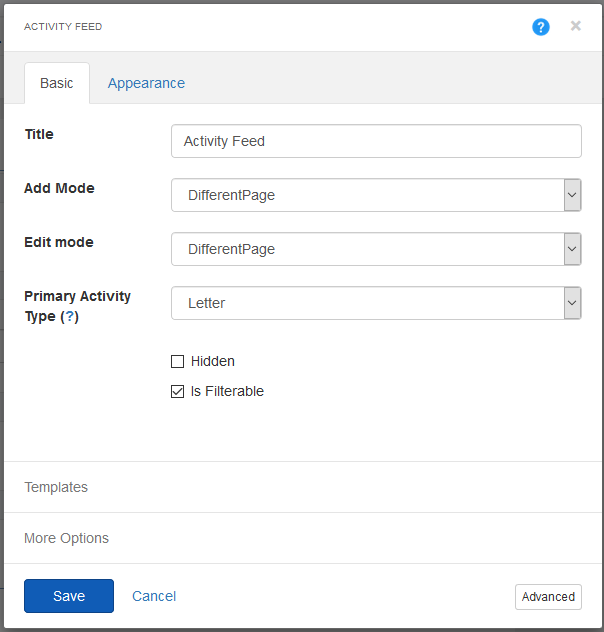
On the Basic tab, you can configure the following:
- Title: The title displayed on the form.
- Add Mode / Edit Mode: How the activity will be added or edited.
- DifferentPage: The form will open another page and return to this one after successful submission.
- Popup: The form will open in a modal window on the current page and close after successful submission.
- Primary Activity Type: The activity type that will be shown on the 'Add New' button. All others will be in the dropdown.
- Hidden: The activity feed widget will be hidden. You can use the Rules Manager or custom JavaScript to show is as needed.
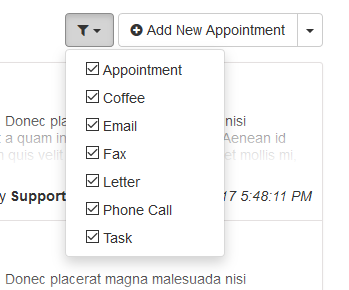
- Is Filterable: Enables a dropdown with a checklist of activity types on the form used for filtering of the activities feed.
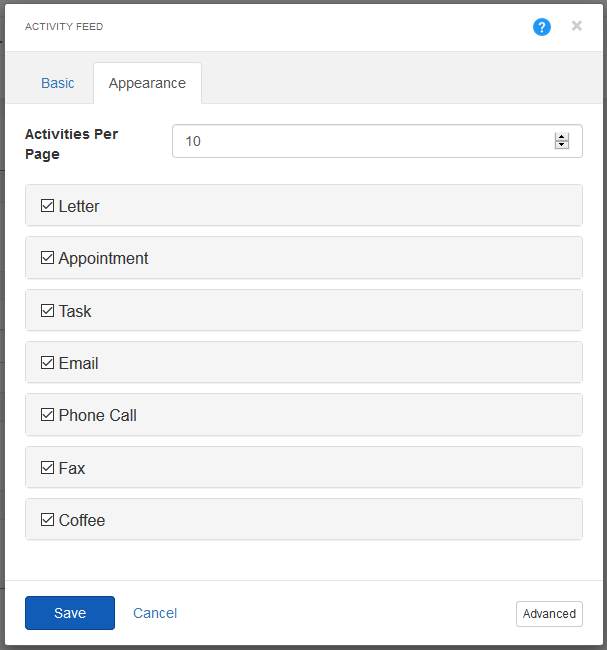
On the Appearance tab, individual Activity types are configured as well as the number of activities displayed per page. In the above image, you can see all the built-in activity types plus a custom one called Coffee.
By default, when you add the widget to the form, all activity types are enabled. You can disable any activities you do not want to display by unchecking them. To configure an activity type, click its name and the configuration section will expand, exposing its options as seen below.
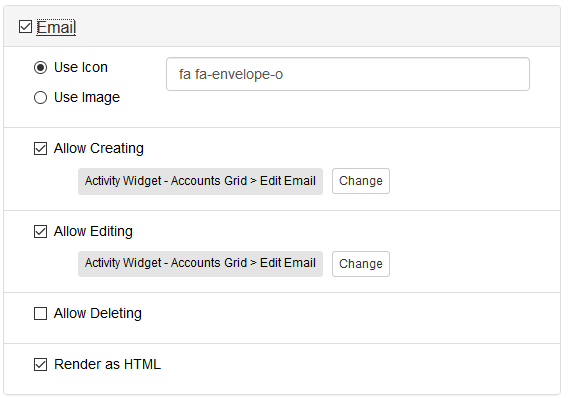
- Use Icon: The default option for displaying an icon next to each activity. Selectin this option will expose a field containing the CSS classes that will be applied.
- Use Image: Selecting this option will expels an image picker allowing you to select an image for the Sitefinity Imager Library to use as the activity icon. Because images will be scaled down, it is recommended that you use an image of the exact size needed (42px by 42px).
- Allow Creating: Checking this option exposes a page picker to select a page where you have configured a form for creating activities of this type. The activity will appear in the Add dropdown button. Only activities with this checked and correctly configured will appear in the button.
- Allow Editing: As with Allow Creating, this option exposes a page picker to select a page where you have configured a form for editing activities of this type. An edit button will appear under the activity icon.
- Allow Deleting: Checking this option will cause a Delete button to appear under the activity icon.
- Render as HTML: Selecting this option will treat the description field on the activity as HTML. This option is selected by default on the Email activity type but is available for all activity types. This allows custom activity types to use an HTML field and have it render correctly.
Usage
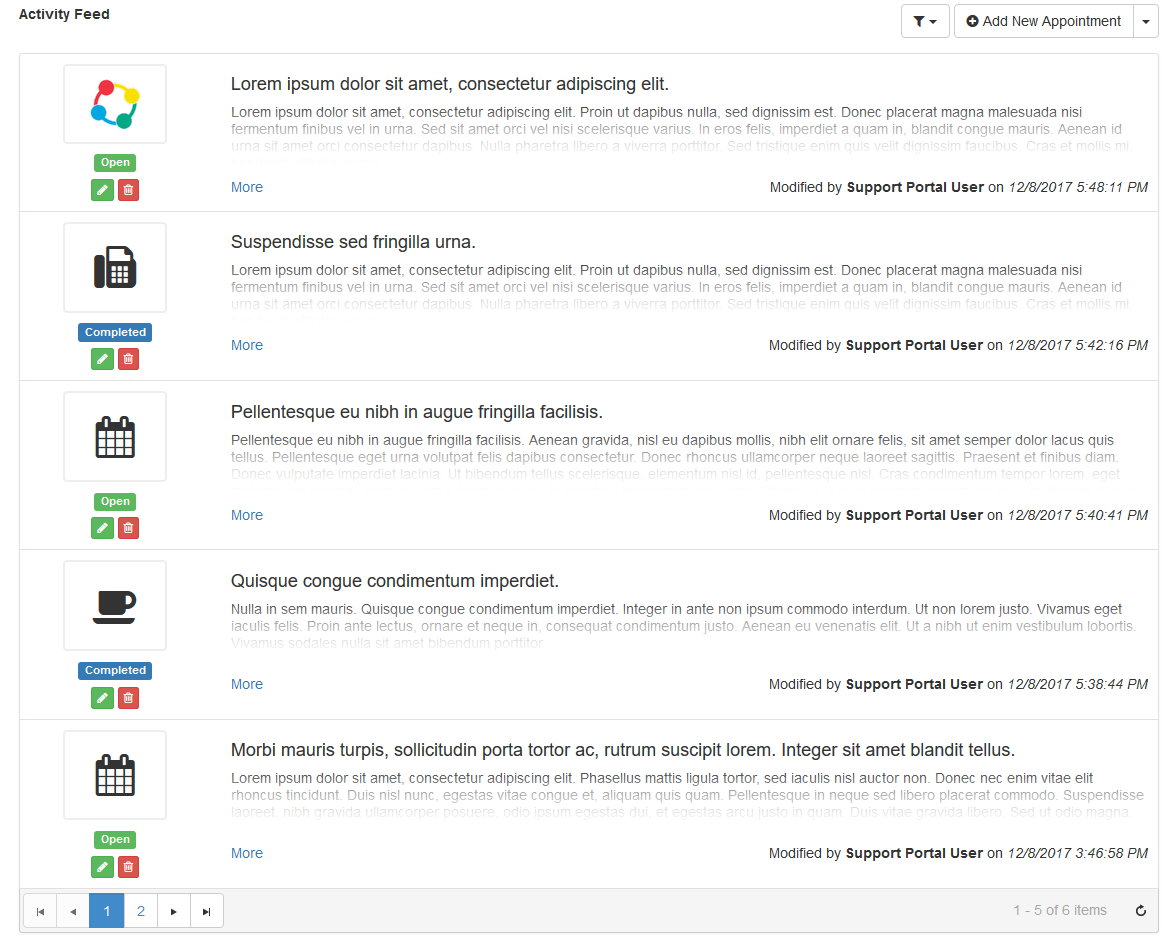
Once a form is configured with an Activity Feed widget, navigating to the form with data (from a Grid or ListView for example), you will see something like the image below:
Adding Activities
Adding activities to a CRM record depends on Activity type entities to be added to The Portal Connector on the CRM Entities page from The Portal Connector menu in the Sitefinity backend. For each activity type you want to support, you will need to create a form as you would any other form in The Portal Connector and add the form to a page. Once created, the page can be set on the Activity Feed widget by checking the Allow Adding box for the activity type and then setting the page with the form.
Note: No special configuration is required on the Add/Edit form to handle the relationship between the activity and the entity it is regarding. This is handled automatically during form submission.
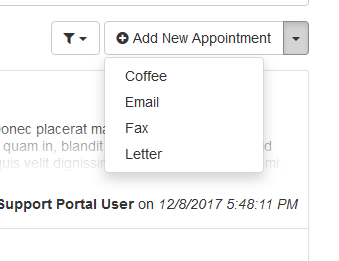
Activities Types with Allow Adding checked and configured with a page appear in the Add button as seen in the image below with the activity type set as primary visible on the button and any others in the dropdown. If only 1 activity is configured, a standard button will appear without the dropdown.
 Editing Activities
The configuration for editing an activity type is the same as adding an activity except you check the Allow Editing checkbox and set the page with the correct form. Usually the same form as adding but a different form can be used.
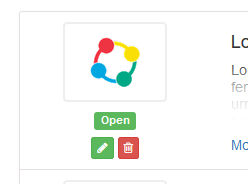
When configured for editing, an edit icon appears below the Activity status label in the feed as seen below.
Deleting Activities
Deleting activities is configured by checking the Allow Deleting checkbox for the activity type just as you do when enabling adding or editing. When enabled, a delete button appears below the Activity status label in the feed as seen above.
Filtering Activities
Activities can be filtered from the using a list of checkboxes as seen in the image below. This feature is enabled on the Basic tab by checking the Is Filterable checkbox.
