Create a Sitefinity Project for Your Portal Site
Sitefinity needs to be installed via NuGet before installing The Portal Connector. If your Sitefinity site is already installed and configured you can move on to Installing The Portal Connector.
-
1. Create an Empty Database
-
2. SQL User Creation and Mapping
-
3. Creating a New Project
-
4. Site Setup
Create an empty database in your SQL server
Creating a New Project
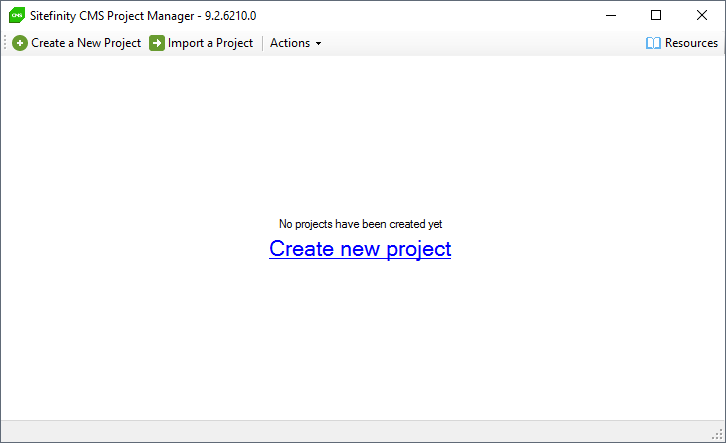
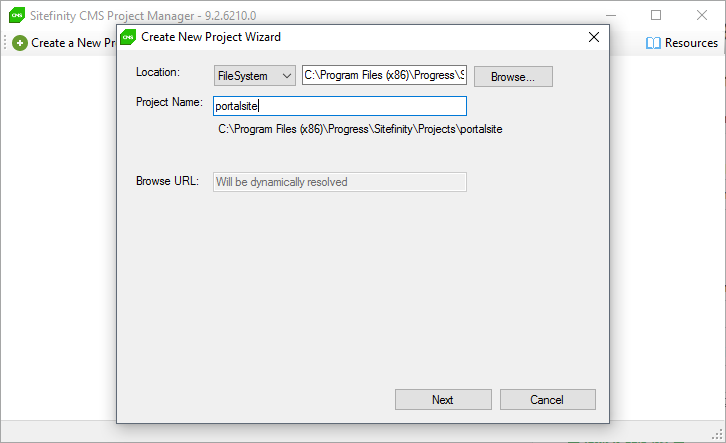
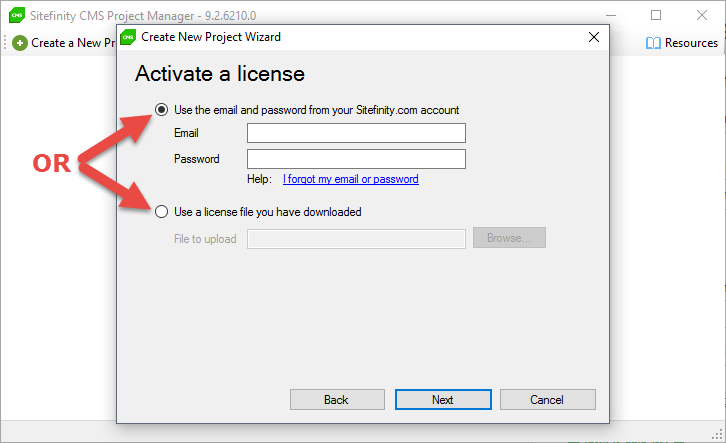
Run your Sitefinity Project Manager and Press Create New Project. The wizard will prompt you to enter all required details.


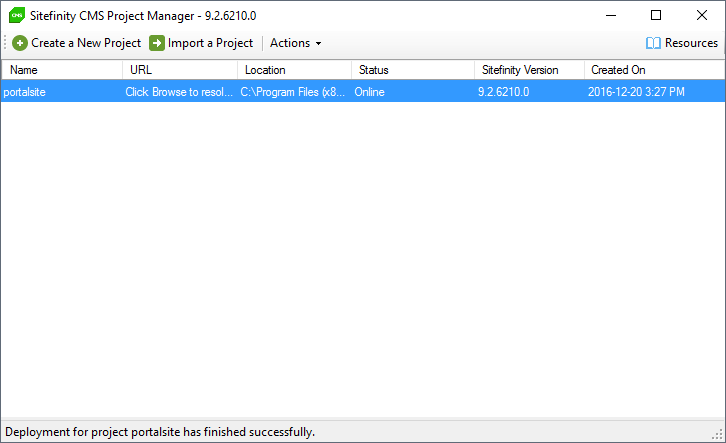
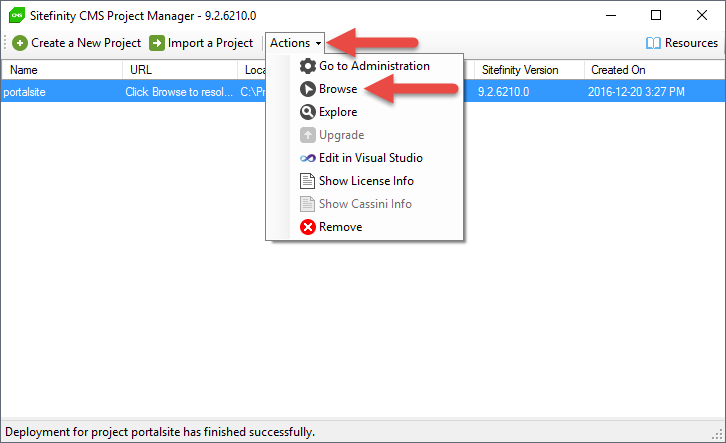
Once the project has been created, select your portal site from the list and, under
Actions, select
Browse to open the
Project Startup in your web browser.

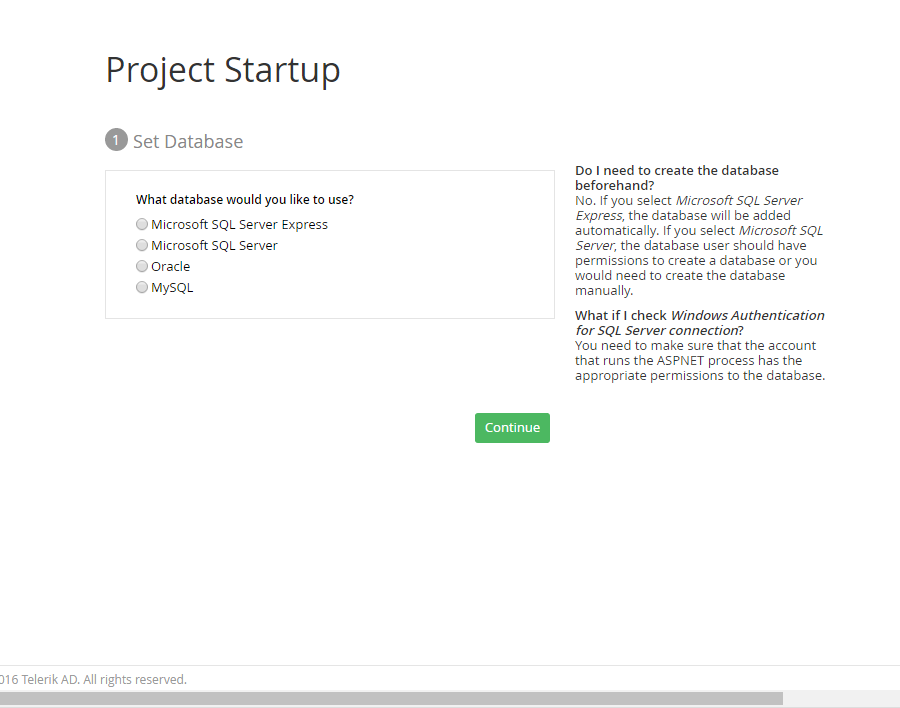
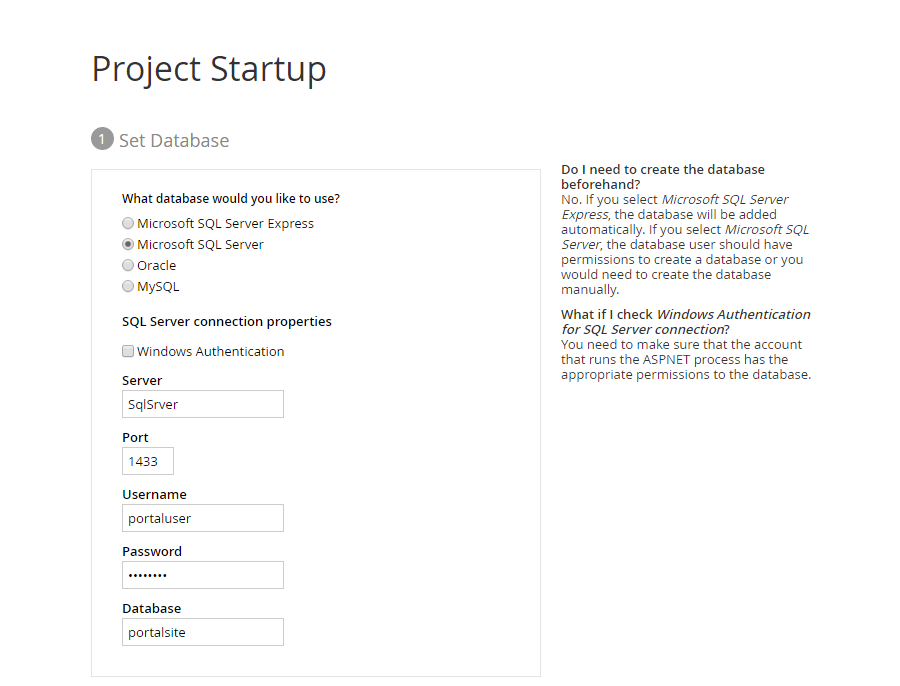
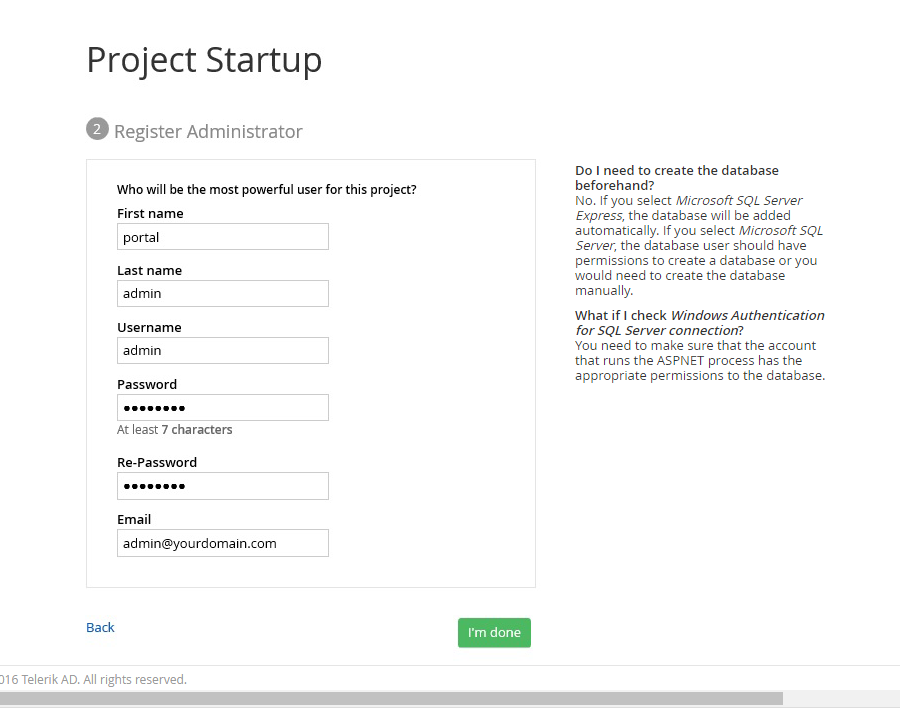
Site Setup
Please note, if you are using SQL Express, you must select
Microsoft SQL Server Express from the provided options.


Now, you are ready for
Installing The Portal Connector.