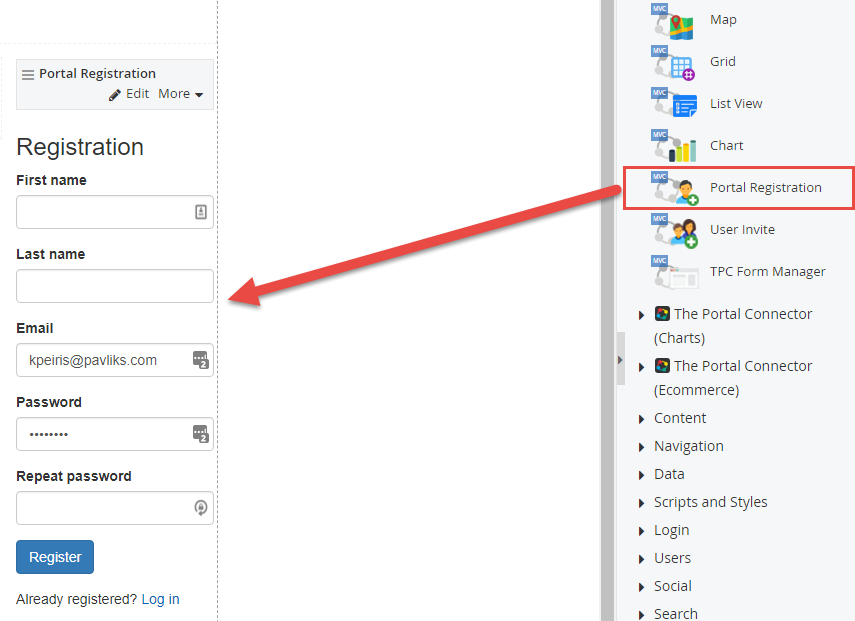
Drag and drop the
Portal Registration widget to your page.

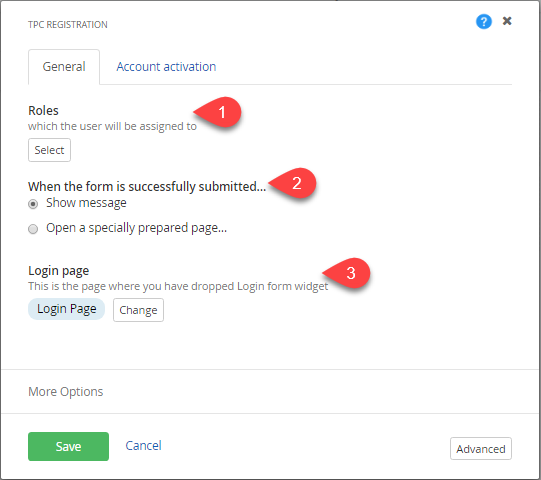
Click on the edit button to open the widget designer, where you can configure the following:
General
On this tab, you can configure:

- Roles Here you can choose whether the user is assigned to any roles. Click Select button, select the roles to which you want to assign the user and click Done.
- When the form is successfully submitted This provides you with option to choose what to display after the registration form has been completed by the user. Select one of the following radio buttons:
- Show a message This shows a predefined message on successful registration.
- Open a specially prepared page Click Select button, from the list select the page that opens when registration is complete, and click Done.
- Login Page Select the page where you have dropped the Login form widget.
Account Activation
In the Account activation tab page, you choose when to activate the account of the user who completed the registration form.
Select one of the following radio buttons:
- Immediately The account is activated when the user clicks Register button in the registration form.
- If, after the user account has been activated, you want to send a confirmation email, select ‘Send an email for successful registration’ checkbox.
- In 'Success email template’, select the template for the email that the system sends to the user when the account has been successfully activated.
- By confirmation link sent to user email
On selecting this option a confirmation link is sent to the user email. The user clicks on link for account confirmation.
- In 'Confirmation email template’, select the template for the email that the system sends to the user for confirmation.
- The Activation page is which user will open by confirmation link. The page must have the Account activation widget added to it. Click Select button, select the page from the displayed list and click Done.
When you are finished with all the settings, click Save.