-
1. Prerequisites
-
2. Preparing for Upgrade
-
3. Installation
- 4. Licensing
- 5. Updating Dynamics CRM Solution
- 6. Configuration
- 7. Additional Steps
Prerequisites
- Sitefinity 13.0.7300 and above installed
- The Portal Connector 6.0 successfully installed on the Sitefinity site
- A Portal Connector license applicable for the version you are upgrading to
- Visual Studio 2017 or greater
Preparing for Upgrade
- We recommend that you take a backup of all the website files and a backup of the database (Refer to this article regarding how create a database backup).
- Identify the Sitefinity version of the target site. To do this, navigate to the Sitefinity backend, select Administration and then Version & Licensing.
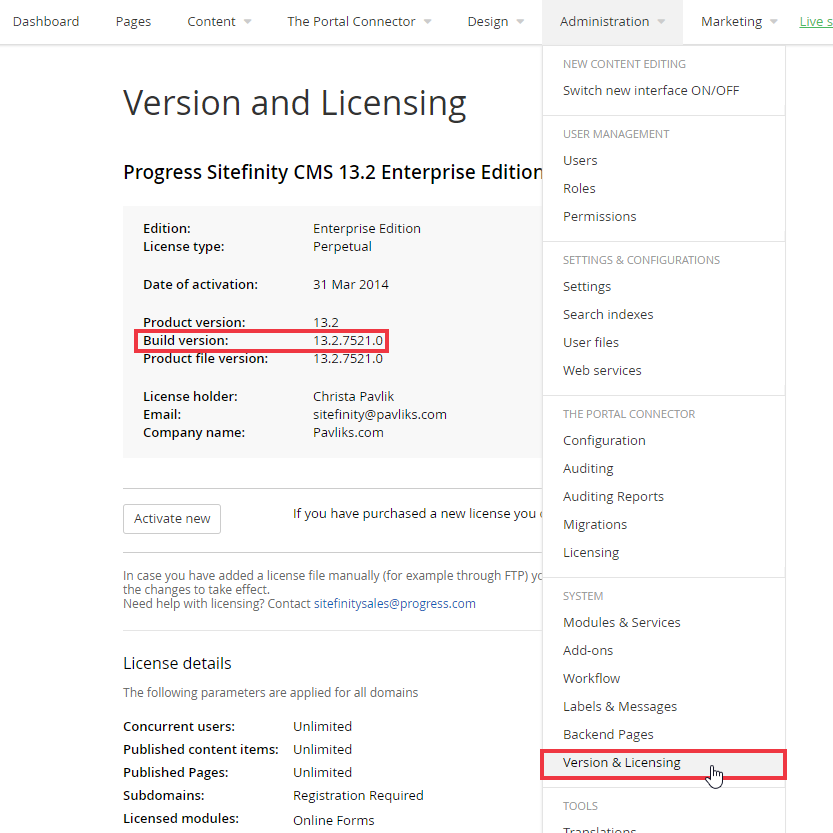
- With this version, we’re able to download our Portal Connector release. Login to The Portal Connector website and navigate to the downloads page.
- On the left-hand side, select the version you want, in this case we’re upgrading to TPC 5.3.
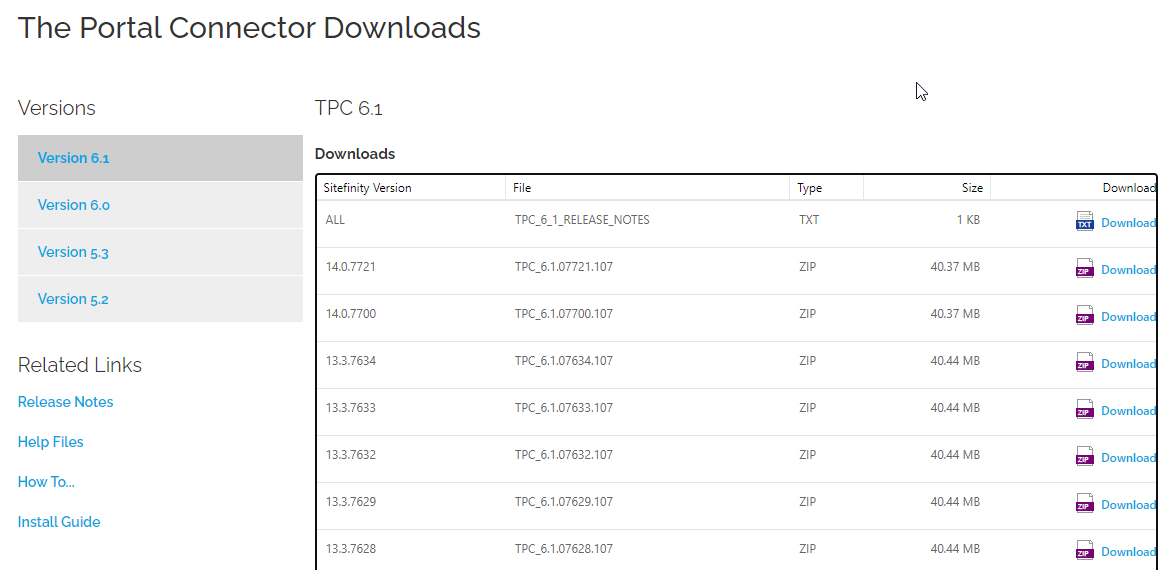
- Download the release appropriate to your Sitefinity version from Step 2.
If your version is not found in the list, The Portal Connector is either not supported for that release of Sitefinity or in the case of a recent Sitefinity release, we’re still testing the release with the latest Portal Connector version. For all questions about versioning please contact support@crmportalconnector.com
Installation
- Verify that the contents of the downloaded TPC .zip file will not blocked by right-clicking on the file and selecting Properties. On the General tab, ensure Unblock is checked, if the option is available.
- Extract the contents of the downloaded TPC .zip file.
- Navigate to the bin directory of your Sitefinity installation.
- Copy and paste the contents of the downloaded .zip file into this directory.
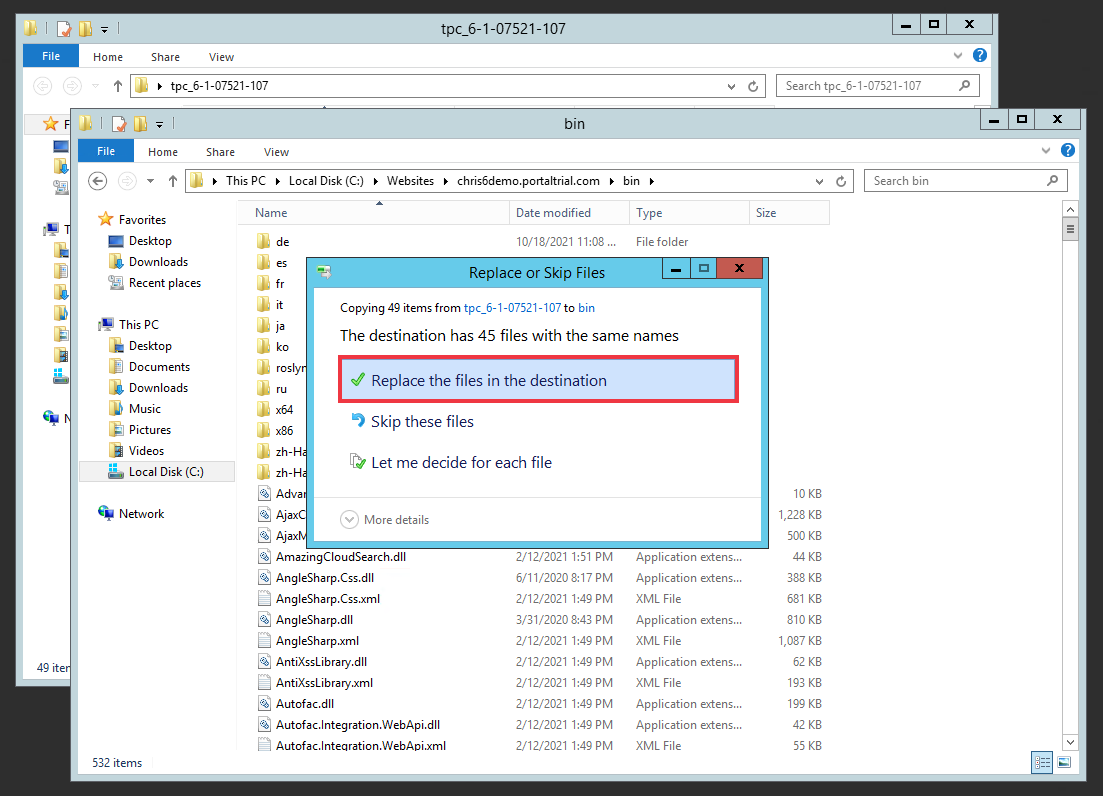
- Navigate to the bin directory of your Sitefinity installation.
- If you are not recompiling the Sitefinity application, you need to add the following to the ControllerContainerAssembliesLocation.json file shown in the above image.
"pavliks.PortalConnector.AdminApp.dll",
"pavliks.PortalConnector.PowerPlatform.dll",
This tells Sitefinity to look in the above assemblies for required files.
Note: When adding the above to the file, ensure you follow the existing format and put them in quotes and include the commas as shown above. This is needed for properly formatted JSON.
-
If references exist in the project for the following assemblies, they will need to be deleted and then re-added pointing to the files that are in the TPC distribution. Otherwise, they will be overwritten by the references that Sitefinity includes. The references for Microsoft.SharePoint.Client and Microsoft.SharePoint.Client.Runtime do not need to be modified if using Sitefinity 13.1 or greater.
- Telerik.Reporting
- Telerik.Reporting.XpsRendering
- Microsoft.SharePoint.Client
- Microsoft.SharePoint.Client.Runtime
-
Add the following required Binding Redirects according to the installed Sitefinity version:
<!-- Required Binding Redirects -->
<dependentAssembly>
    <assemblyIdentity name="System.Web.Http.WebHost" publicKeyToken="31BF3856AD364E35" culture="neutral"/>
    <bindingRedirect oldVersion="0.0.0.0-5.2.3.0" newVersion="5.2.3.0"/>
</dependentAssembly>
<dependentAssembly>
    <assemblyIdentity name="Telerik.Reporting" publicKeyToken="a9d7983dfcc261be" culture="neutral"/>
    <bindingRedirect oldVersion="0.0.0.0-14.1.20.618" newVersion="14.1.20.618"/>
</dependentAssembly>
<dependentAssembly>
    <assemblyIdentity name="Telerik.Reporting.XpsRendering" publicKeyToken="a9d7983dfcc261be" culture="neutral"/>
    <bindingRedirect oldVersion="0.0.0.0-14.1.20.618" newVersion="14.1.20.618"/>
</dependentAssembly>
<dependentAssembly>
    <assemblyIdentity name="Microsoft.IdentityModel.Clients.ActiveDirectory" publicKeyToken="31bf3856ad364e35" culture="neutral" />
    <bindingRedirect oldVersion="0.0.0.0-5.2.9.0" newVersion="5.2.9.0" />
</dependentAssembly>
<!-- Additional Required Binding Redirects if Below Sitefinity 13.1 -->
<dependentAssembly>
    <assemblyIdentity name="Microsoft.SharePoint.Client" publicKeyToken="71e9bce111e9429c" culture="neutral"/>
    <bindingRedirect oldVersion="0.0.0.0-16.1.0.0" newVersion="16.0.0.0"/>
</dependentAssembly>
<dependentAssembly>
    <assemblyIdentity name="Microsoft.SharePoint.Client.Runtime" publicKeyToken="71e9bce111e9429c" culture="neutral"/>
    <bindingRedirect oldVersion="0.0.0.0-16.1.0.0" newVersion="16.0.0.0"/>
</dependentAssembly>
<!-- Additional Required Binding Redirects if Sitefinity 13.0 or Above -->
<dependentAssembly>
    <assemblyIdentity name="Newtonsoft.Json" publicKeyToken="30ad4fe6b2a6aeed" culture="neutral"/>
    <bindingRedirect oldVersion="0.0.0.0-12.0.0.0" newVersion="12.0.0.0"/>
</dependentAssembly>
<!-- Additional Required Binding Redirects if Below Sitefinity 13.0 -->
<dependentAssembly>
    <assemblyIdentity name="Newtonsoft.Json" publicKeyToken="30ad4fe6b2a6aeed" culture="neutral"/>
    <bindingRedirect oldVersion="0.0.0.0-11.0.0.0" newVersion="10.0.0.0"/>
</dependentAssembly>
Licensing
This section will show you how to apply your new license to your upgraded Portal Connector installation. For more information on licensing please contact sales at info@crmportalconnector.com
You can read The Portal Connector End-User License Agreement here: https://www.crmportalconnector.com/license/eula.pdf
- Navigate to the license keys page on The Portal Connector web portal found here.
- Select View Keys next to the portal where you wish to install the license.
- On the next page, click View on the appropriate TPC version for your installation.
- Copy the contents of the License Key in the text box to your clipboard.
- Log in to the Sitefinity backend of your portal.
- Under the Administration > The Portal Connector, select Licensing.
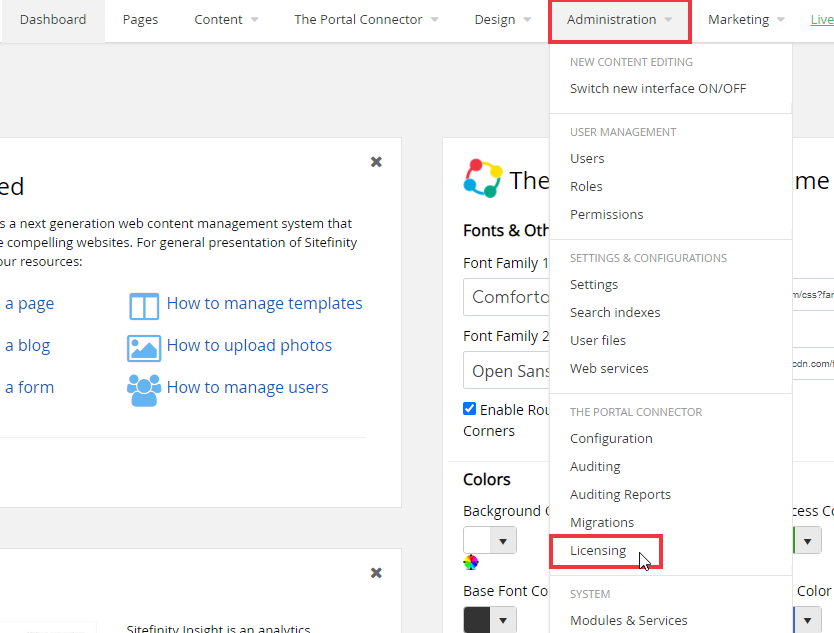
- Select Show License, then paste the license key from your clipboard into to the license text area.
- Click Update License.
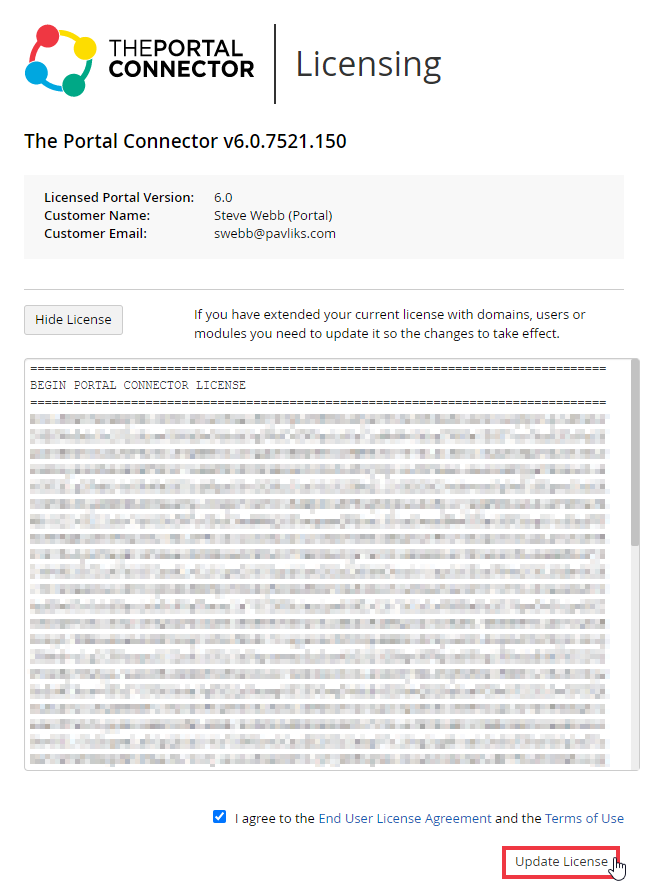
- If the correct license was copied, the Portal Connector will be licensed with a valid license
Updating Dynamics CRM Solution
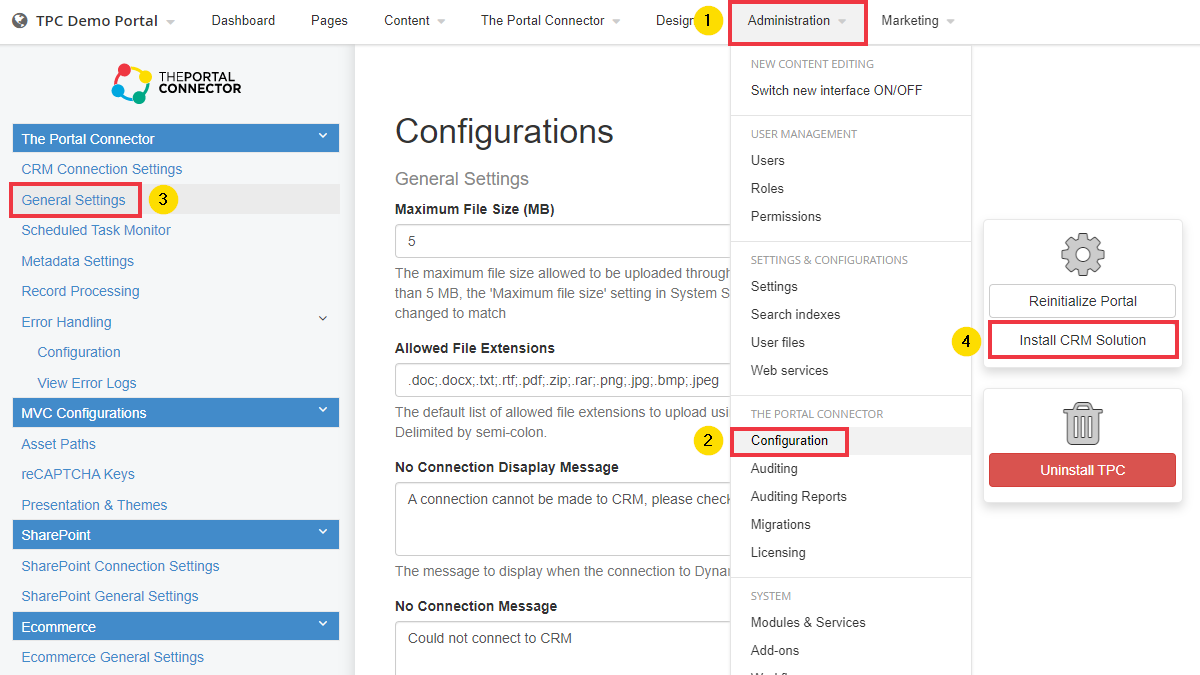
To update the TPC Dynamics solution, log into your Portal Dashboard and navigate to Administration > The Portal Connector > Configuration > General Settings, then click on Install CRM Solution.
Configuration
To configure the Environment, please follow the setup steps in the link below:
Additional Steps
Review the Release Notes for breaking changes and take the appropriate actions: