In Portal Connector, you can configure multiple entities on a form by defining the relationship between the entities.
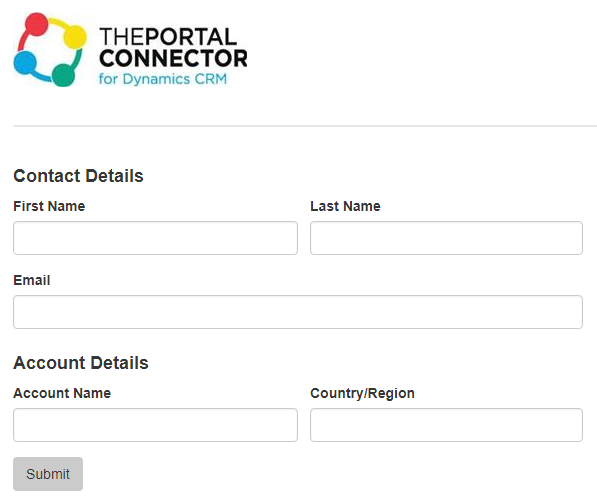
Below is an example for the form configured for Contact & Account Entity.
Creating a Form
Navigate to the backend of the Sitefinity > Content > click on Forms.
Click on ‘Create a Form’ button and give the new Form a name. Then click “Create and go to add content”. You will now see the Form Designer screen.
Step 1: Configure the form for Contact Entity.
Drag and drop the ‘TPC Form Layout’ under the Layout tab. Click on ‘Content’ and drag & drop the Form Configuration.
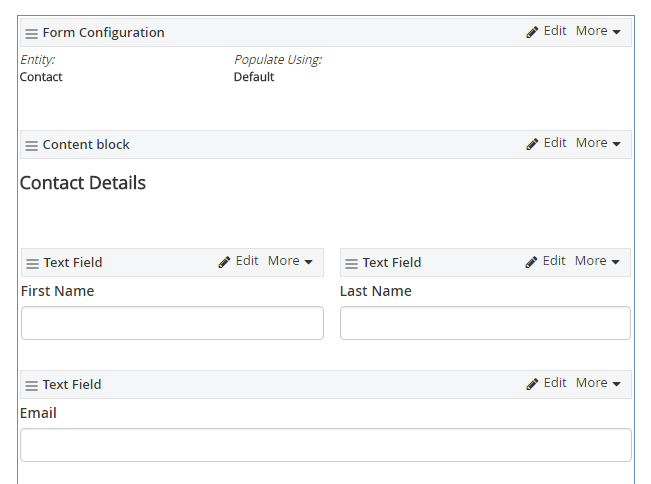
Now click Edit on the Form Configuration widget. Select the Contact Entity and click Save.
Now you can drag and drop the widgets within the blue border to configure attributes for this entity (as shown below).
Step 2: Configure the form for Account Entity.
Drag the ‘TPC Form Layout’ and drop it within the first TPC Layout configured for the Contact entity. Refer to the screenshot below:
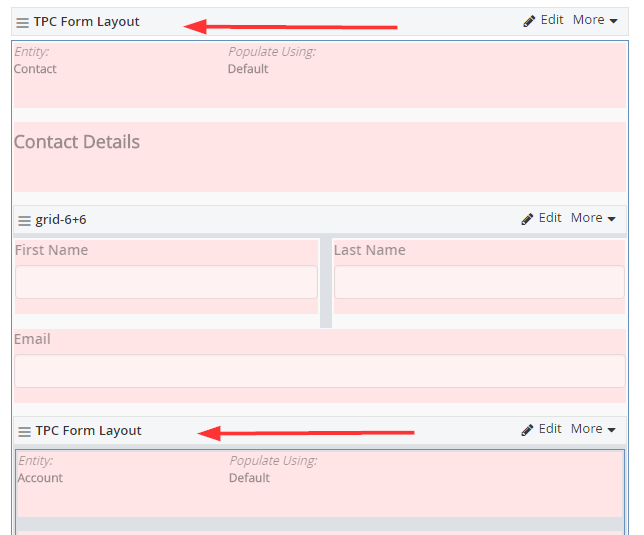
Now click on ‘Content’ and drag & drop the Form Configuration with the second TPC Form Layout.
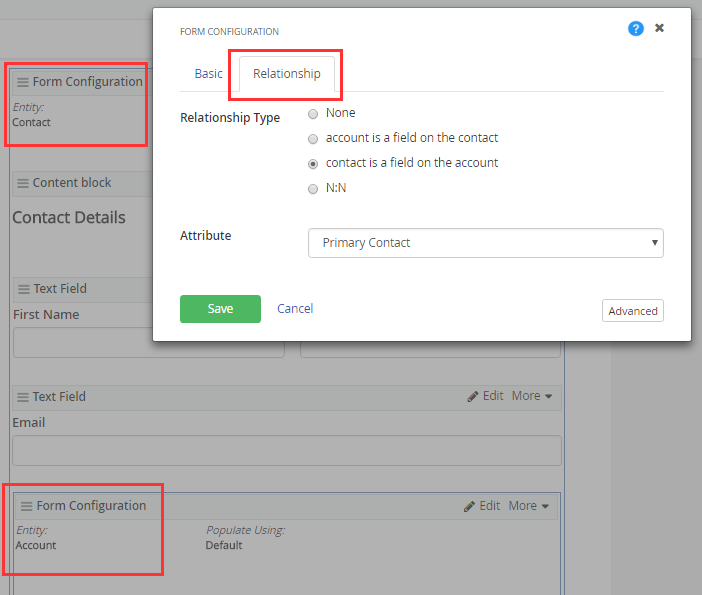
Click Edit on the Form Configuration widget. Select the Account Entity and then configure the “Relationship” tab. Select the Relationship type between the entities as shown below. Based on your selection the Attribute field will be updated.
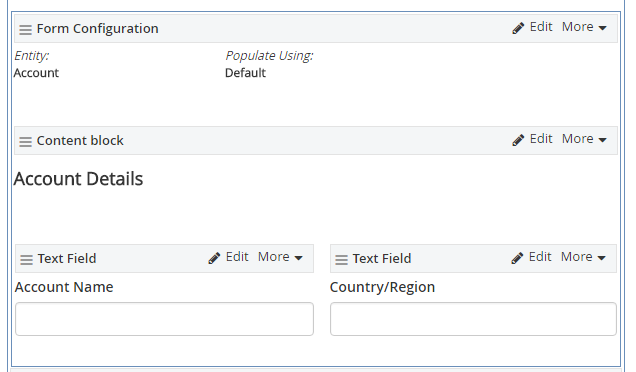
Once the form is configured for Account entity, drag and drop the widgets to configure attributes for this entity as shown below.
Once both the entities are configured, the form appears as shown below:
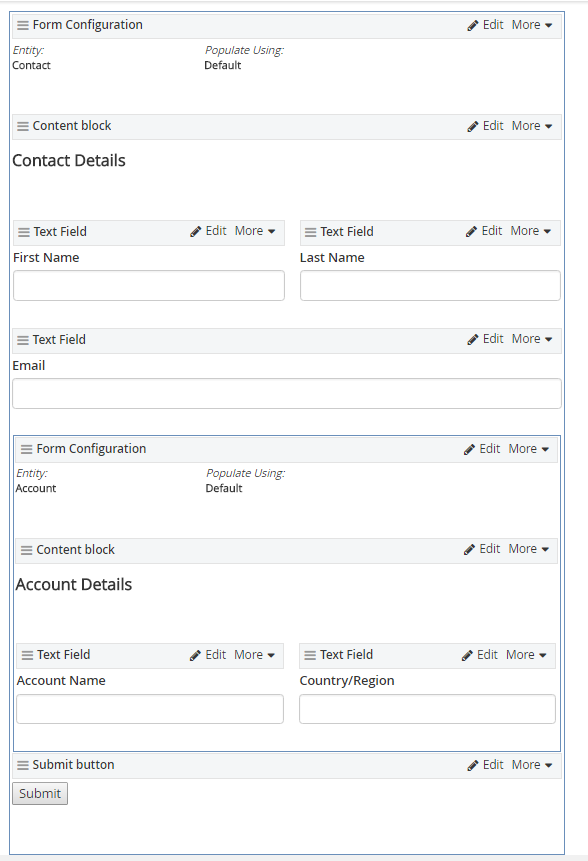
The data submitted through this form will be updated in Dynamic CRM for both the Contact & Account Entity.