Installing The Portal Connector's CRM Solution
Installing The Portal Connector's CRM Solution will enable you to create, invite and manage Portal Users. This includes the ability to Invite Users to Portal and Manage Portal Roles from directly within CRM.
Installing the CRM Solution
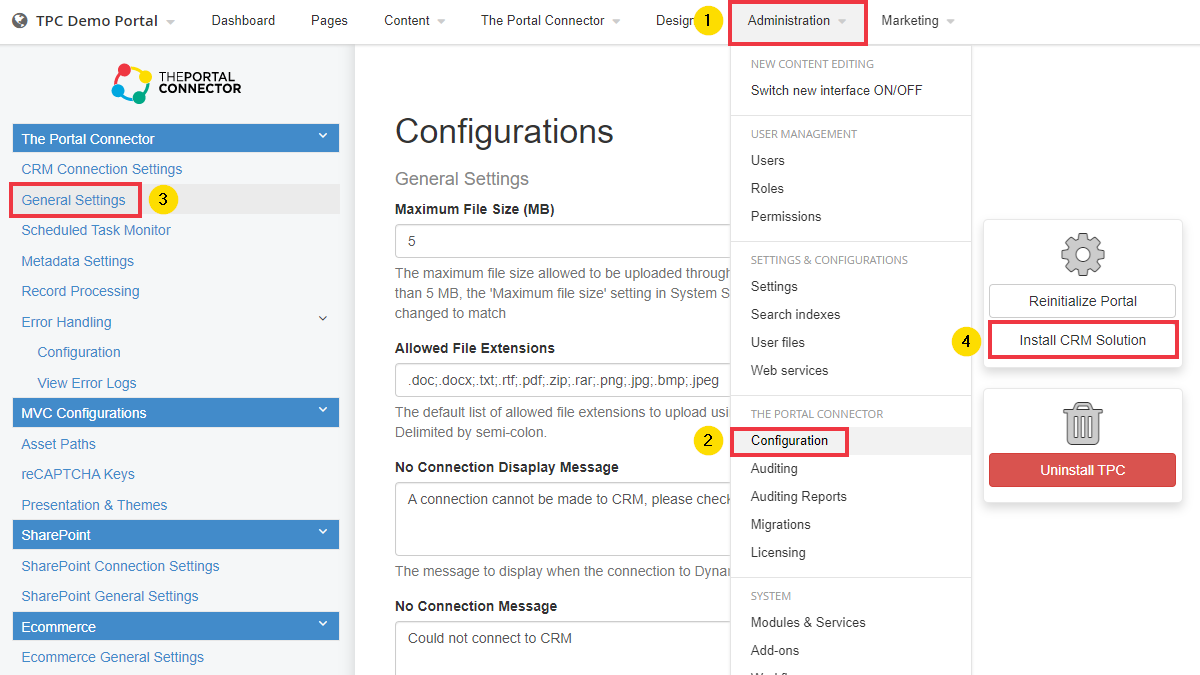
To install the CRM Solution, log onto your Portal backend and navigate to Administration > The Portal Connector > Configuration > General Settings, then click on Install CRM Solution.

Adding a Portal Record
Once The Portal Connector CRM Solution is installed in Dynamics, you need to point the CRM to your Portal Site.
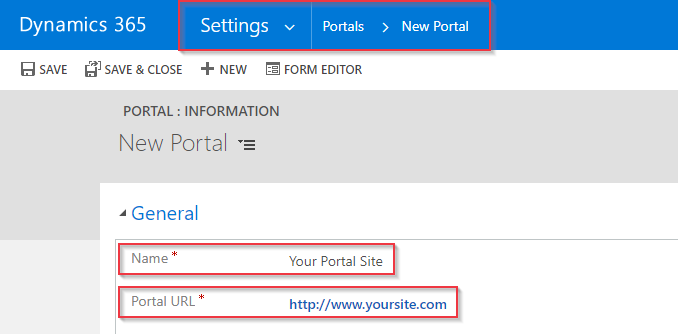
Under Settings you can now select The Portal Connector group and then Portals.
Add a new Portal by clicking the +NEW button.
Give the Portal a Name and enter in your Portal Site's URL, then SAVE. Add a new record for each unique Portal you wish connect to the Dynamics instance.

Creating Portal Roles
Roles are used to control which Portal pages or elements contacts from Dynamics CRM can access. The Portal Connector allows your to define, at a very granular level, what Roles can and cannot view. There is no need for any other permission settings on the Dynamics CRM side of the system.
NOTE: By default there are no Roles defined within Dynamics CRM. You need to create roles that align with your business requirements. Any Roles you create in Dynamics CRM will be pushed out and synchronized with The Portal Connector when users are assigned the role.
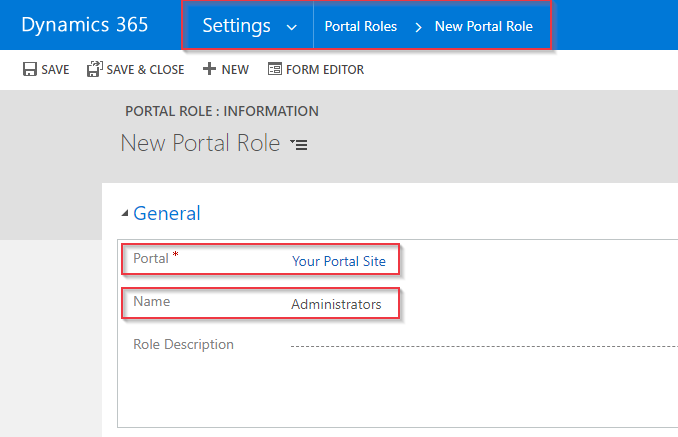
To create a New Portal Role, in Dynamics CRM navigate to Settings and select The Portal Connector group and then Portal Roles.
Click the +NEW button and give the Portal Role a Name.
Optionally, enter a Role Description to better identify the intended use of the Role, then SAVE.

That is it. Create as many Roles as you require.