User roles can be employed in a variety of ways. For example, user roles can be used on The Portal Connector side of things by filtering pages or widgets by roles so only certain users can access pages or interact with relevant data. First, navigate to the Portal Rules option under the Settings section.

The
Active Portal Roles page will give you a list of all of your active Portal roles, including their name, description, and the Portal that they are assigned to. In order to create a new user role, you must do the following:

- Click on the New button to create a new role. Alternatively you can click on an existing role to edit its name, description, or associated Portal.
- The Portal lookup field will allow you to attach this role to any Portal you desire. After naming your Portal Role and providing a description, click on the save button to save your role.
It is now ready to be assigned to a Portal user. For more information on this, please see the
How to Manage Portal Users in Dynamics CRM How-To.
Adding Users by Bulk
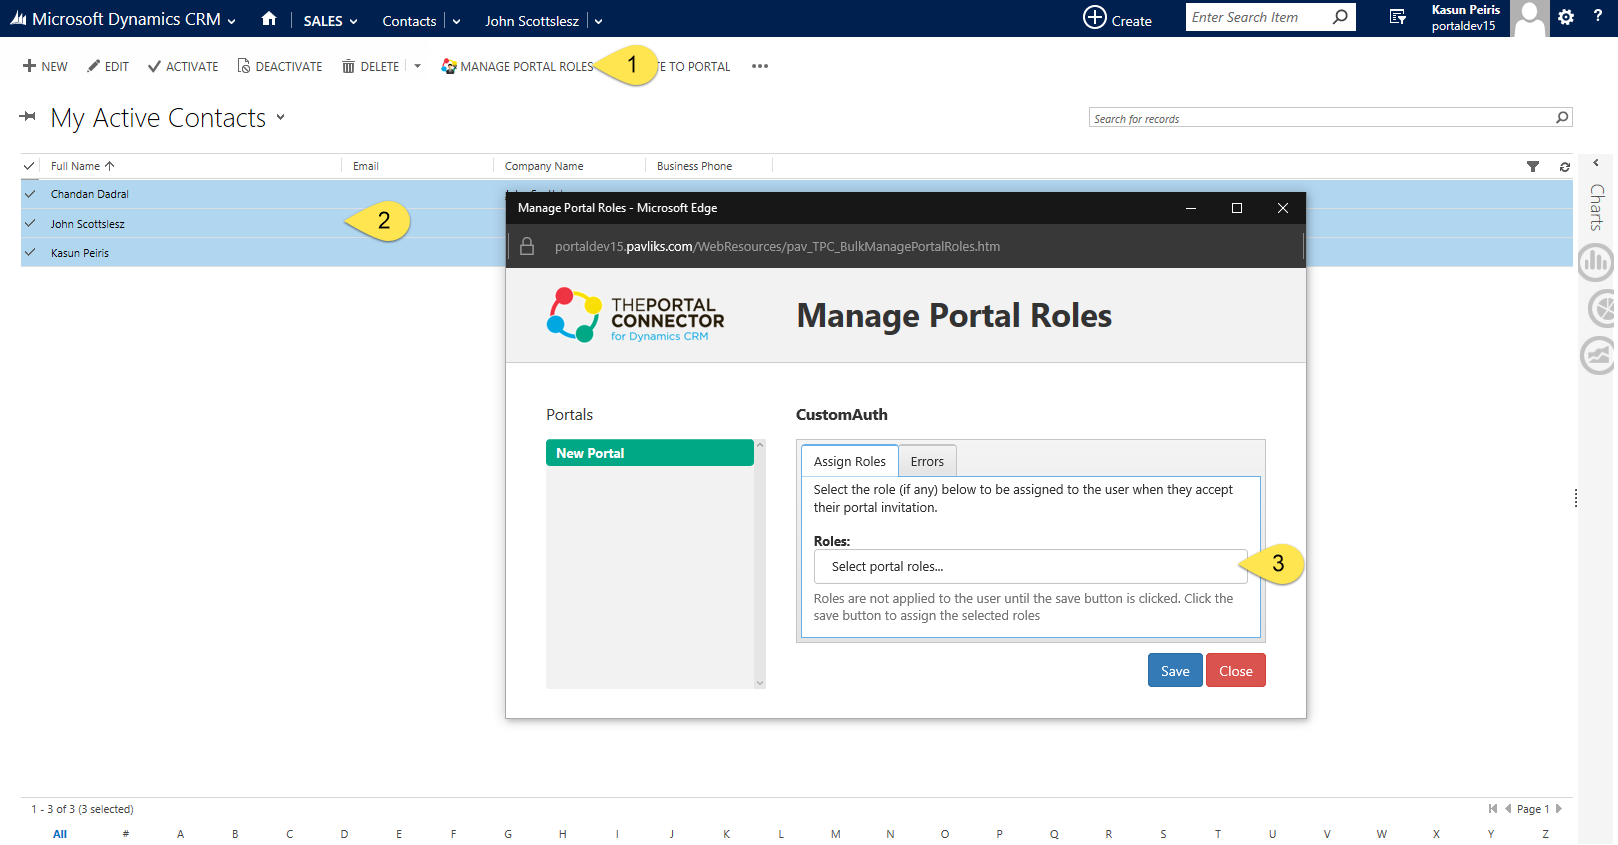
In addition to being able to change user roles for individual users, there is also the option of changing user roles by bulk. In contrast to the individual option, the changes will not occur until you hit the
save button on the prompt. In order to do this, you must first select multiple users from your Dynamics CRM contacts list and select the
Manage Portal Roles that appears in the toolbar.

You can use this prompt to update multiple roles for the selected users along any of your Portals. In addition, if you encounter an error while processing these changes, you can check out the
Errors tab to see what went wrong. Please note that if you add a role to a user that is not an existing user of your Portal website, an automatic username/password will be generated for the new user. In this case, their username will be the email field of the chosen contact(s) while the password will be generated.