Configure SharePoint integration through Server-based SharePoint Integration.
In your Dynamic 365, navigate to Settings > Document Management > Enable Sever-based SharePoint Integration.
- In the Enable Server-based SharePoint Integration alert click Next.
- Choose Online for where your SharePoint sites are located, and then choose Next.
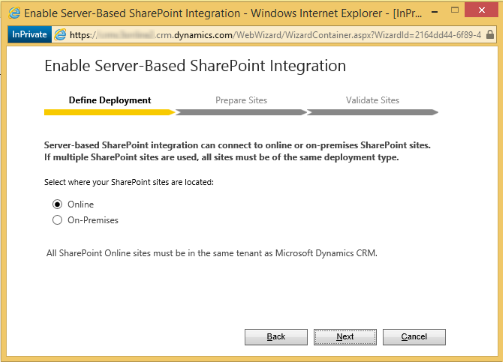
- If your Dynamics 365 (online) is not connected to a SharePoint online site, enter the URL (for example https://contoso.sharepoint.com) of your SharePoint site that you will use for auto folder creation, and then choose Next.
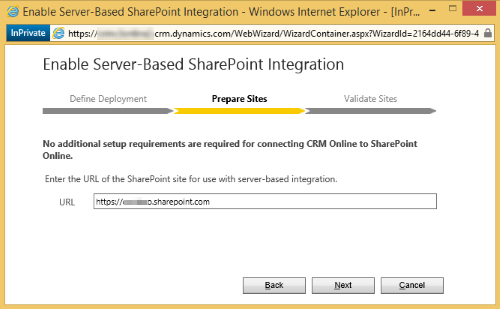
4. The URL will be checked for being a valid SharePoint online site and for existing in the same Office 365 tenant as your Dynamics 365 organization. After enabling server-based SharePoint integration you can’t go back to the previous client-side integration.
After you enable server-based SharePoint the options to Install List Components and to enable server-based integration will no longer appear as an option in Document Management.
Once server-based SharePoint integration is enabled you will need to enable the entities you want available for document management integration.
Document Management Settings:
- Go to Settings > Document Management.
- Click Document Management Settings.
- Select the entities that you want to use to manage SharePoint documents.
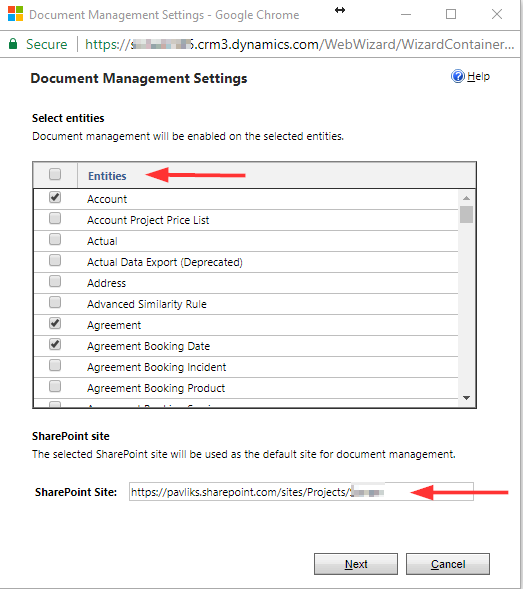
If a URL is not already specified, enter the URL of the SharePoint site where the document locations and folders for storing documents will be created, and then click Next.
4. If you use server-based integration (recommended)
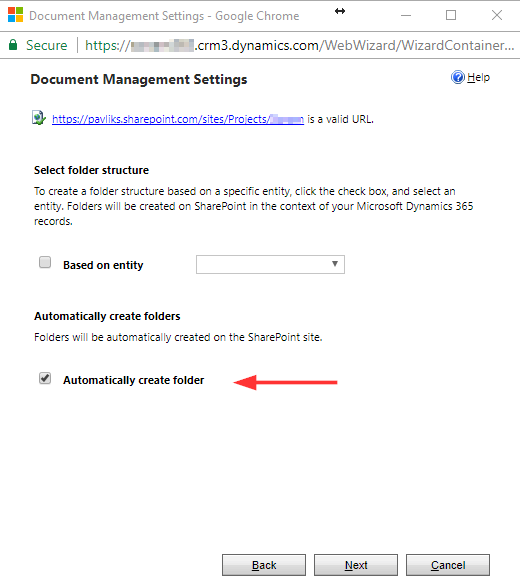
Check Based on entity to have document libraries and folders that are based on the Dynamics 365 Account entity automatically created on the SharePoint site. Users will not be prompted to create them.
If you don't want folders automatically created, clear the Based-on entity check box.
When you first visit the documents grid, if you want users to confirm folder creation corresponding to the entity record on SharePoint, clear the Automatically create folder check box.
Click Finish.
Configure the SharePoint connection in The Portal Connector
To configure the SharePoint connection, perform the following:
- On the Sitefinity CMS main menu, choose Administration » Portal Connector Configuration » SharePoint
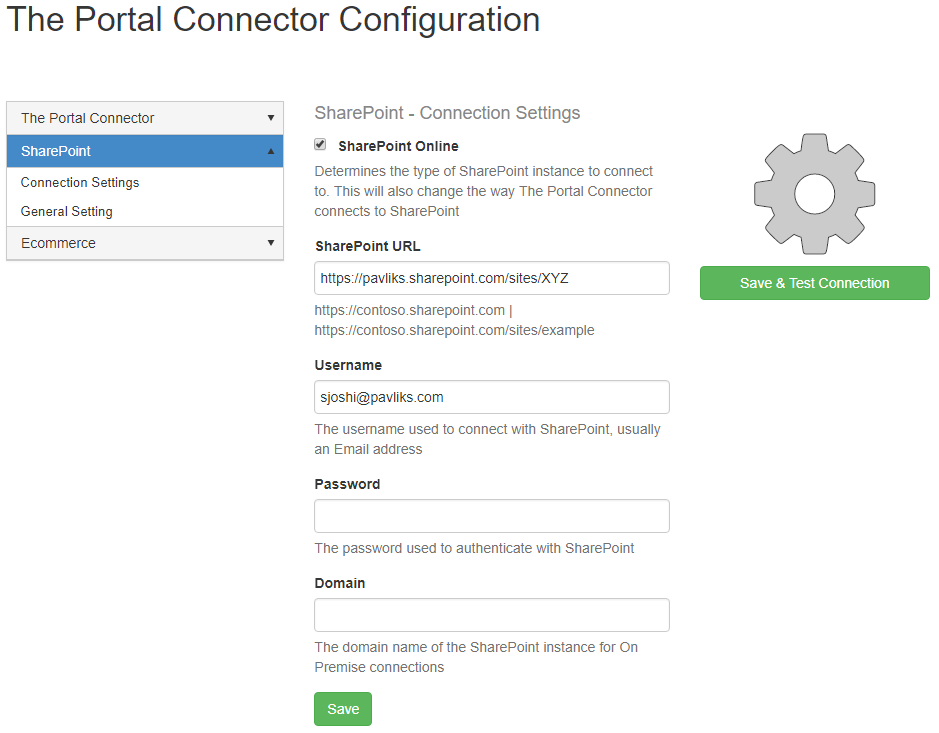
- Define the type of SharePoint instance, check box in case of SharePoint Online.
- In SharePoint URL address field, enter the URL or the IP address of the SharePoint site.
- In Username and Password fields, enter your SharePoint site credentials.
- If the SharePoint type is OnPremise, mention the domain name of the SharePoint instance in Domain field.
Then click on Save and Test Connection, if the connection is successful it will show green message box, as shown below:
General Settings
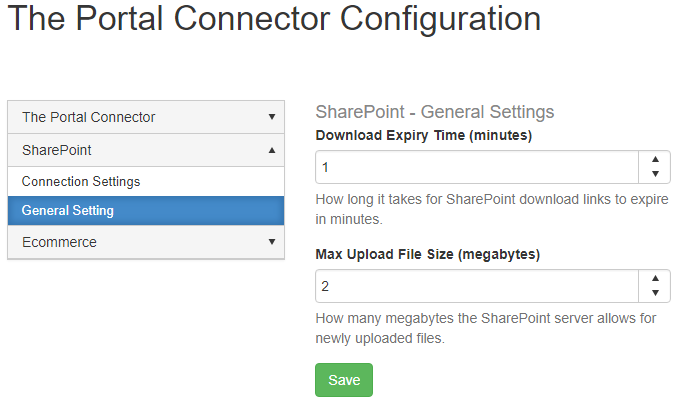
You can also modify the download expiry time and file size under general settings for SharePoint.