Dynamics CRM can be used to create, manage, and delete users and their roles. The easiest way of doing this is through CRM. To begin, navigate to the Contacts section of your CRM instance.

How to Create a Portal User for an Existing Dynamics CRM Contact
- From the Active Contacts list, click on the contact that you would like to become a Portal user.
- You will be redirected to a form for editing the details of this contact. There are an array of options for you to configure your user.
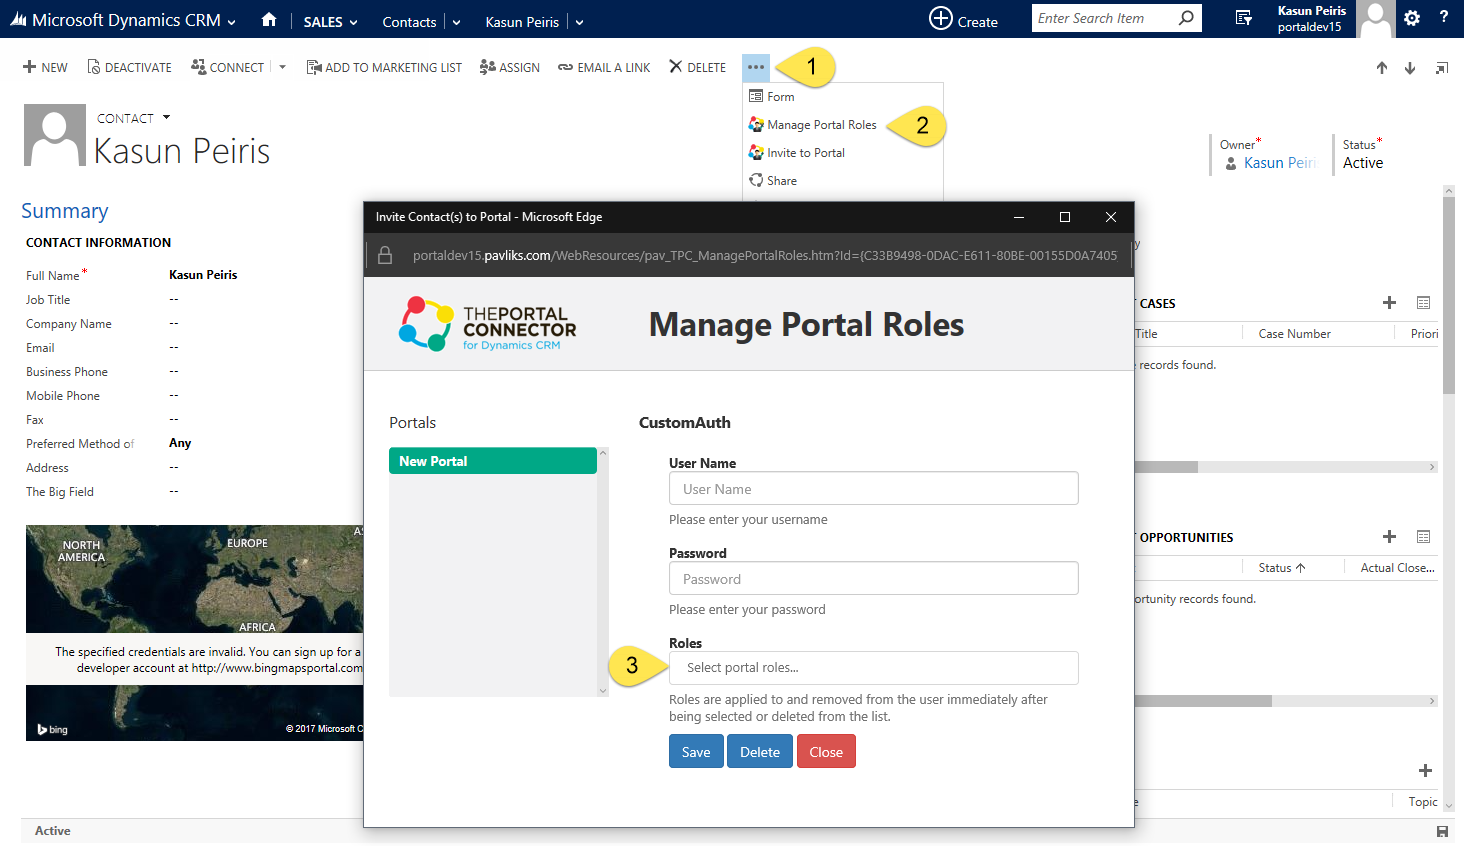
- Now we can make this contact a Portal User; in addition to altering the contact's details if you wish. Click on the ellipses (...) button at the end of the options toolbar and click on the Manage Portal Roles option. A dialog window like this should appear:

- The Manage Portal Roles window allows you to change the username, password, and roles associated with a user by portal. The Portals list contains a list of all of your portals.
Please note that in order to change a user's roles you must first save the user. To do this you must first enter the username of the user (Which can be anything you want) and then a password for them to use when logging into your Portal website. Click on the
save button to save the contact. You may now assign or subtract roles to users. You can even delete the user if you wish, though this will
not delete them from Dynamics CRM. Please note that adding and removing roles from your users happens instantly on your Portal Connector website!