NOTE: This documentation is only applicable to The Portal Connector v4.0 to v4.2, to edit templates in higher versions use the new Template Editor that automates this process.
We can easily change templates on any TPC widgets. Please follow these steps.
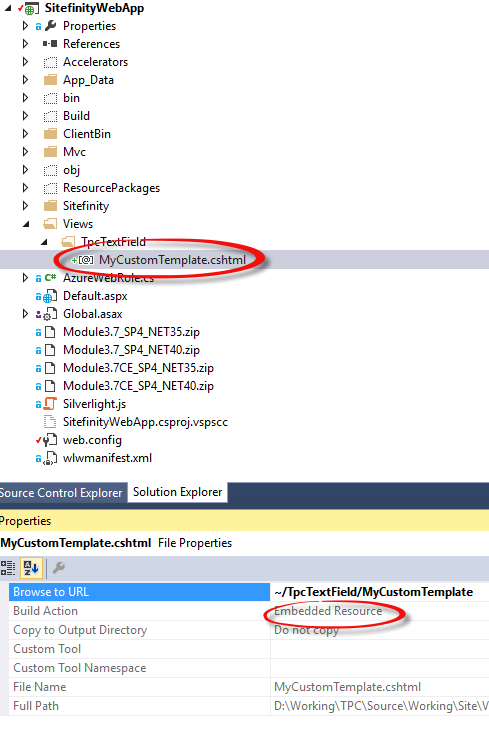
- In the Sitefinity Project, look for a folder named Views. If it does not exist, create it. Next, create a new folder inside of the Views folder and name it to the Widget name.
- Example: if you are creating a custom template for textbox widget rename the new folder as TpcTextField and place the new file under that folder.
- Right click the new widget folder and choose Add > View... Give your view a name, set the Template to Empty (without model) then click Add.
- Create the view you require in the new .cshtml file.
- Once complete, right click the file and click Properties. Set the Build type of the custom file to embedded Resources.
- Restart your site.
- Note: You may receive an error page when the site reloads. This is because Visual Studio may try to display your new template if it was open when restarting. This error can be safely ignored.
- From the backend, go to your form or page where the widget you are trying to template is set. Click the edit link on the widget. Click the Advanced button. Set the name of your template in the WriteTemplateName field then click Save. Finally, click the Publish button to publish your page or form.
