Introduced with The Portal Connector 4.3, the template editor allows implementers to make changes to the View for all page and form widgets. Prior to this feature, changing the way a widget looked was an involved process requiring manually copying Views to a specific place on the Web Server and setting the name in the widgets designer. This was a problem in situations where developers/implementers do not have access to the file system.
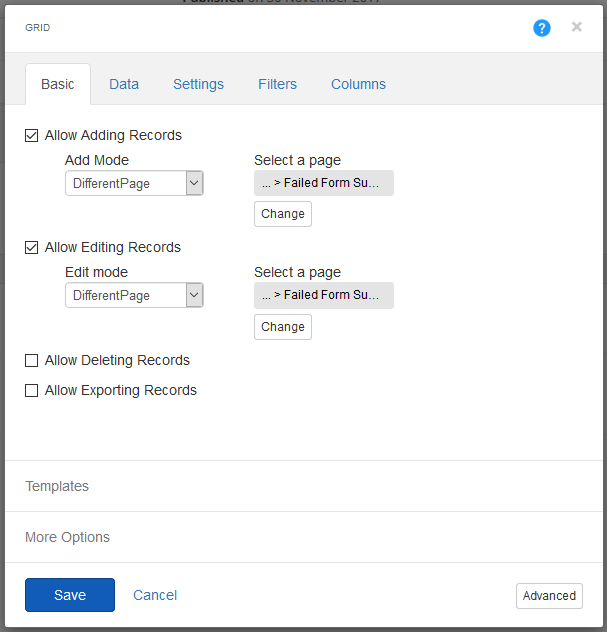
To edit a widget template, open a page or form and click the Edit link for any widget to open its designer. In the designer, you will see a section at the bottom of the first tab called Templates.

Clicking it will open the Templates section. Depending on the widget, you will see 1 or more Items. Each one is a template type. In the image below, only 1 type is available. In others, such as the TpcTextField form widget, has 5 types.

Creating a New Template
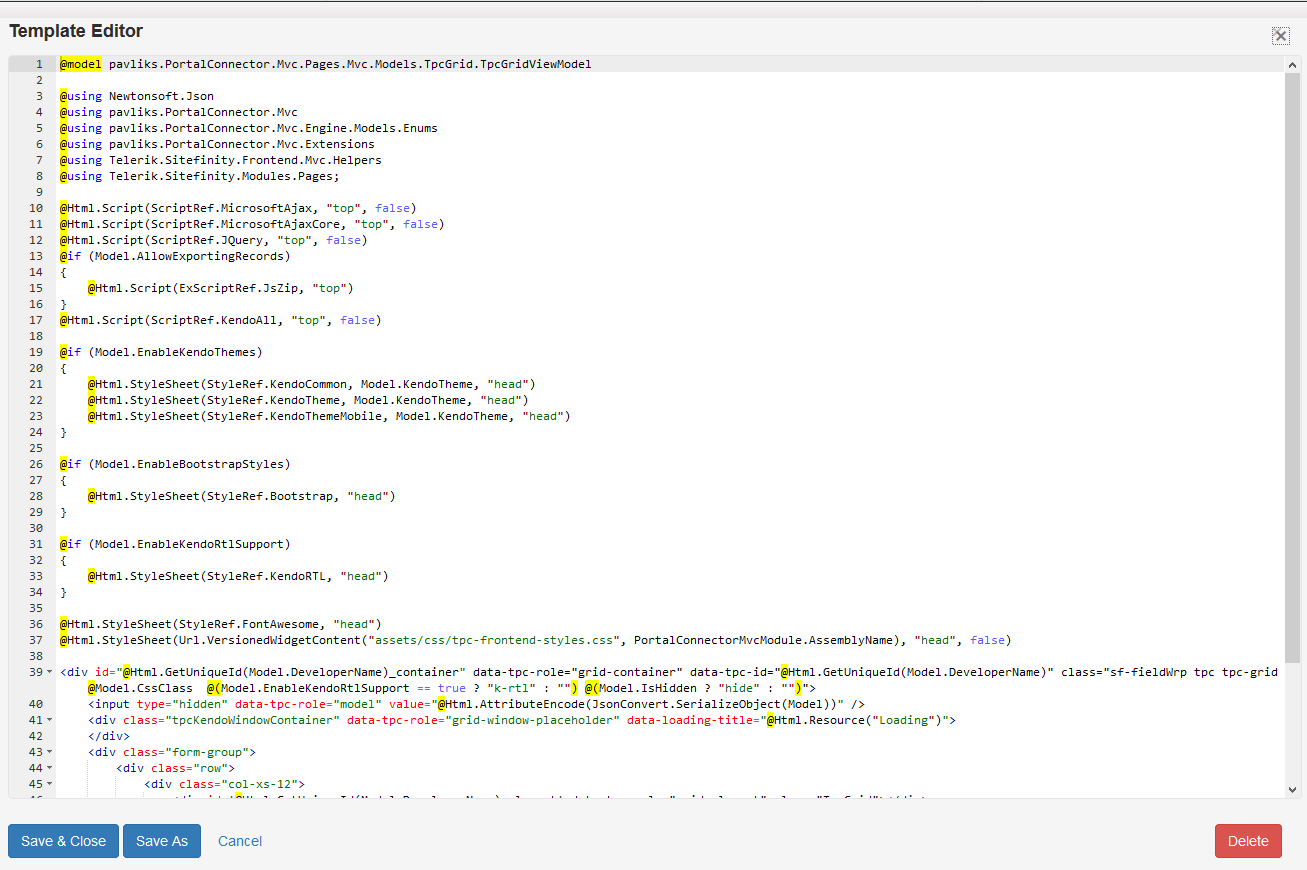
All template types for all widgets have a default template that is used as a starting point for new templates. Default templates cannot be changed as they live inside of The Portal Connector assemblies. When you choose to create a new template, the system copies the default template and presents it to you in an editor with some basic syntax highlighting as seen below:

To create a new template:
- Open the designer for the widget you wan to modify
- Expand the Templates section
- Find the template type and click the green add button
- After the editor loads, make your changes to the template.
- After making your changes, clicking the Save As… button will prompt you for a name for this template. The name you give the template must be unique and it cannot be Default.
- Select the new template from the dropdown and then click the Save button on the designer.
Editing an Existing Template
To edit existing template:
- Open the designer for the widget you wan to modify
- Expand the Templates section
- Find the template type and select the template to edit from the dropdown.
- Click the edit button
- After the editor loads, make your changes to the template.
- Save the template:
- NOTE: Saving a template writes it to the file system immediately. If it is already selected on any widgets, the change is immediate and cannot be undone. Be sure you want to overwrite the template before doing so. When in doubt, create a copy.
- To overwrite the existing template, click the Save and Close button.
- To create a new copy leaving the old one unchanged, click Save As… and give the template a unique name.
Deleting a template
Templates can be deleted by following the same steps to edit a template but once the editor is open, click the Delete button and confirm that you do want it deleted. Templates can also be deleted from the file system.
Note: Deleting a template that is in use by other widgets will cause exceptions in the widgets that use it.
Template Naming and Location
For the template editor to find and edit templates, it is critical that they are named correctly in the correct location on the file system. Creating templates with the editor creates these templates with the correct naming convention and places them in the correct folder on the file system for you but if you have created templates manually in a previous version of The Portal Connector, your templates may need to be renamed and reselected on the widgets that use them.
The naming convention is: {View Type}.{Template Name}.cshtml (Note the “.” Between the parts)
- View Type
- The type of view this template is for. Readonly (Read) for example.
- Template Name
- The name of the template. Must be unique for this widget type. All default templates are named Default. You cannot name your template Default and will not be able to save it with this name.
Page Widgets
|
Widget Name
|
View Types
|
|
TpcChart
|
Chart
|
|
TpcGrid
|
Grid
|
|
TpcListView
|
ListView
|
|
TpcMap
|
Map
|
|
TpcRegistration
|
Registration
|
|
TpcUserInvite
|
UserInvite
|
Form Widgets
|
Widget Name
|
View Types
|
|
TpcKnowledgeBase
|
List
|
|
Detail
|
|
TpcKnowledgeBaseSearch
|
Search
|
|
TpcActivityFeed
|
Write
|
|
TpcBarCode
|
Read
|
|
TpcBoolean
|
Read
|
|
CheckBox
|
|
DropDownList
|
|
RadioButton
|
|
Switch
|
|
TpcDateTime
|
Read
|
|
Write
|
|
TpcFileUpload
|
Write
|
|
TpcImage
|
Read
|
|
Write
|
|
TpcLookup
|
Read
|
|
Write
|
|
TpcNotes
|
Write
|
|
TpcPayButton
|
Write
|
|
TpcPicklist
|
Read
|
|
DropDownList
|
|
RadioButton
|
|
MultiSelect
|
|
CheckBox
|
|
TpcQRCode
|
Read
|
|
TpcQueryString
|
Write
|
|
TpcRating
|
Read
|
|
Write
|
|
TpcRulesManager
|
Read
|
|
TpcSharePointGrid
|
Write
|
|
TpcSignature
|
Read
|
|
Write
|
|
TpcStaticValue
|
User
|
|
Write
|
|
TpcStatus
|
Read
|
|
Write
|
|
|
Badges
|
|
TpcSubGrid
|
Write
|
|
TpcSubmitButton
|
Write
|
|
TpcTextField
|
TextArea
|
|
|
Write
|
|
|
Read
|
|
|
Password
|
|
|
Duration
|
|
TpcValidator
|
Write
|
|
TpcWorkflow
|
Write
|
|
TpcFormConfiguration
|
Write
|
Upgrading From Previous Versions of The Portal Connector
If you created or modified widget templates prior to version 4.3 of The Portal Connector, you may need to follow some additional steps to set these templates. If you have no custom templates, no action is required.
Custom widget templates created in previous versions of TPC can be stores in /Views/{Widget Name} or /Mvc/Views/{Widget Name} folders of the Sitefinity. Previously, either location was valid and the template would be found and used but starting from 4.3, templates must be in the /Mvc/Views/{Widget Name} folder for the editor to find it.
To update an existing template to work with the template editor, do the following:
- Rename the template to match the naming convention detailed in this documentation
- For example: If you are creating a custom Read only template for the TpcTextField form widget named MyTemplate, its name would be Read.MyTemplate.cshtml
- Check that the template is in the correct folder
- Templates must be in the /Mvc/Views/{Widget Name} folder
- Move the file to the correct folder, if needed
- Open the page or form that uses the custom template.
- Find the widget and click the Edit link to open its designer.
- Click the Templates section at the bottom of the designer to expand it.
- Select the template from the dropdown for that template view type.
- If you do not see the template, verify its name and location match what is described here. If you are still having trouble, please contact support.
- Save the designer and publish the page or form.
- Verify the page or form is using the selected template.