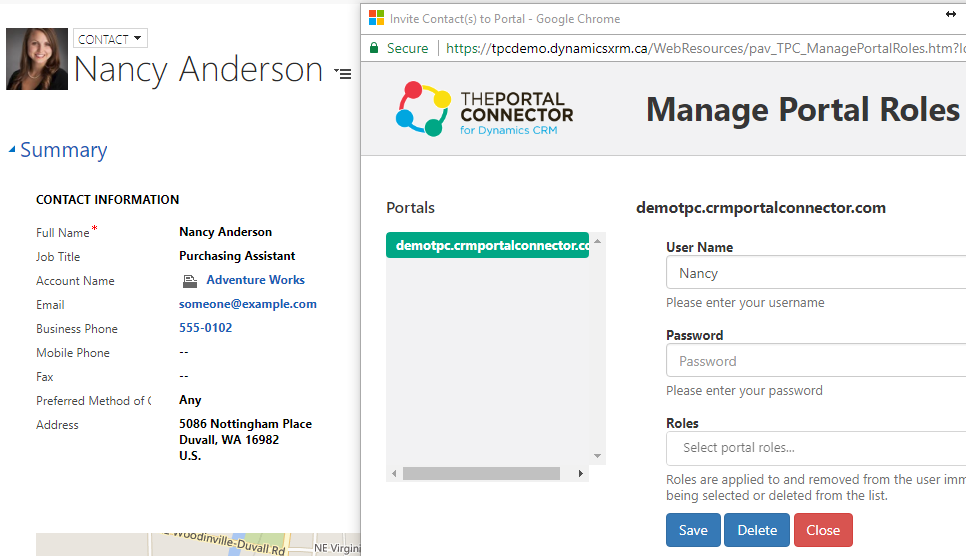
The Registration Form can be customized to add any fields from the CRM.
The form needs to be configured with ‘Portal User Entity’ to assign the Username & Password for a contact in the respective Portal.
Below is an example for the Custom Registration Form configured for Account & Contact Entity.
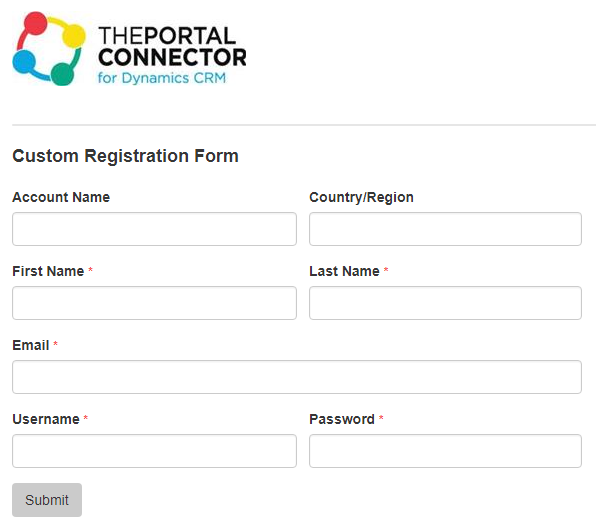
Configuration
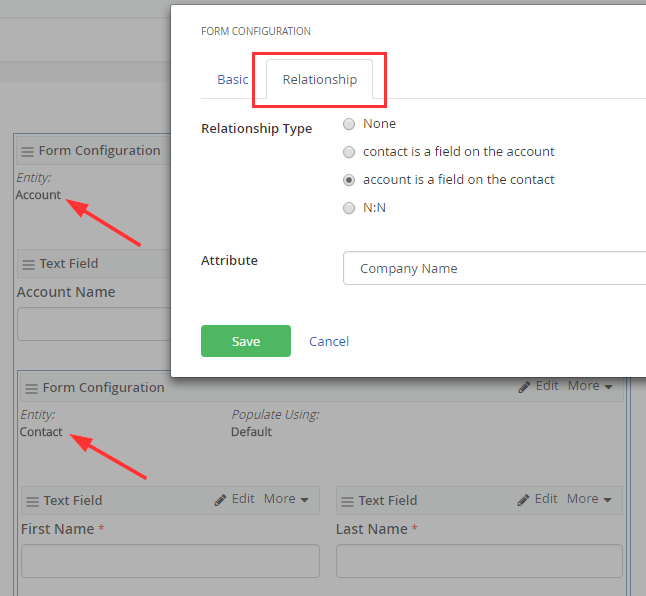
Configure the form for Account and Contact Entity, such that Contact Entity is nested within the Account Entity. Define the relationship between both the entities and drag & drop the fields/attributes for the respective entities.
Refer to the screenshot below:
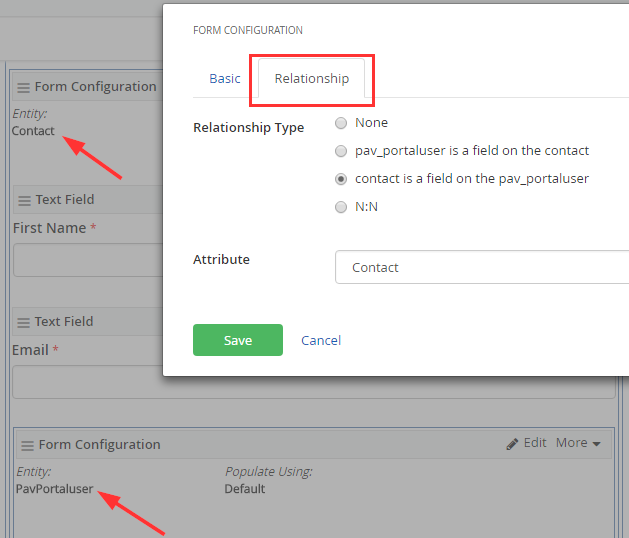
Now configure the form for ‘Portal User’ entity, such that ‘Portal User’ entity is nested within the Contact entity. Define the relationship between the entities.
Now within the Portal User Form Configuration, drag & drop the Static Value widget. Configure this Static value widget to link to the respective Portal record in Dynamic CRM by providing the GUID value.
Note: The GUID value will change if you migrate to different CRM instance.
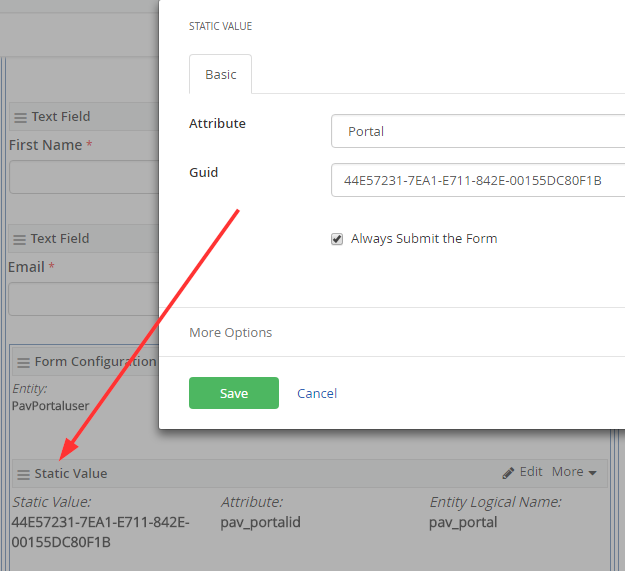
Now you can configure the Username and Password text fields for the ‘Portal User’ entity. You may make the fields required on the form as per your requirements.
Once you have configured the entities and attributes, the complete form should like below:
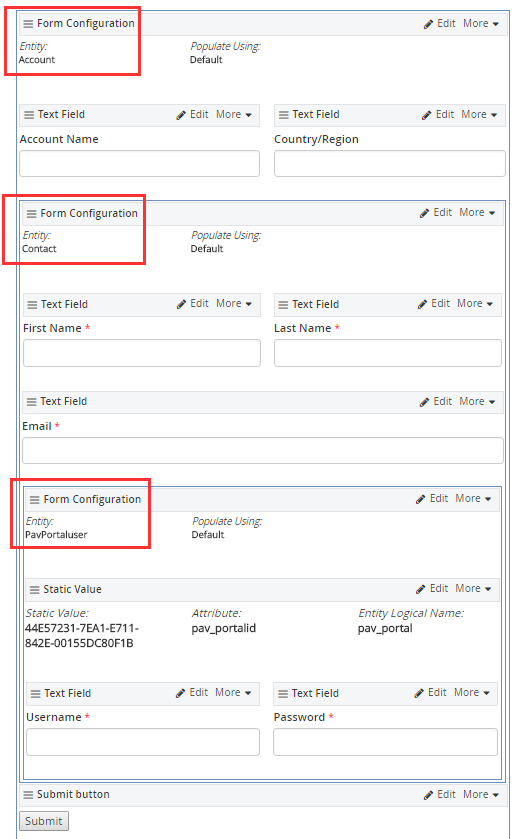
On successful submission of this form, a Portal User is registered with Contact and Account information updated in Dynamic CRM.
Refer to the screenshot below:
