RECOMMENDATION: If you are using a version of The Portal Connector higher than 4.0, we strongly recommend utilizing the MVC based widgets and components to create your site. This documentation is for legacy purposes only and will soon be deprecated.
Set up Client Secret Connection to SharePoint
Steps in Microsoft Azure
-
Navigate to portal.azure.com and login.
-
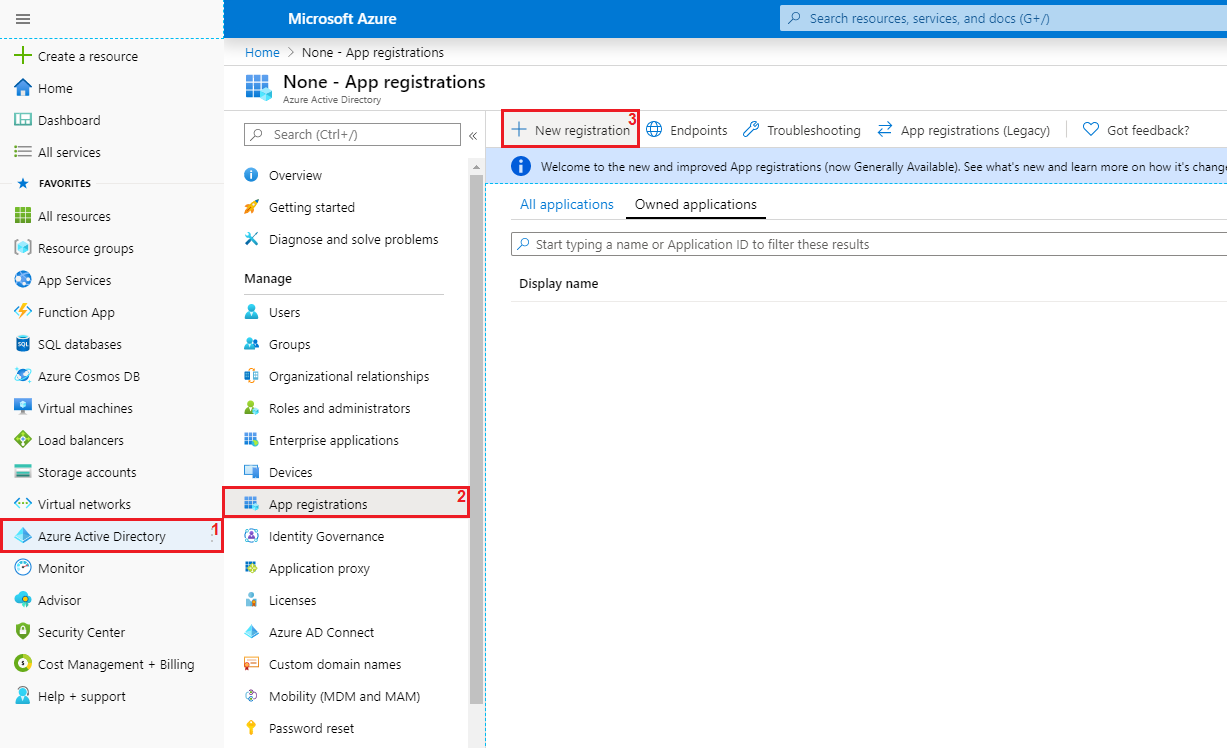
Navigate to Azure Active Directory > App Registrations > New Registration
-
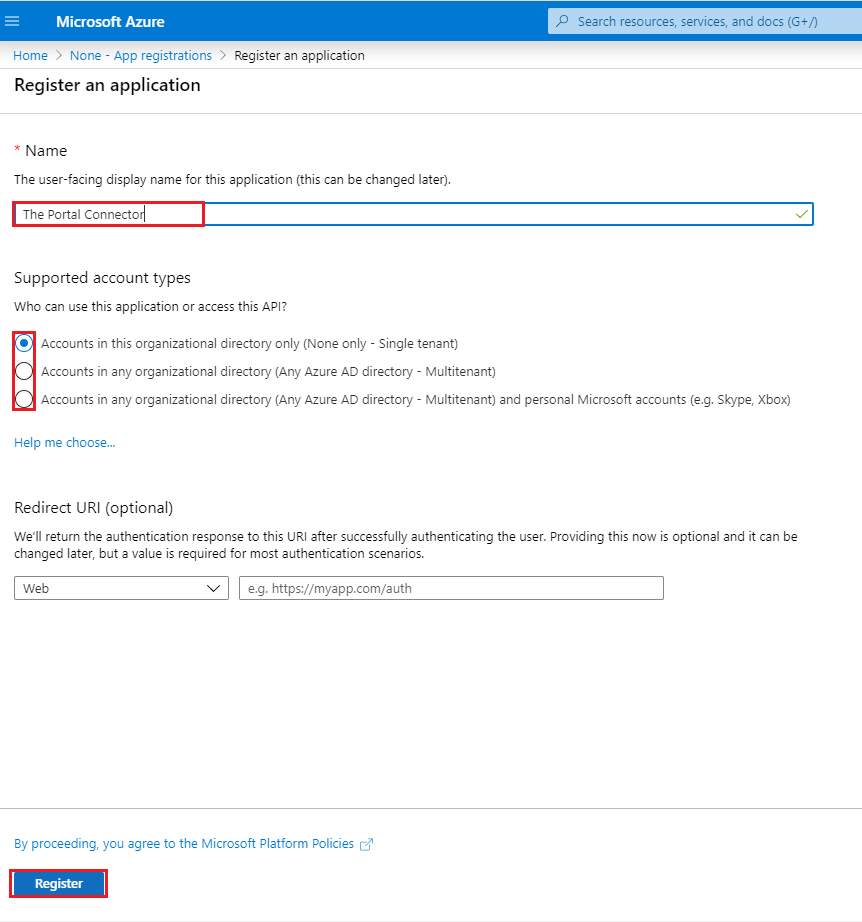
Register your Application.
-
Enter an Application name.
-
Select which account types you wish to access this API.
-
Click Register.
-
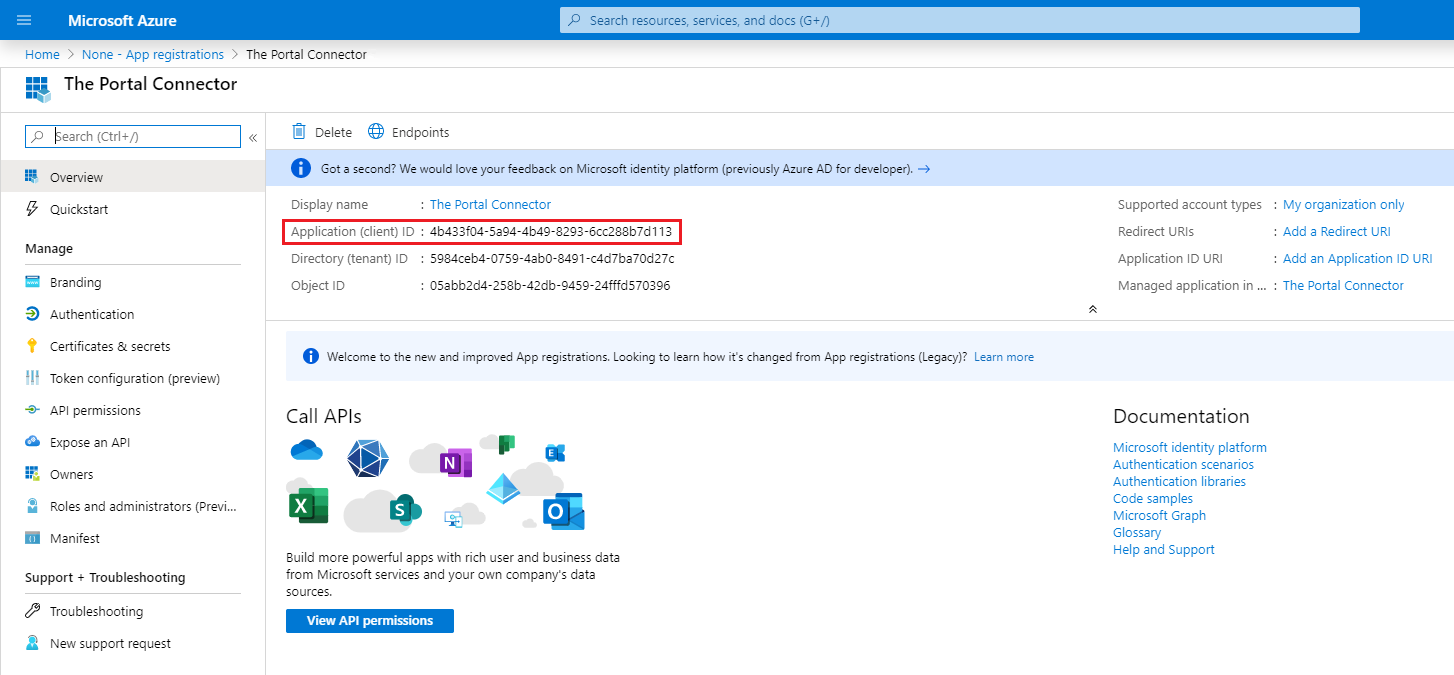
Copy the Application (client) ID and note it for later use.
-
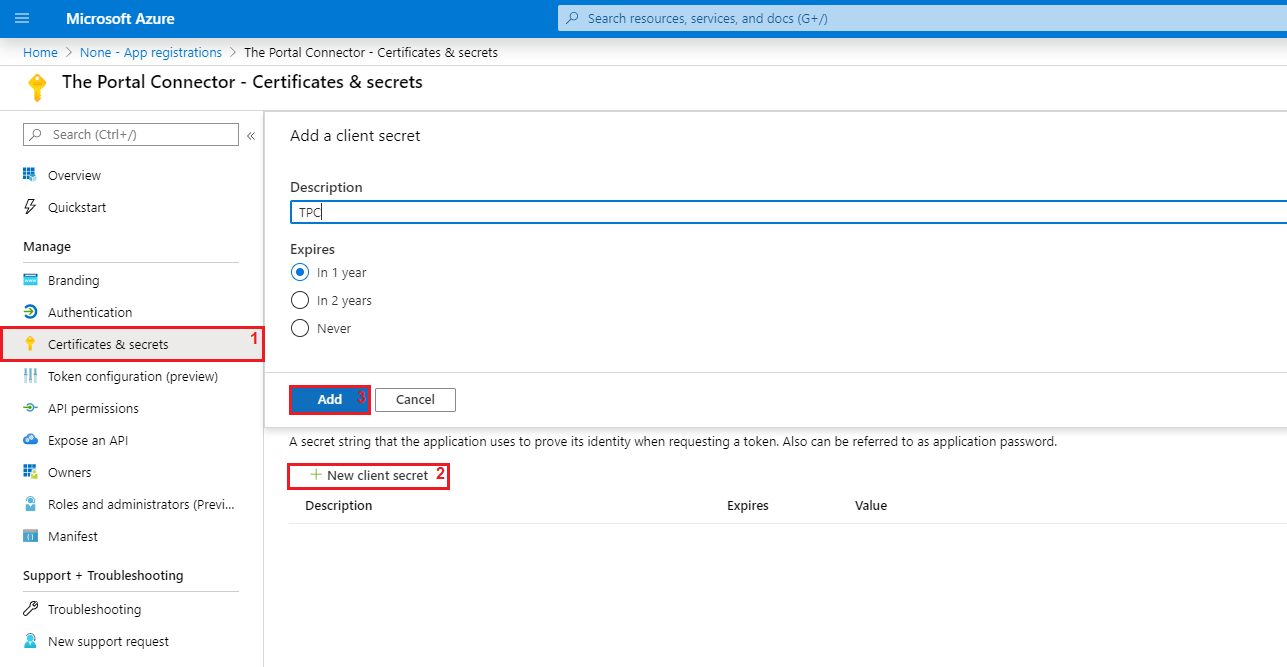
Create a new Client Secret for the Application.
-
Select Certificates & secrets > New Client Secret
-
Enter a description, select an expiry duration and click Add.
-
Copy the client secret and note it for later use. Make sure to copy the Value field, as below.

-
Grant Admin Consent.
-
Select API Permissions
-
Under API Permissions, make sure SharePoint is Given Delegated AllSites.FullControl.All permission.
-
After Permission is added click “Grant Admin Consent”.
Steps in SharePoint
- Navigate to the following URL in your SharePoint Online Instance. <YourSharePointSite>/sites/<Site>/_layouts/15/appinv.aspx.
- Paste the Application Id generated earlier on Azure ID into the App ID slot and hit the Lookup button.
-
Provide the App Domain and Redirect URL of your Portal Site..
-
In App’s Permissions Request XML, paste the following. Do not modify the scope, it’s in a URI format specified by Microsoft.
<AppPermissionRequests AllowAppOnlyPolicy="true">
    <AppPermissionRequest Scope="http://sharepoint/content/sitecollection" Right="FullControl"/>
</AppPermissionRequests>
- Click Create.
Steps in Sitefinity
-
Navigate to the backend of your portal site
-
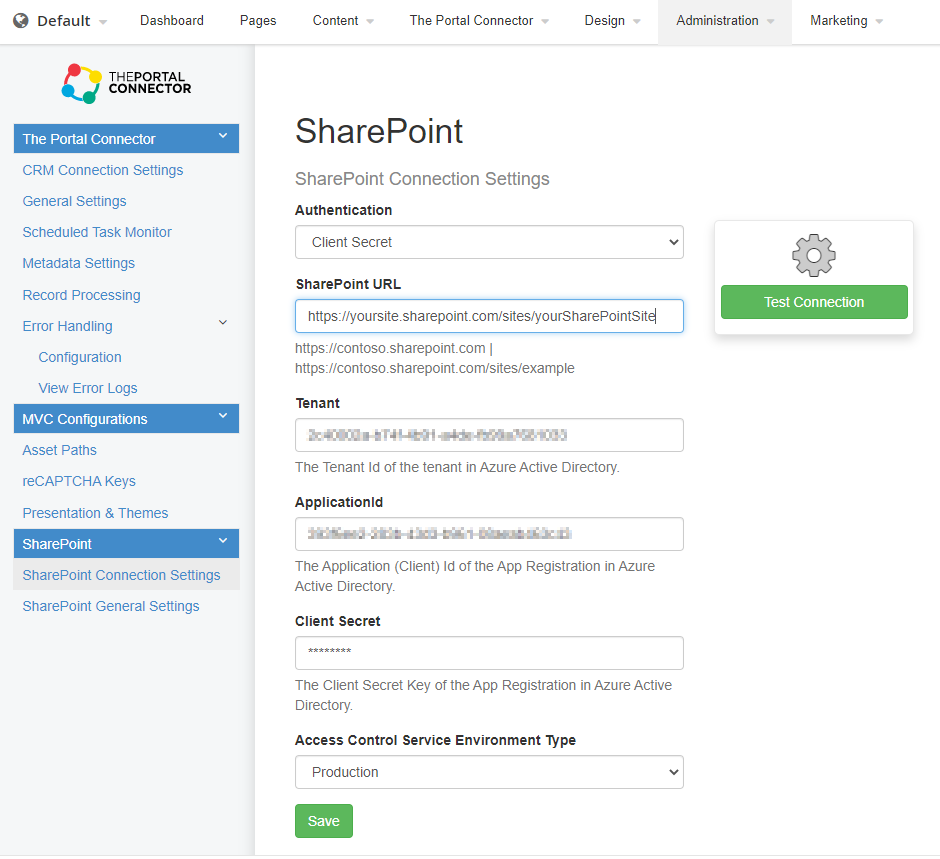
Go to Administration > The Portal Connector > Configuration > SharePoint Connection Settings
-
Fill in the SharePoint Connection settings
-
Under Connection Type select Client Secret
-
Under SharePoint URL, Enter the URL to your SharePoint site using the appropriate format, examples of which are displayed below the field.
-
Under Tenant (client) ID, paste the Tenant Id of the tenant in Azure Active Directory.
-
Under ApplicationId, paste the Application (Client) Id of the App Registration in Azure Active Directory..
-
Under Client Secret, paste the Client Secret copied and noted previously in the Azure Active Directory section.
-
Finally, Select the Access Control Service Environment Type from the drop-down menu.
-
Click Save, then Test Connection.