There are many new interactive widgets on modern websites that are being used to display data in an organized structure, to gain attention from the users. Some examples include timelines, accordions, fancy tab strips, slideshows etc.
In this blog post, we are going to create a Static Tab Strip Widget from a Sitefinity custom layout using Bootstrap 3.
Step 1
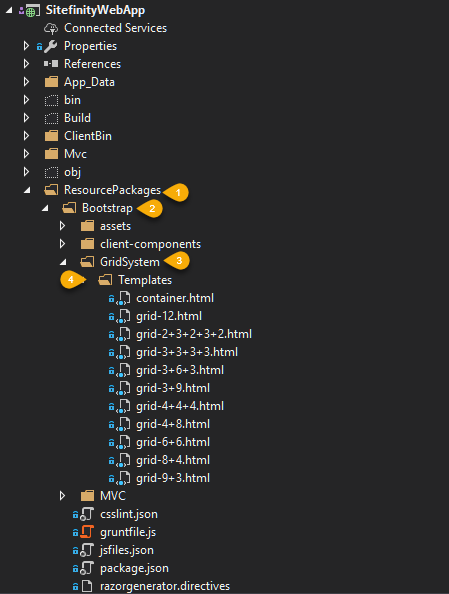
First, you must create a custom layout in your Sitefinity webApp. To do that, locate your Templates folder inside the ResourcePackages folder within the Sitefinity Webapp. Refer to the screenshot below.

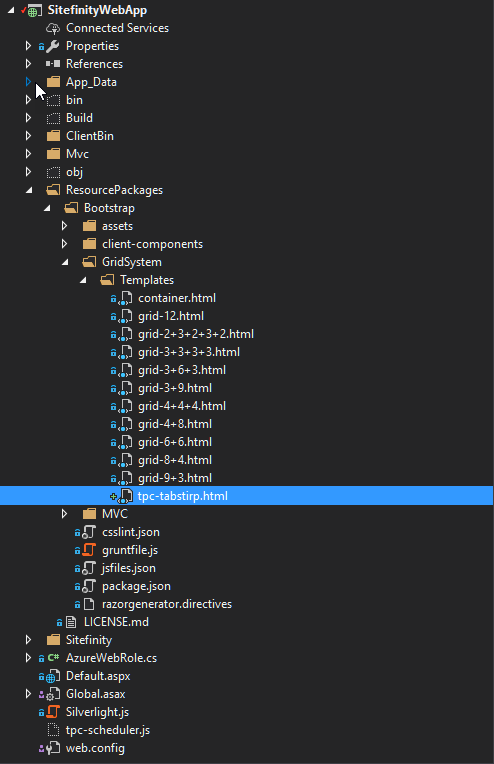
Once you locate your Templates folder, duplicate one of the template files and give it a unique name. In this case, I’m going to duplicate “Grid-4+4+.html” file and rename it "tpc-tabstirp.html".

Step 2
In this next step, we will be looking to the HTML mark up that we need to create the tab strip. I have manipulated the default HTML that comes with the “Grid-4+4+.html”.
Default HTML markup for “Grid-4+4+.html”

New HTML on “tpc-tabstirp.html”
		<div class="row" data-sf-element="Row">
			 <ul class="nav nav-tabs">
				  <li class="active">
				   <a data-toggle="tab" href="#dashboard">Dashboard</a>
				  </li>
				  <li>
				   <a data-toggle="tab" href="#profile">Profile</a>
				  </li>
				  <li>
				   <a data-toggle="tab" href="#other">Other</a>
				  </li>
			 </ul>

			 <div class="tab-content">
				  <div id="dashboard" class="tab-pane fade in active">
					<div class="sf_colsIn col-md-12" data-sf-element="Column 1" data-placeholder-label="Column 1"></div>
				  </div>

				  <div id="profile" class="tab-pane fade">
					<div class="sf_colsIn col-md-12" data-sf-element="Column 2" data-placeholder-label="Column 2"></div>
				  </div>

				  <div id="other" class="tab-pane fade">
					<div class="sf_colsIn col-md-12" data-sf-element="Column 3" data-placeholder-label="Column 3"></div>
				  </div>
				 </div>
		</div>

		<!--We would highly recommend moving this styles to external style sheet-->
<style>
		 .sfPageEditor  .tab-content  .tab-pane {
		  display: block;
		  opacity:1;
		 }
		</style>
Once you finish creating your template file, please make sure that you have included jQuery and Bootstrap JS file in order to initiate the tab strip.
Then, copy and paste this code in the Head section of your main template file (ResourcePackage > Bootstrap > MVC > Views > Layouts > default.chtml) to include these files:
@Html.Script(Url.WidgetContent("Mvc/Scripts/Bootstrap/js/bootstrap.min.js"), "head", false)
@Html.Script(Url.WidgetContent("Mvc/Scripts/Bootstrap/js/bootstrap.min.js"), " head ", false)
More information about the templates can be found in here: https://www.crmportalconnector.com/blog/post/2018/05/24/step-by-step-guide-to-creating-sitefinity-mvc-templates
Step 3
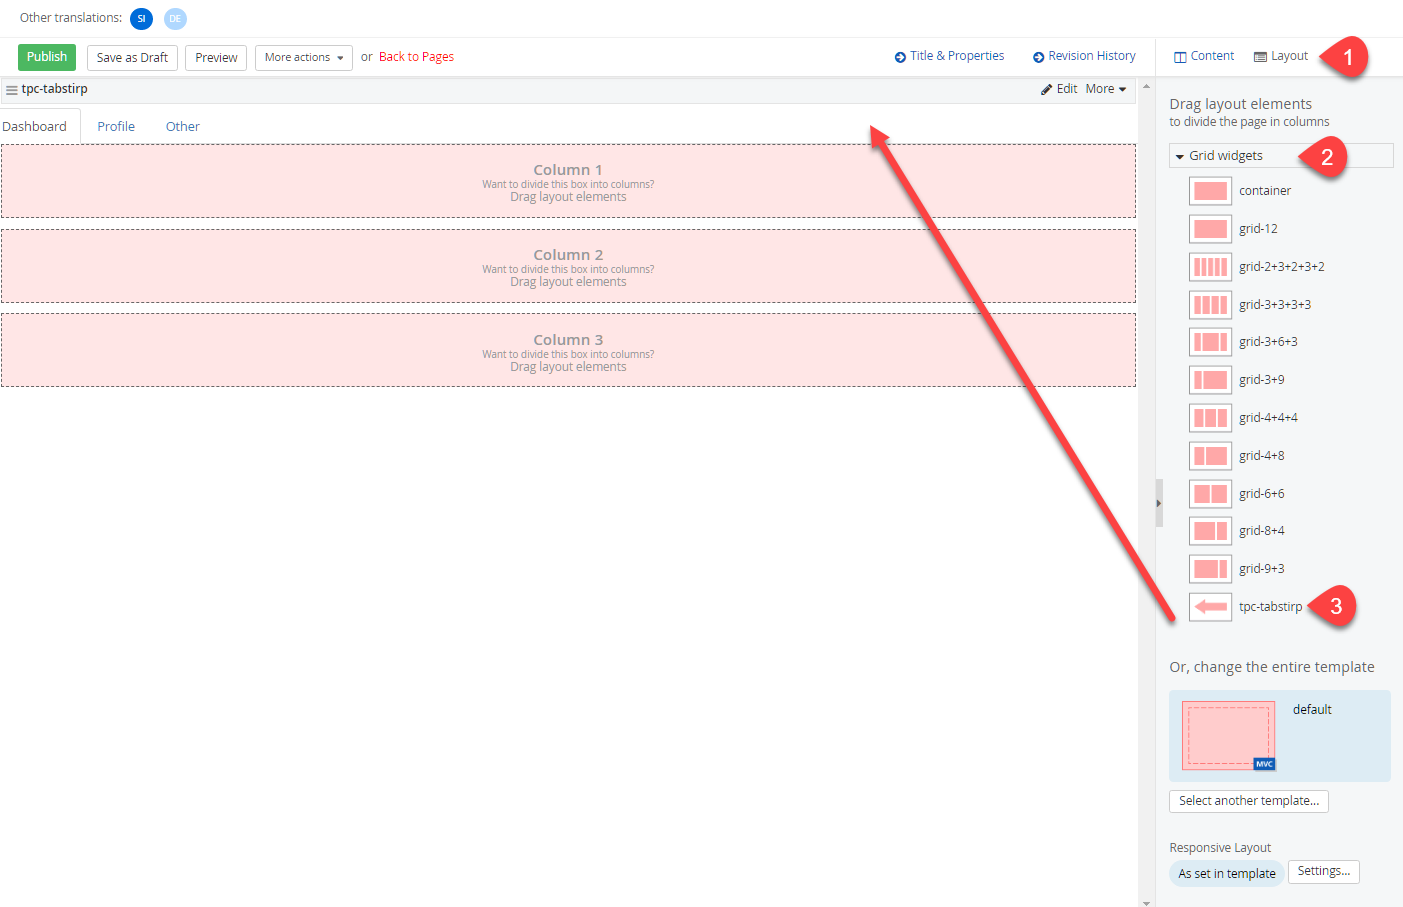
Next, run your Sitefinity project. Go into the Sitefinity Backend > Pages > Create Page or Edit Existing Page. From here, navigate to the "Layout" section and select "Grid Widget". Here you will be able to see the new layout that you have created. Drag and drop this newly created layout to your page, and then start adding content for each tab.

As demonstrated in the above screenshot, you will have 3 content placeholders where you can add content and 3 tabs. The first content placeholder (column 1) belongs to the “Dashboard” tab. The second content placeholder (column 2) belongs to the “Profile” Tab, and the third content placeholder (column 3) belongs to the “Other” tab.
As well, you may notice that the tabstrip does not function in the back-end of the page. This is nothing to worry about, as it is due to the CSS and the extra HTML added from Sitefinity.
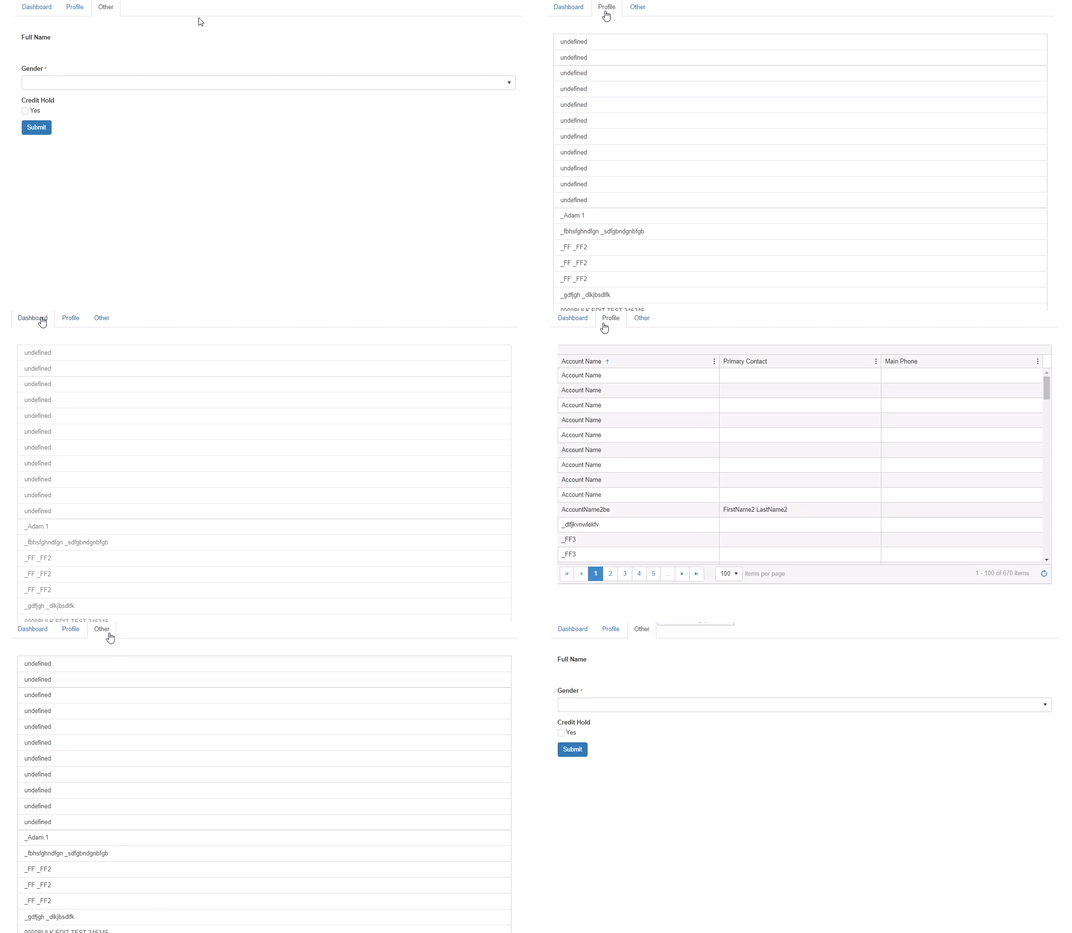
Once you add the content to each placeholder and publish the page, it will be fully functional and it will look like this:

If you have any questions, please consider registering for one of our upcoming Daily Q&A Sessions, or contact our team at info@crmportalconnector.com