Configuring a form will allow you to change how the form behaves, including restrictions, confirmation options, label placement, the CSS class for the form, and email notification for responses.
In order to reach the form configuration page, you must navigate to a form, the list of which is available under the
Forms page which is under the
Content tab of your Portal Connector dashboard.
Setting #1
From the form creation page, the settings page is located to the right of the
Layout button. It should look like this:

There are several options available in the form settings which allow you to control the behavior of your form.
The
Restrictions radio buttons will allow you to control how many times a form can be submitted, as well as who may submit the form in the first place.
The
Confirmation Options will allow you to change the message that is seen when a form is successfully submitted. It also allows you to choose if the form will redirect the browser to another page.
The
Send Email Notification... option allows you to send notifications for successful form submissions to your email address or a list of emails.
The
Label Placement dropdown list allows you to choose where the labels of the input fields will appear in respect to the widget.
The
CSS Class text box will allow you to add a CSS Class for the form to adhere to.
Setting #2
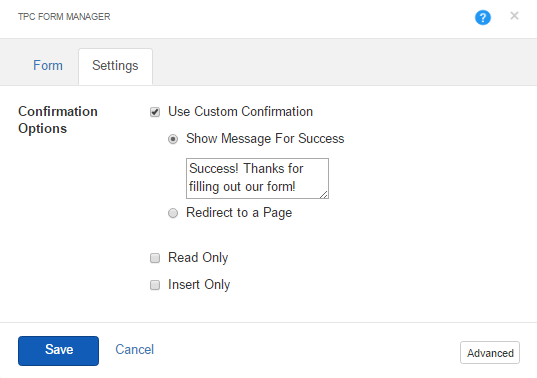
There are additional from settings in the TPC Form Manager it self. To locate these settings go to Pager > Drag and Drop a TPC FOrm Manager > Select a Form > Go to the settings Tab.

in this tab you are able to select a custom Success Message upon form submission , or Redirect to a page. Set the form Read only or Insert Only.