The pages and content can be localized in The Portal Connector based on translations in your Dynamic CRM.
Once the language packs are installed in CRM:
1) In CRM, open Main menu > Click on Settings > Select Administration > Languages.
2) This would display all the languages installed in your Dynamic CRM along with the Language Code.
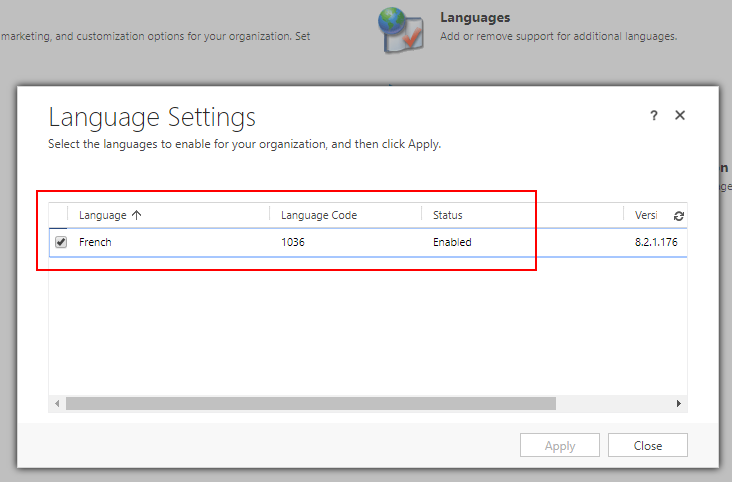
3) Based on the language code, look up for the culture name on the internet. You can use the following link: https://msdn.microsoft.com/en-us/library/ms912047(v=winembedded.10).aspx
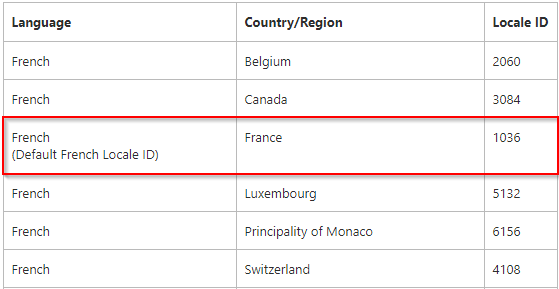
For example, in the case highlighted above, the language is French, Locale ID is 1036 and the culture is French-France.
Add the languages in Sitefinity.
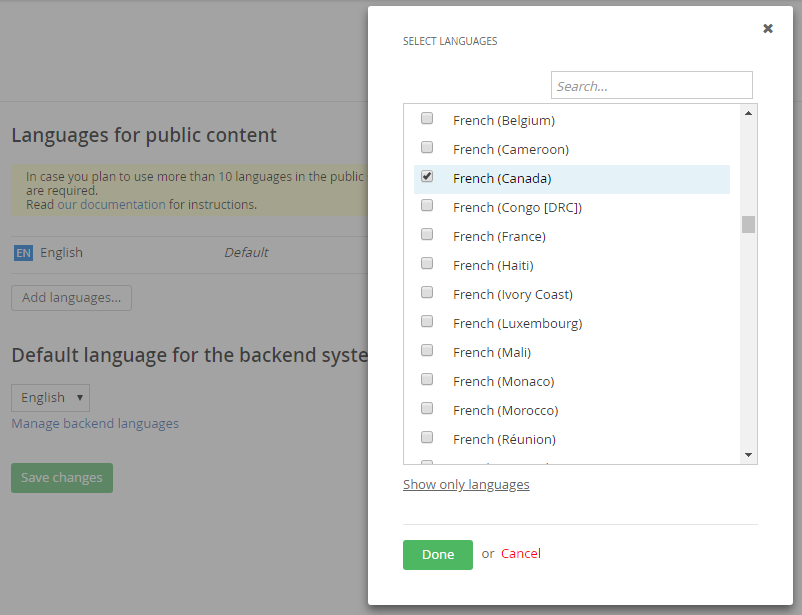
To add the languages in Sitefinity, in the main menu, click Administration » Settings » open the language settings. The Basic Settings page opens. Choose Global Settings, and then choose Languages.
To add a new language, click “Add languages” button. The Select languages window appears, displaying a list of all available languages. If you want to add different language cultures, click Show cultures.
LANGUAGE MAPPING
The Language mapping allows localization of the content based on any culture in Sitefinity and not just to default culture provided with Dynamics CRM Language pack.
Example 1:
Localize the content to French Language, follow the steps below:
- Navigate to the backend of The Portal Connector> click on Administration > Settings > Advanced > Portal Connector > Language Mapping.
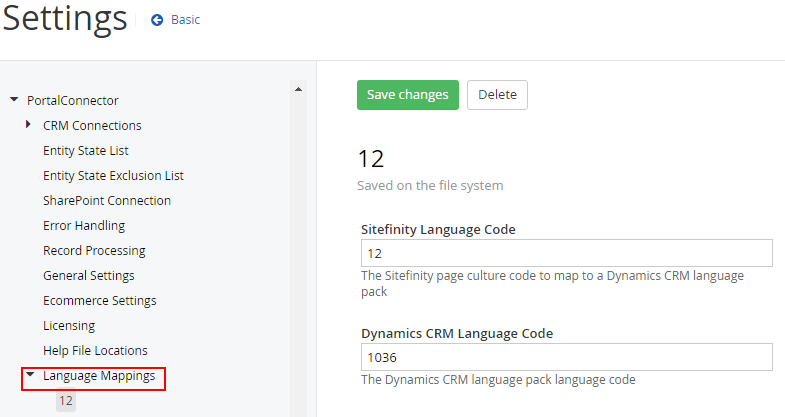
- In the Language Mappings module, define the language code values for:
- Sitefinity Language code: The Sitefinity page culture to map to a Dynamics CRM language pack.
Example: For French language, the language code is 12.
- CRM Language code: The Dynamics CRM language pack language code.
Example: For French Language, the default culture is French-France and language code is 1036.
Example 2:
Localize the content based on the culture French-Canada, follow the steps below:
1) Navigate to the backend of The Portal Connector> click on Administration > Settings > Advanced > Portal Connector > Language Mapping.
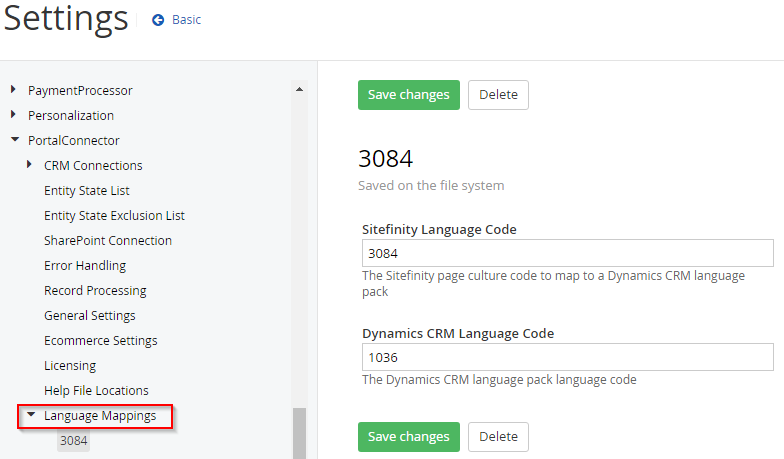
2) In the Language Mappings module, define the language code values for:
- Sitefinity Language code: The Sitefinity page culture to map to a Dynamics CRM language pack.
Example: To localize the content based on the culture French-Canada, you would define the language code i.e 3084 in ‘Sitefinity Language code’ field.
- CRM Language code: The Dynamics CRM language pack language code.
Example: For French Language, the default culture is French-France and language code is 1036, so define this code value in “CRM Language code” field.
Click here to access the Language Code Table.
Once you have defined the language code values, click on Save Changes and then ‘Restart the App pool’ and synchronize the respective entities.
By following the above steps, you will now have enabled a multilingual web portal experience for your users.