The Scheduler Widget is a feature introduced in Version 5.1 of The Portal Connector.
This Scheduler Widget allows you to display data based on the date and time. You can use any of the Dynamics CRM entities to configure this widget. One of the important things to remember is that when you are configuring your widget's fetch XML, in order for your widget to function properly, you need to select the data type fields that are listed below:
- 2 Date Time Fields (Start Date and End Date)
- 2 Text Fields (Title and Description)
- 1 Numeric Field (Duration)
- 1 Bool Field (is All Day)
One of the main features of the Scheduler is that you can create recurring events using the Appointment Entity. Here are the steps to enable recurring appointments in the scheduler. Let's have a look at how we can configure the Scheduler Widget to use/display recurring events.
Back End
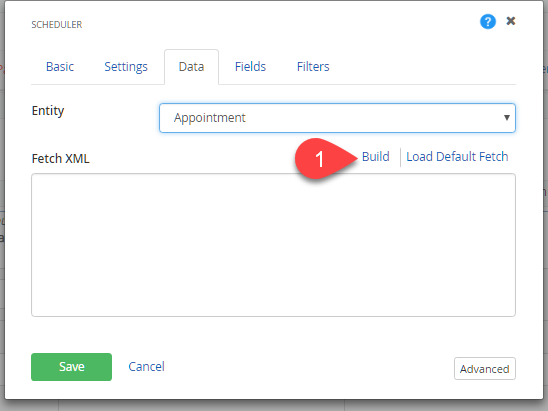
Drag and drop a Scheduler Widget to your page and click "Edit" to configure the widget as you normally do. When it comes to the "Data" tab, select the Appointment entity and click on "Build".
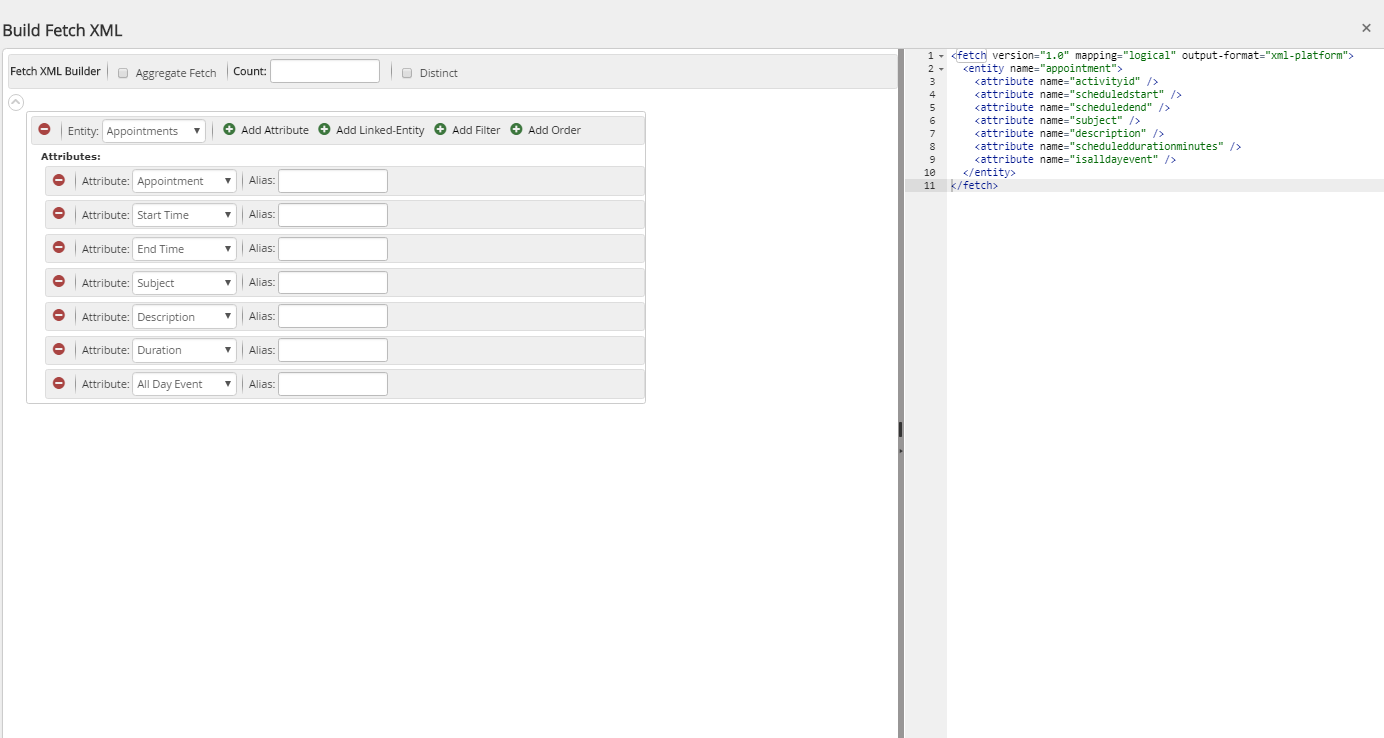
Next, when you are building the Fetch XML, make sure you are selecting: Subject, Description, Duration (optional), All Day Event, Start Time, and End Time.
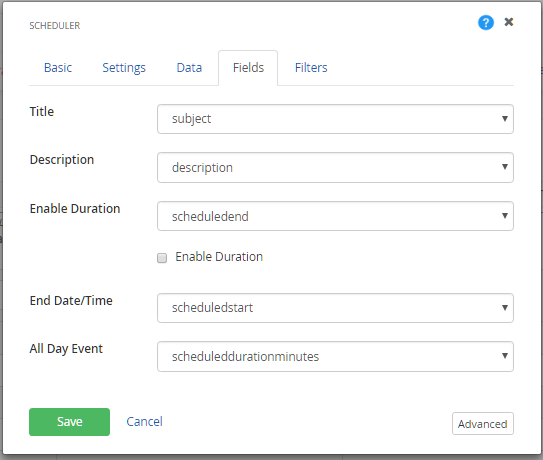
Once you have the Fetch XML created, assign the fetch attributes to the fields accordingly in the "Fields" tab.
Once you have finished configuring the widget, click on "Save" and navigate to the front-end of the page. In my case, I have enabled Inline Editing and Inline Adding on Basic Tab of the Scheduler Widget.
Front End
Once in the front-end of your website, you will be able to see the fully functional scheduler and if you have any appointments records, it will show up on the scheduler as well. If you double click anywhere on the scheduler, the inline pop-up will open and you will be able to see the recurrences (repeat) enabled.
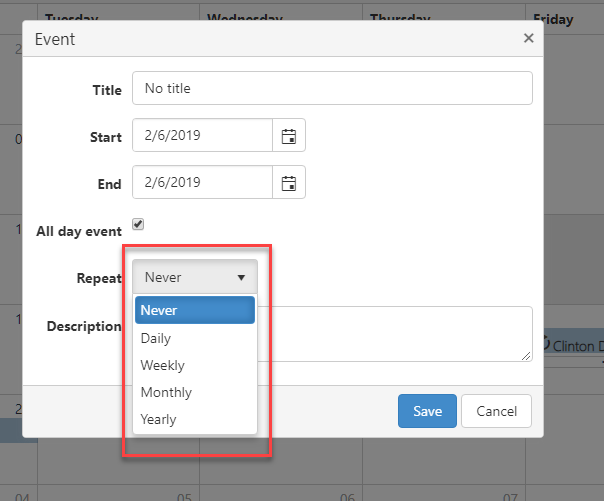
As you can see, you can setup recurrences based on Daily, Weekly, Monthly and Yearly. In this instance, I’m going to select "Daily" and then the pop-up will display the rest of the configurations related to the Daily recurrences.
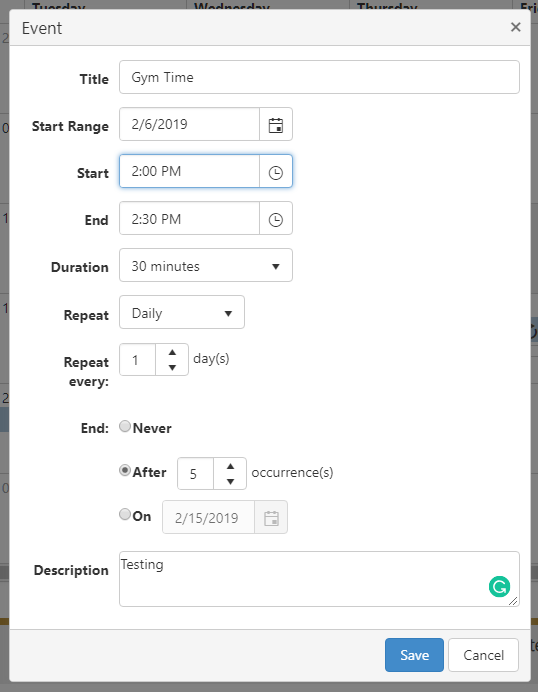
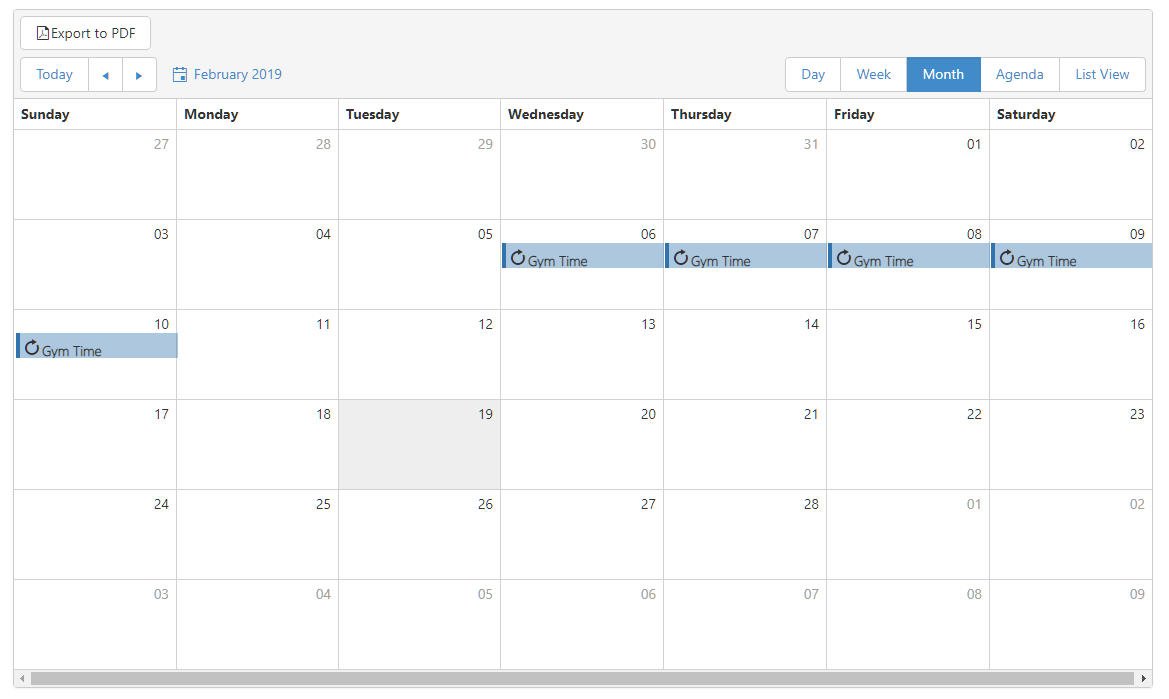
Once I configure these settings and add a description, I click "Save" to add the record, and it will display the recurring appointment that you just created on the Scheduler.
If you have any questions about the scheduler widget, please contact The Portal Connector Team at info@portalconnector.com or jump on one of our Daily Q&A sessions.