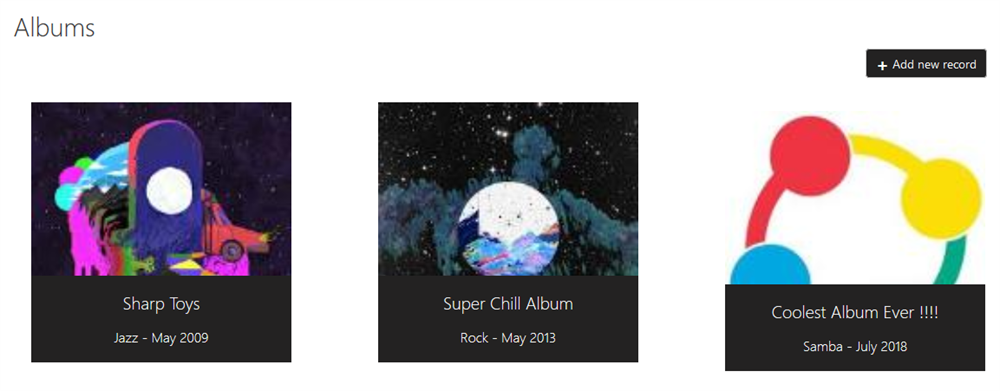
Microsoft Dynamics 365/CRM can store many different types of information, but as we know the software is particularly geared towards supporting information with relationships. These relationships can vary in complexity.
A relationship can be simple, for example, each Case Entity will have a Customer Entity associated with it. This is a many-to-one (N:1) relationship. A more complex relationship may involve one entity being associated with multiple entities, this is called a one-to-many relationship (1:N). The most complex of these relationships is a many-to-many relationship (N:N), whereby both related entities are able to associate with multiple entities of the other entities’ type. An example of this relationship could be a Pizza Entity that has many Topping Entities associated with it, but a Topping Entity may belong to many Pizza Entities.
Relationships within Microsoft Dynamics 365/CRM can be tricky, but they are no match for The Portal Connector. The Portal Connector handles relationships on all levels, from accessing the data, to displaying and even creating relationships between information within your Portal.
Displaying and Creating Related Information
In the following example, we are going to display a list of Event entities. Each Event will have a single Band (Account) entity and a single Venue entity that is related to it. This is an example of a 1:1 relationship. We will be using a TPC ListView control to display our information.
The key to displaying a many-to-one relationship within a TPC ListView or TPC Grid starts with the FetchXML. Any time you are dealing with a many-to-one relationship, you will need to create a fetch with a Linked-Entity. A Linked-Entity is an entity with an existing relationship to the parent Entity. Let’s create a FetchXML with a Linked-Entity in the TPC FetchXML Builder.
1) TPC ListView -> Edit
2) Data
3) Build
4) Click “Add Linked-Entity”
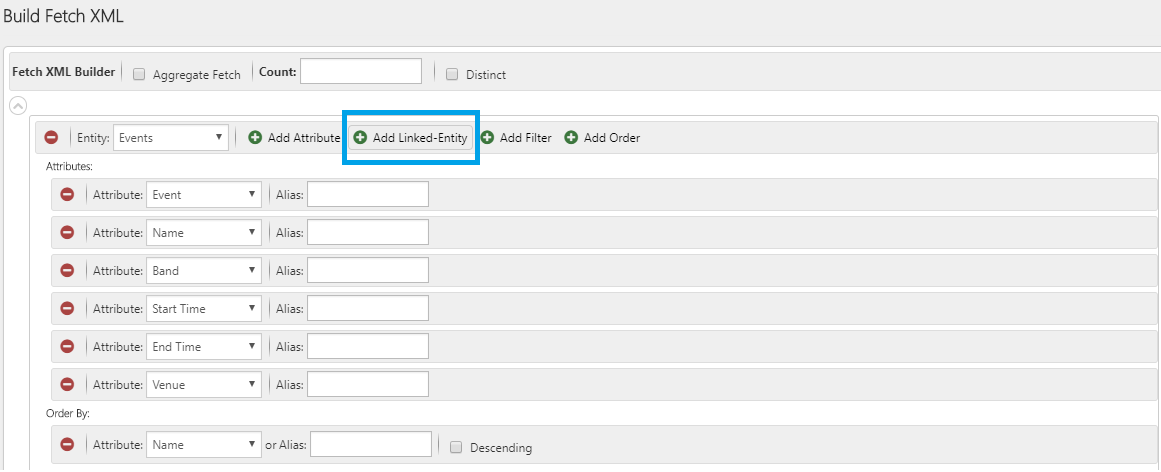
5) Configure Linked-Entity

6) Click “Save”
Now that we have set up our FetchXML, all that’s left to do is access the Linked-Entity in the TPC ListView Template. You can access Linked-Entity attributes the same way you access regular Entity attributes. The only difference is that you need to make sure to add the Linked-Entity’s alias to the start of the variable name. In the following code, we can access a venue’s name with the variable aa_event_name, whereby aa is the alias of the Linked-Entity Venue, and event_name is the name of the attribute.
<script type="text/x-kendo-template" id="template-@Html.GetUniqueId(Model.DeveloperName)">
 <li class="list-group-item">
   <div>
     <h2>#:event_name#</h2>
     <h3>#:event_band#</h3>
     <img alt="#:event_band# Image" height="200px" width="200px" src="data:image/png;base64,#= btoa(String.fromCharCode.apply(null, new Uint8Array(typeof ab_entityimage === 'string' ? ab_entityimage.split(',') : ab_entityimage))) #"></img>
   </div>
   <div>
     <h3>#:aa_event_name#</h3>
     <img alt="#:aa_event_name# Image" height="150px" width="150px" src="data:image/png;base64,#= btoa(String.fromCharCode.apply(null, new Uint8Array(typeof aa_entityimage === 'string' ? aa_entityimage.split(',') : aa_entityimage))) #"></img>
     ...
   </div>
 </li>
</script>
Viola, you are ready to rock and roll!

When displaying information that contains a one-to-many relationship, there are multiple approaches we can take. The first approach is to use a filter in the FetchXML of a TPC ListView or TPC Grid widget, to filter the results based the ID field of the primary entity. The second approach is to use a TPC Form with a TPC Subgrid widget, which will automatically filter the results based on the parent entity of the form.
For this example, we will use both approaches to display all of the different albums belonging to a specific band. First, we will begin with a TPC ListView using a filtered FetchXML.
To create our TPC ListView with filtered Album information, we will need to have access to the unique identifier (Id) of the Band (Account) entity we would like to filter on. This is usually achieved by passing the unique identifier of the Account to the query string in the URL. You can also filter on static values or session variables. In this example, we will be passing in the Id through the URL.

Next, we will set up the filter within the TPC ListView containing the albums. This filter will allow us to pass a dynamic value to the FetchXML that will be used to filter the information. Let’s begin by navigating to the page with the TPC ListView widget.
1) TPC ListView -> Edit
2) Filters
3) Create a filter by providing: name, filter type, and value.
4) Click “Save”
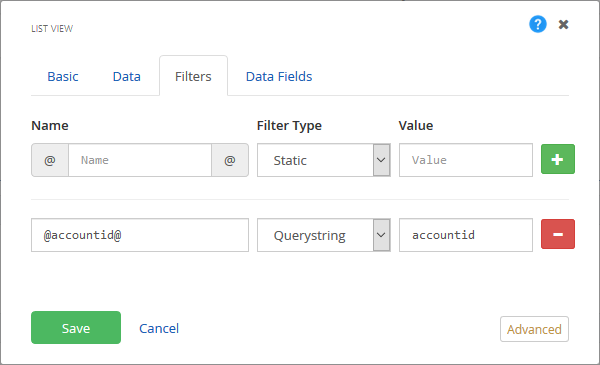
The next step is to provide our new filter to the FetchXML that is populating the ListView.
1) TPC ListView -> Edit
2) Data
3) Select Entity
4) Click “Build”
5) Add Filter
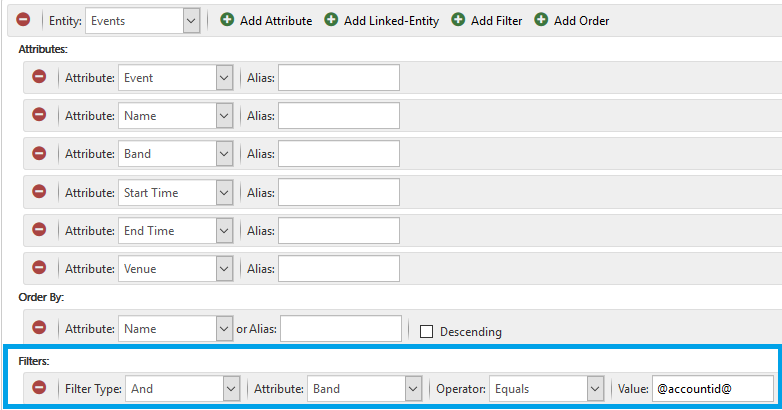
That’s it! You are all ready to go. The ListView now shows all the albums that have the matching Band (Account).
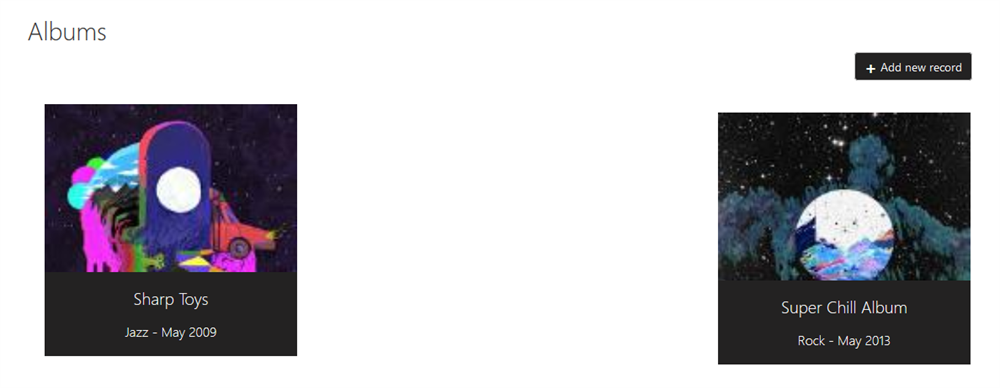
Now, the second approach we discussed earlier is much easier to accomplish than creating a custom TPC ListView filter. In this approach, we will use a TPC Form with an Account entity and add a TPC Subgrid of Albums that will automatically filter based on the selected Account (Band).
1) Create a new TPC Form
2) Drag and drop a TPC Form Layout
3) Add Form Configuration
4) Select Form Entity (in this example we will be using Account)
5) Configure Form Fields
6) Drag and drop a TPC Subgrid on to the form
7) Click Subgrid -> Edit
8) Click “Data”
9) Under Relationship select the related Entity you would like to display
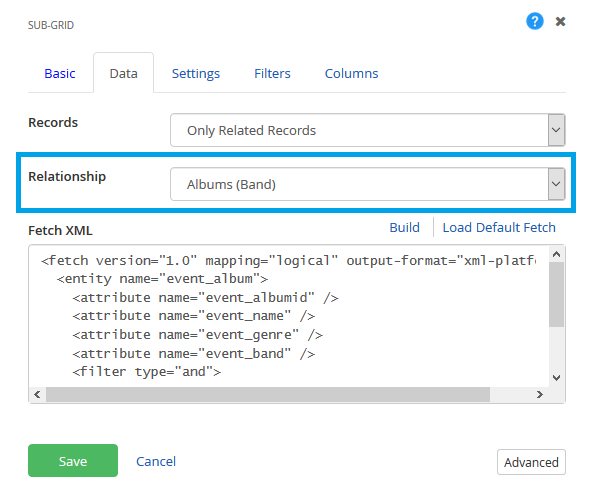
10) Make sure Records is set to “Only Related Records”
11) Click “Load Default Fetch”
12) Click “Build”
13) Configure the attributes you would like to display in the TPC Subgrid
14) Click “Save and Close”
15) Click “Save”
There you go! Now if you load the form and pass it an Account Id, it will automatically populate the TPC Subgrid with all the Album’s that belong to the Band (Account).
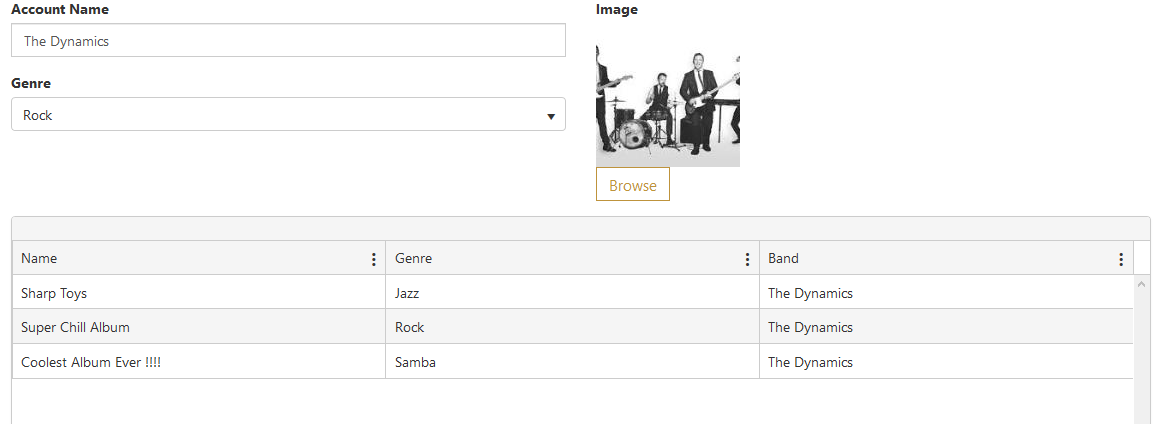
Although, what if you would like to create a new Album and link it to a Band? No problem. In the next part of this exercise, we will be creating a form that is populated with a band’s information. This form will allow you to create a new album that is automatically linked in a one-to-many relationship with the band. To begin, let’s create a new form.
1) Create a new TPC Form
2) Drag and drop a TPC Form Layout
3) Add Form Configuration
4) Select Form Entity (In this example we will be using Account)
5) Configure Form Fields
6) Within the Existing Form, add a TPC Form Layout
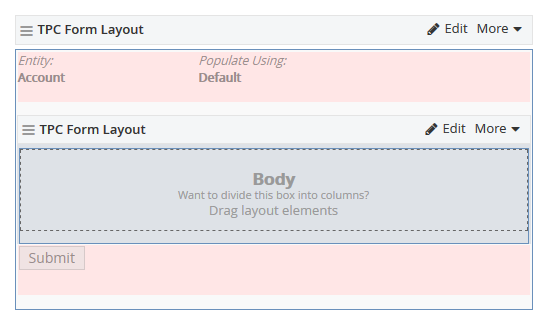
7) Add Form Configuration within the new TPC Form Layout
8) Select Entity
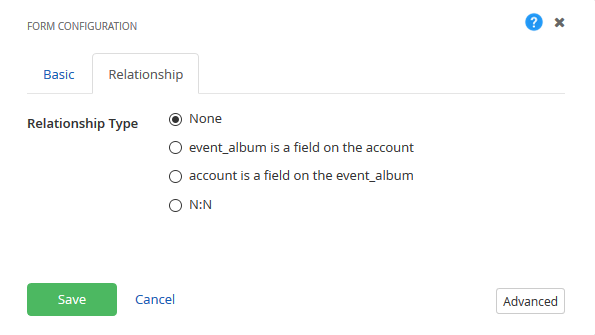
After we have selected our Entity, we will now see a new tab called “Relationship”. The relationship tab is used to establish the relationship type between the two entities. This tab supports all the relationships previously discussed including many-to-one, one-to-many, and many-to-many. In this case, we will select the field “account is a field on the event_album”. Afterward, you can select the attribute on the Entity that is the key between the two. In this case, the attribute is called “Band”.
Now we are all ready to go! After opening this form and passing it the accountId I can create a new album which will automatically set the Band attribute as the Account (Band) in the form.
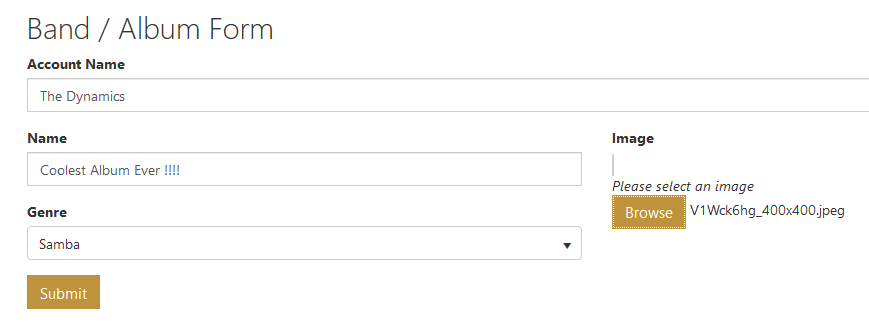
How easy is that! All you need to do is set the relationship type, and The Portal Connector will automatically establish the relationship!
