In this post, we will be going over tips to avoid the 4 most common installation issues with The Portal Connector. The focus will be on installing The Portal Connector into a Sitefinity site and will not cover Sitefinity installation issues.
After the successful installation of Sitefinity, it is a good idea to login and confirm that it is running without any obvious issues. This means no error messages should appear and pages can be created and viewed on the front end. Once you are positive that Sitefinity is working, you can proceed to the installation of The Portal Connector.
Note: It is always strongly recommended to make a backup of any files and folders you are changing before making any changes. This includes files and the database.
While we have step-by-step Installation Documentation, errors can sometimes happen where the cause might not be obvious. Here are the 4 most common issues encountered when installing The Portal Connector:
1. Incorrect Build Version
Issue: After copying all files from the downloaded zip file, you encounter an error similar to below:
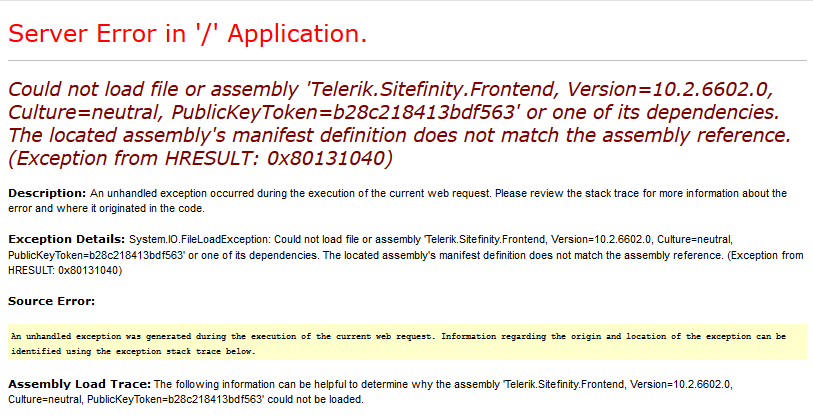
This error might seem confusing as it mentions assemblies that are already in the BIN folder and are still there after the new files are copied in. The error is referring to the version of Sitefinity installed not matching the version of The Portal Connector. This error was caused by copying The Portal Connector files built for one version (in this case, 10.2.6602.0) into a Sitefinity installation of a different version (in this case, 10.1.6502.0).
Solution:
- Verify the Sitefinity Version you are using
- Navigate to the BIN folder of the Sitefinity application
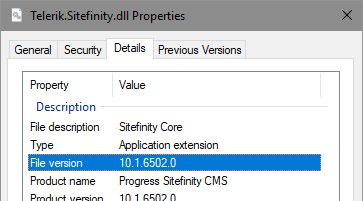
- Find the file named Telerik.Sitefinity.dll and right click it, then click Properties.
- On the Properties dialog, click the Details tab.
- Note the File version.
- Navigate to The Portal Connector download page
- Find the download for the Sitefinity version you noted.
- Copy the contents of the Zip file into the BIN folder, overwriting all files.
The Portal Connector is built against specific versions of Sitefinity. The Version of the Portal Connector MUST match the Sitefinity version you have installed.
2. Failure to copy all files
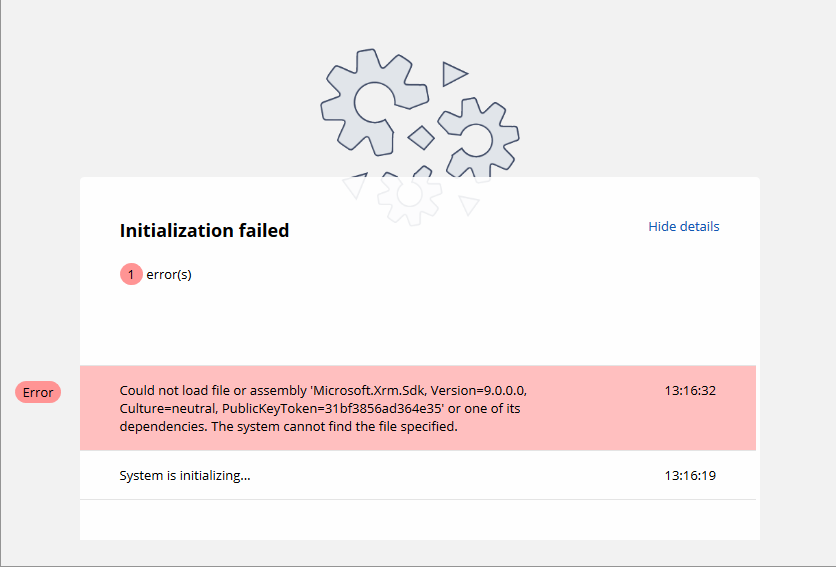
Issue: After copying all files from the downloaded zip file, you encounter an error similar to below:
Solution:
- Make sure all files from the ZIP file are copied into the BIN folder.
- Make sure you choose the Replace the files in the destination option in the file dialog:
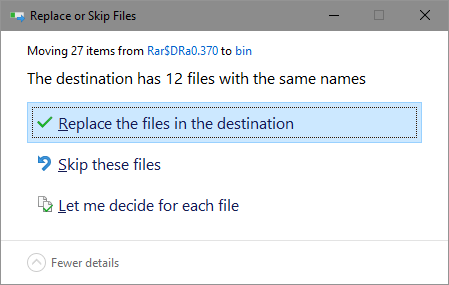
All files in the downloaded ZIP file are required. Files that are not named as pavliks.PortalConnector.* are required for The Portal Connector to connect to CRM.
3. After copying files, The Portal Connector does not appear in backend.
Issue: After copying all files into the BIN folder and starting Sitefinity, The Portal Connector menu items do not appear in the backend.

This happens when you miss the Module initialization step of installation or an error happened when initializing The Portal Connector modules
Solution: Initialize The Portal Connector modules.
- In the Sitefinity backend, click the Administration menu
- Click the Modules and Services menu item
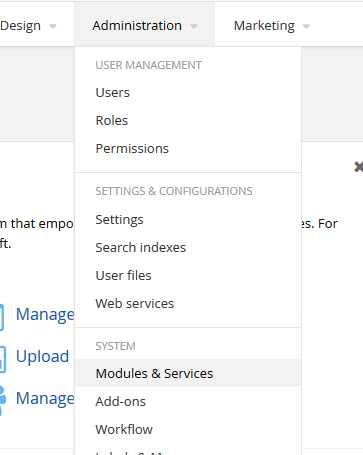
- On the Modules and Services page, scroll down and find The Portal Connector
- Click Actions for it and click Install.
- After a few minutes, the page will reload. You will see several new Portal Connector modules. Find the one labelled The Portal Connector (MVC) and install it as well.
The Portal Connector modules must be installed for all functionality to be present. The Portal Connector and The Portal Connector (MVC) must be installed at minimum. You may require other modules to be installed depending on the functionality you require.
4. Config files cannot be written to
Issue: After copying The Portal Connector files into the BIN folder or after trying to install The Portal Connector modules, you encounter an error similar to below:
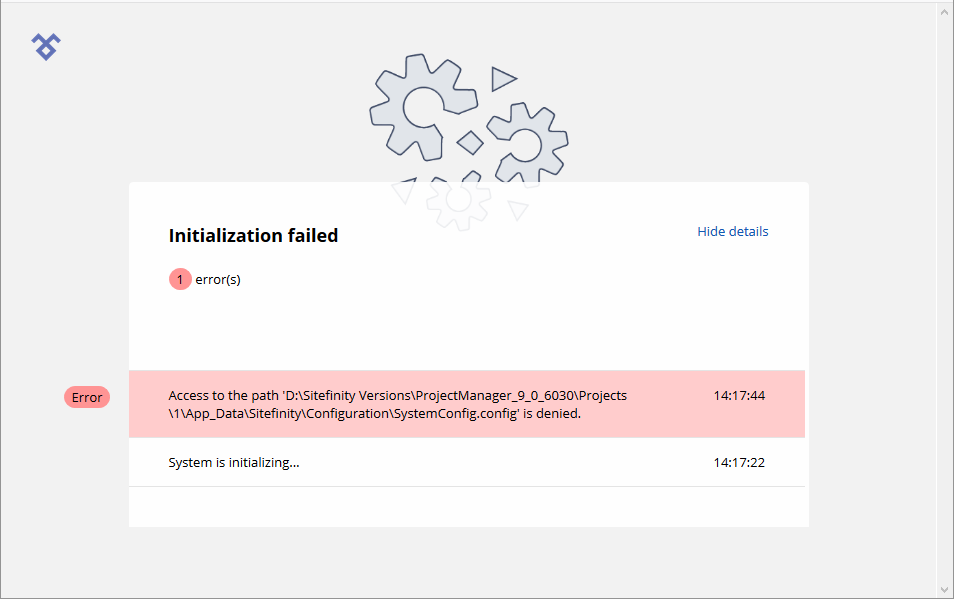
This error is caused when Sitefinity attempts to write to configuration files in the file system.
Solution: Make the \App_Data\Configuration writable.
- Open the file explorer and navigate to the folder that the Sitefinity project is in
- Double click the App_Data folder
- Double click the Sitefinity folder
- Right click the Configuration folder and click Properties
- At the bottom of the Configuration Properties dialog, Uncheck the Read-only check box. Make sure the box is empty. Click the OK button to save the change
- In the Confirm Attribute Change dialog, ensure Apply changes to this folder, subfolders and files option is selected and click OK
- Restart the Application.
Sometimes the configuration folder or some of the files within it are set to read-only. These files must be writable by the webserver.
While these are not the only possible errors you may encounter while installing The Portal Connector, they represent the most common ones.
If you encounter others or the solutions provided here do not appear to resolve the issue, feel free to contact support at support@crmportalconnector.com